
...Some kits are also available at ebay
...Some kits are also available at ebay
Arduino compatible without extra programmer and/or FTDI chip (USB<->serial) needed! Plus exchangeable bootloader!
Usable to construct your own (V-)USB devices like keyboards, mouses or your own protocols.
New! tinyUSBboard at google plus (see in this section) !
New! First look at the new tinyUSBboard webpage design (overdue a looong time)
New! New related project in in this section
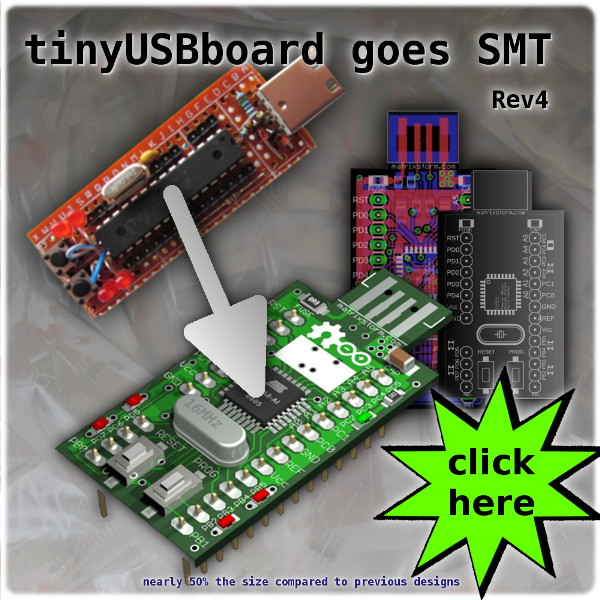
News! Finally tinyUSBboard revision 4 is available in SMT: Lots of stuff coming up soon! (survey)
News! Programm AVR firmware in C or ASM without installing any software or driver: avrstick - tinyUSBboards successor !
Do you have some ideas for further example firmwares - or even completed ones already? Please send them to me.
VISITOR SURVEY: Please answer the tinyUSBboard rev.4 poll
TinyUSBboard is an Arduino compatible, minimalistic and cheap AVR microprocessor board with USB interface and simple "do it yourself" capability.
It utilizes directly features of USB without FTDI chip and/or any USB to serial converter. It can be programmed via assembler, C, Arduino or of course BASCOM.
All its components you need to construct it are universal and available nearly everywhere - no special PCB needed.
It is well suited for beginners to learn AVR microcontroller programming and/or it can be used on solderless breadboards very simple to do various projects.
For example using some firmware provided on this site turns it into
a programming hardware for blank AVR microcontrollers, which can be used to produce further tinyUSBboards for family members, friends or collegues...
While normal handling with microcontrolling units (MCUs) needs additional equipment, tinyUSBboard only needs a Mac-, Windows- or Linux computer with a single free USB socket.
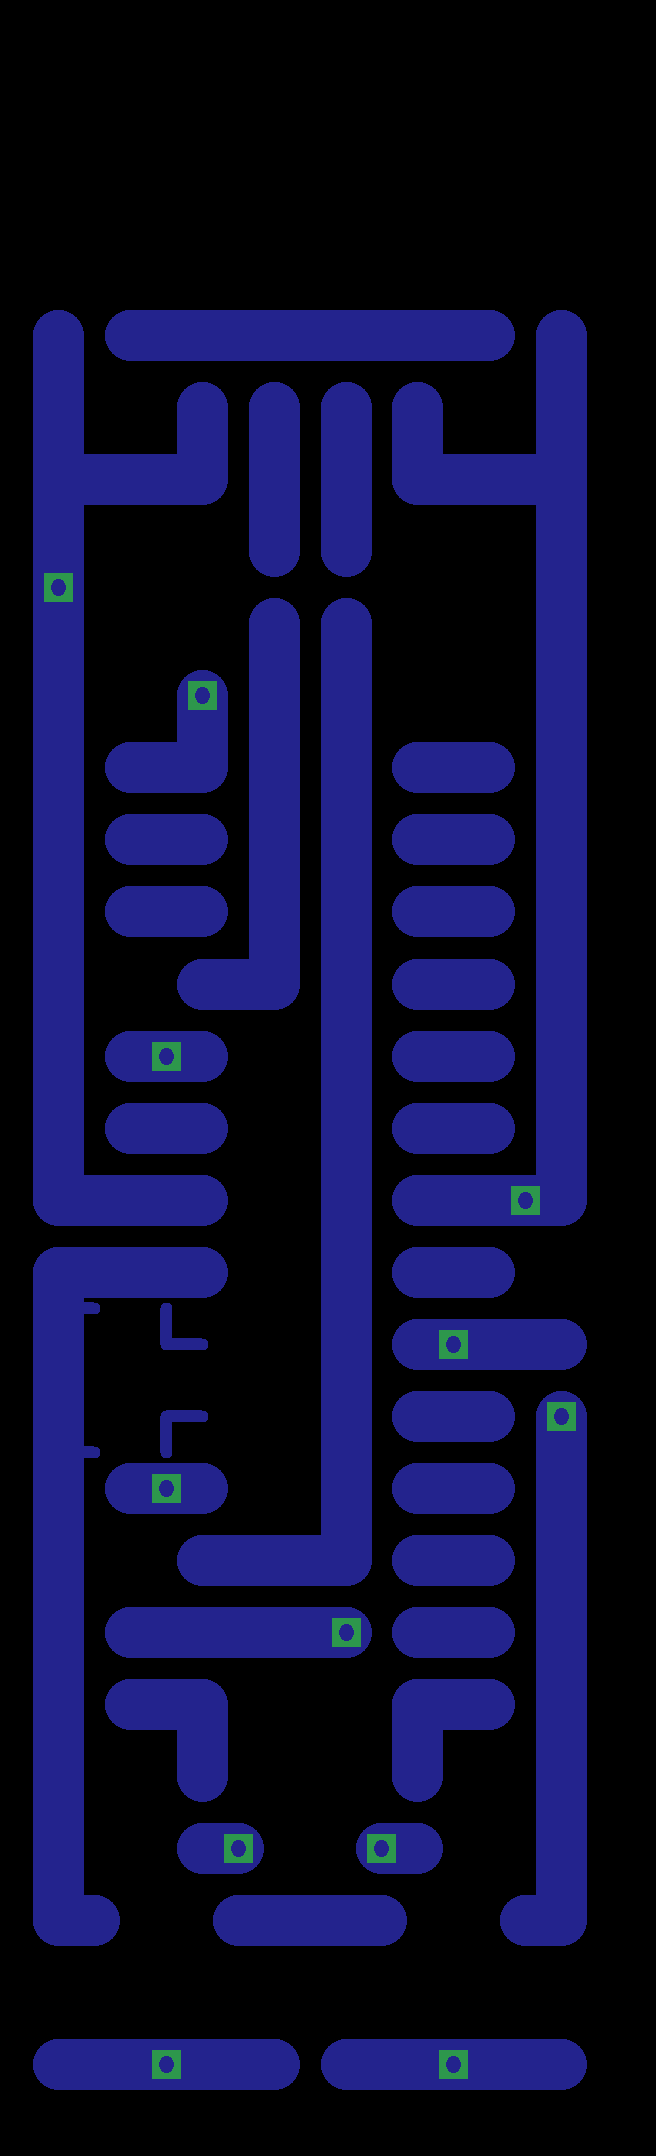
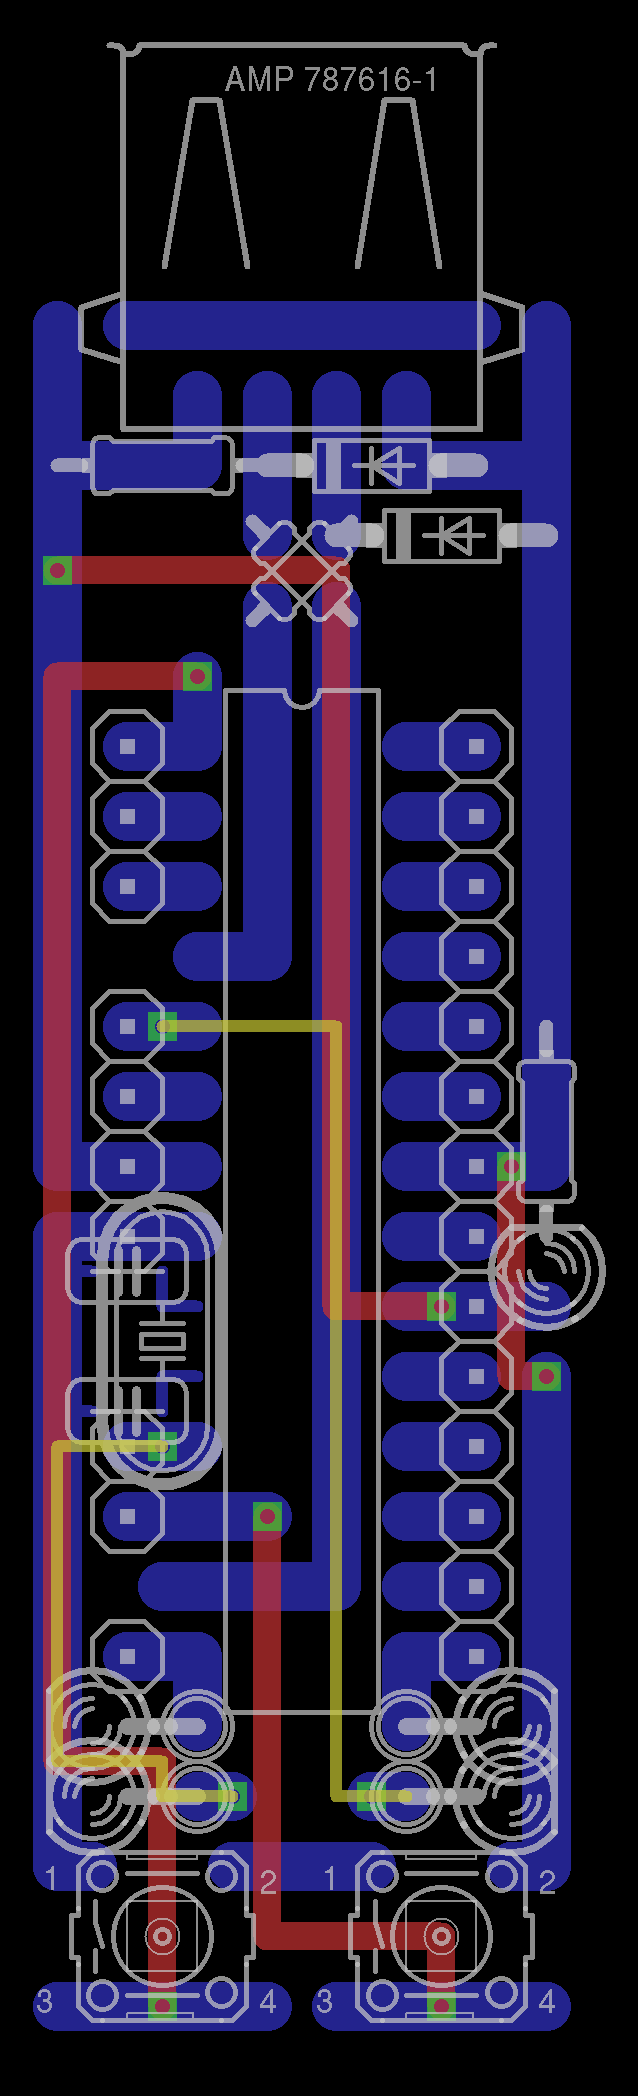
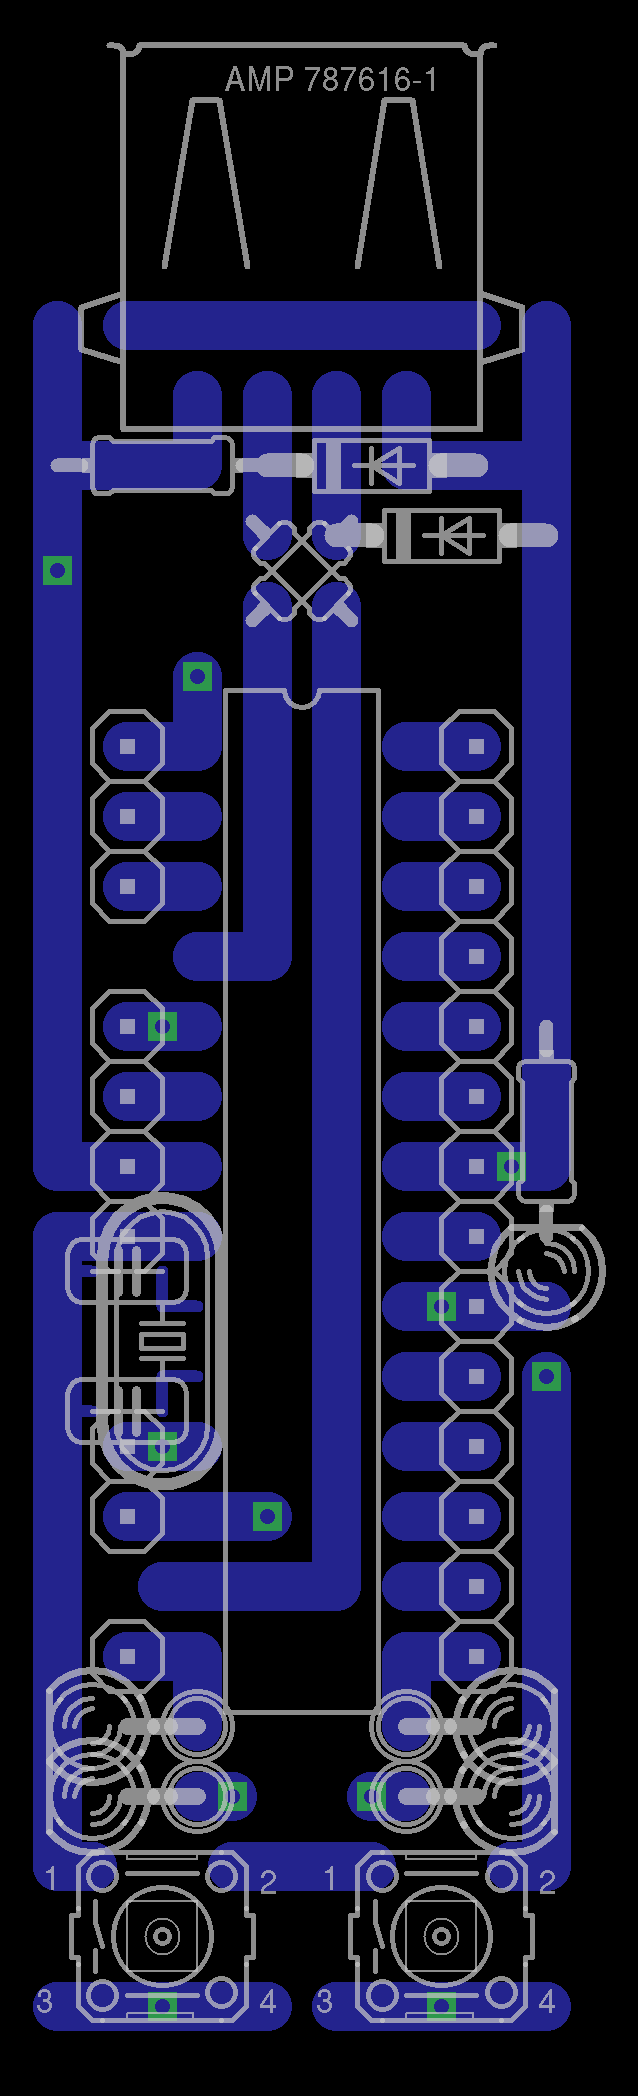
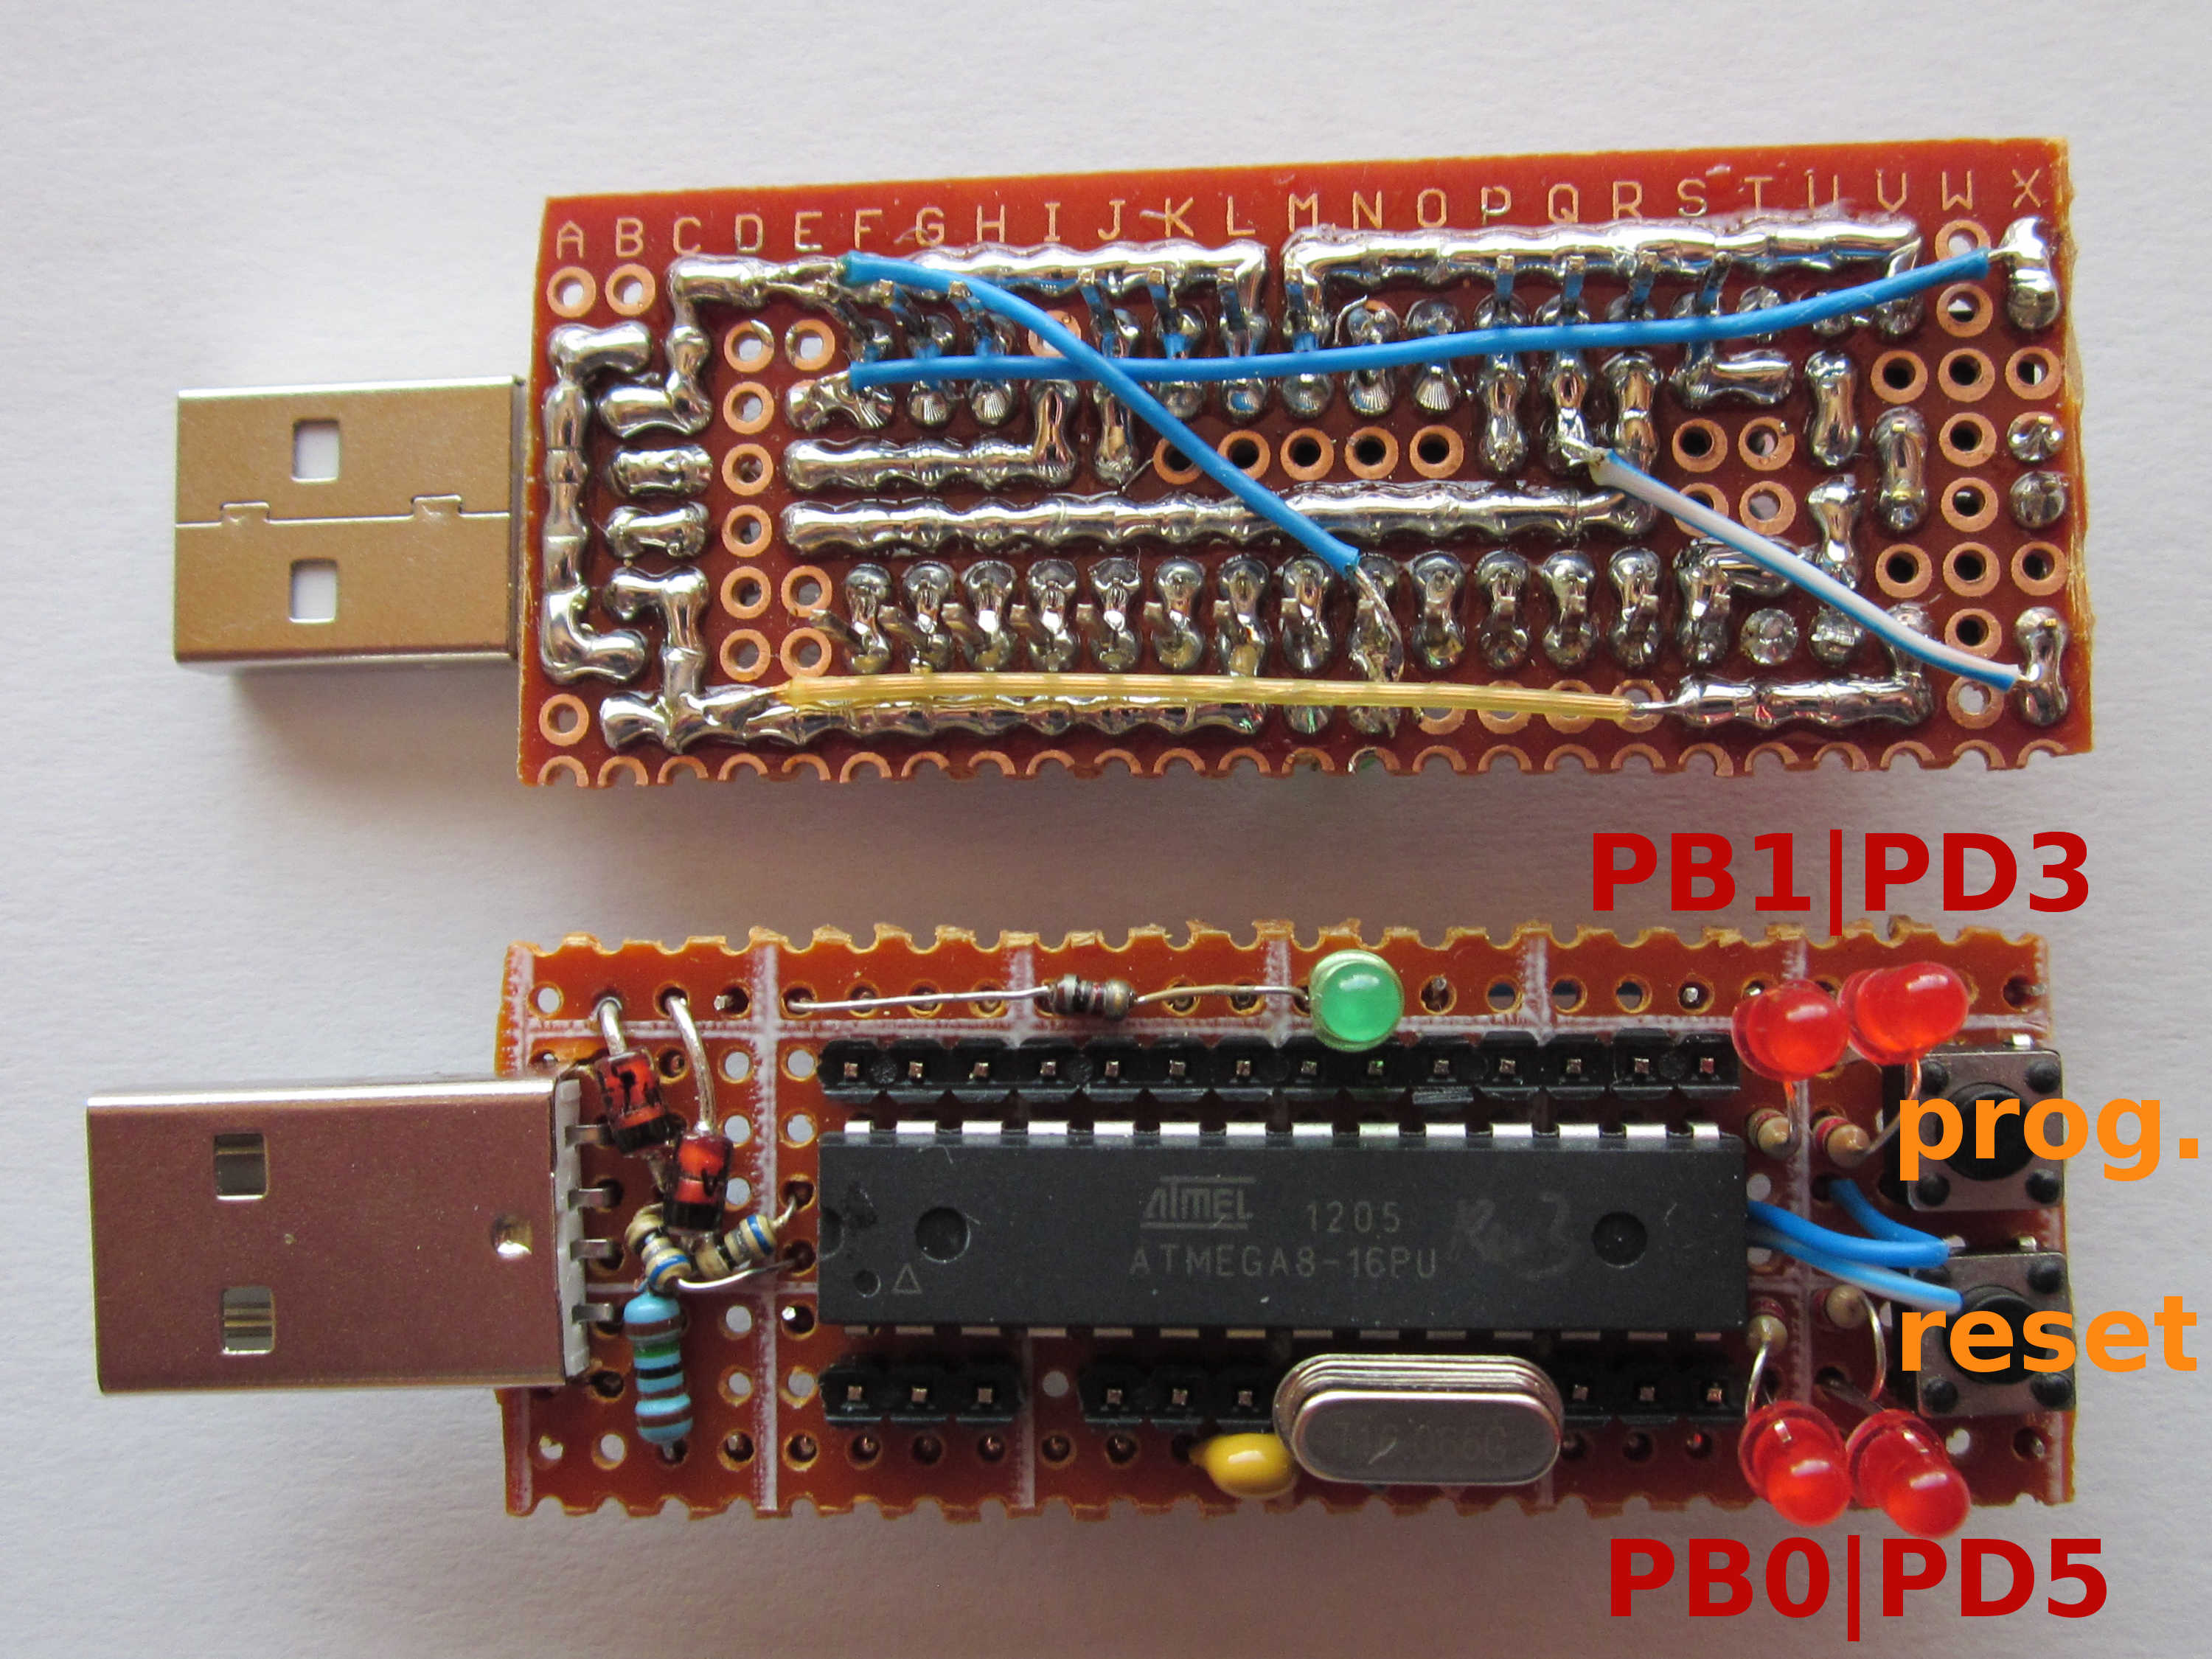
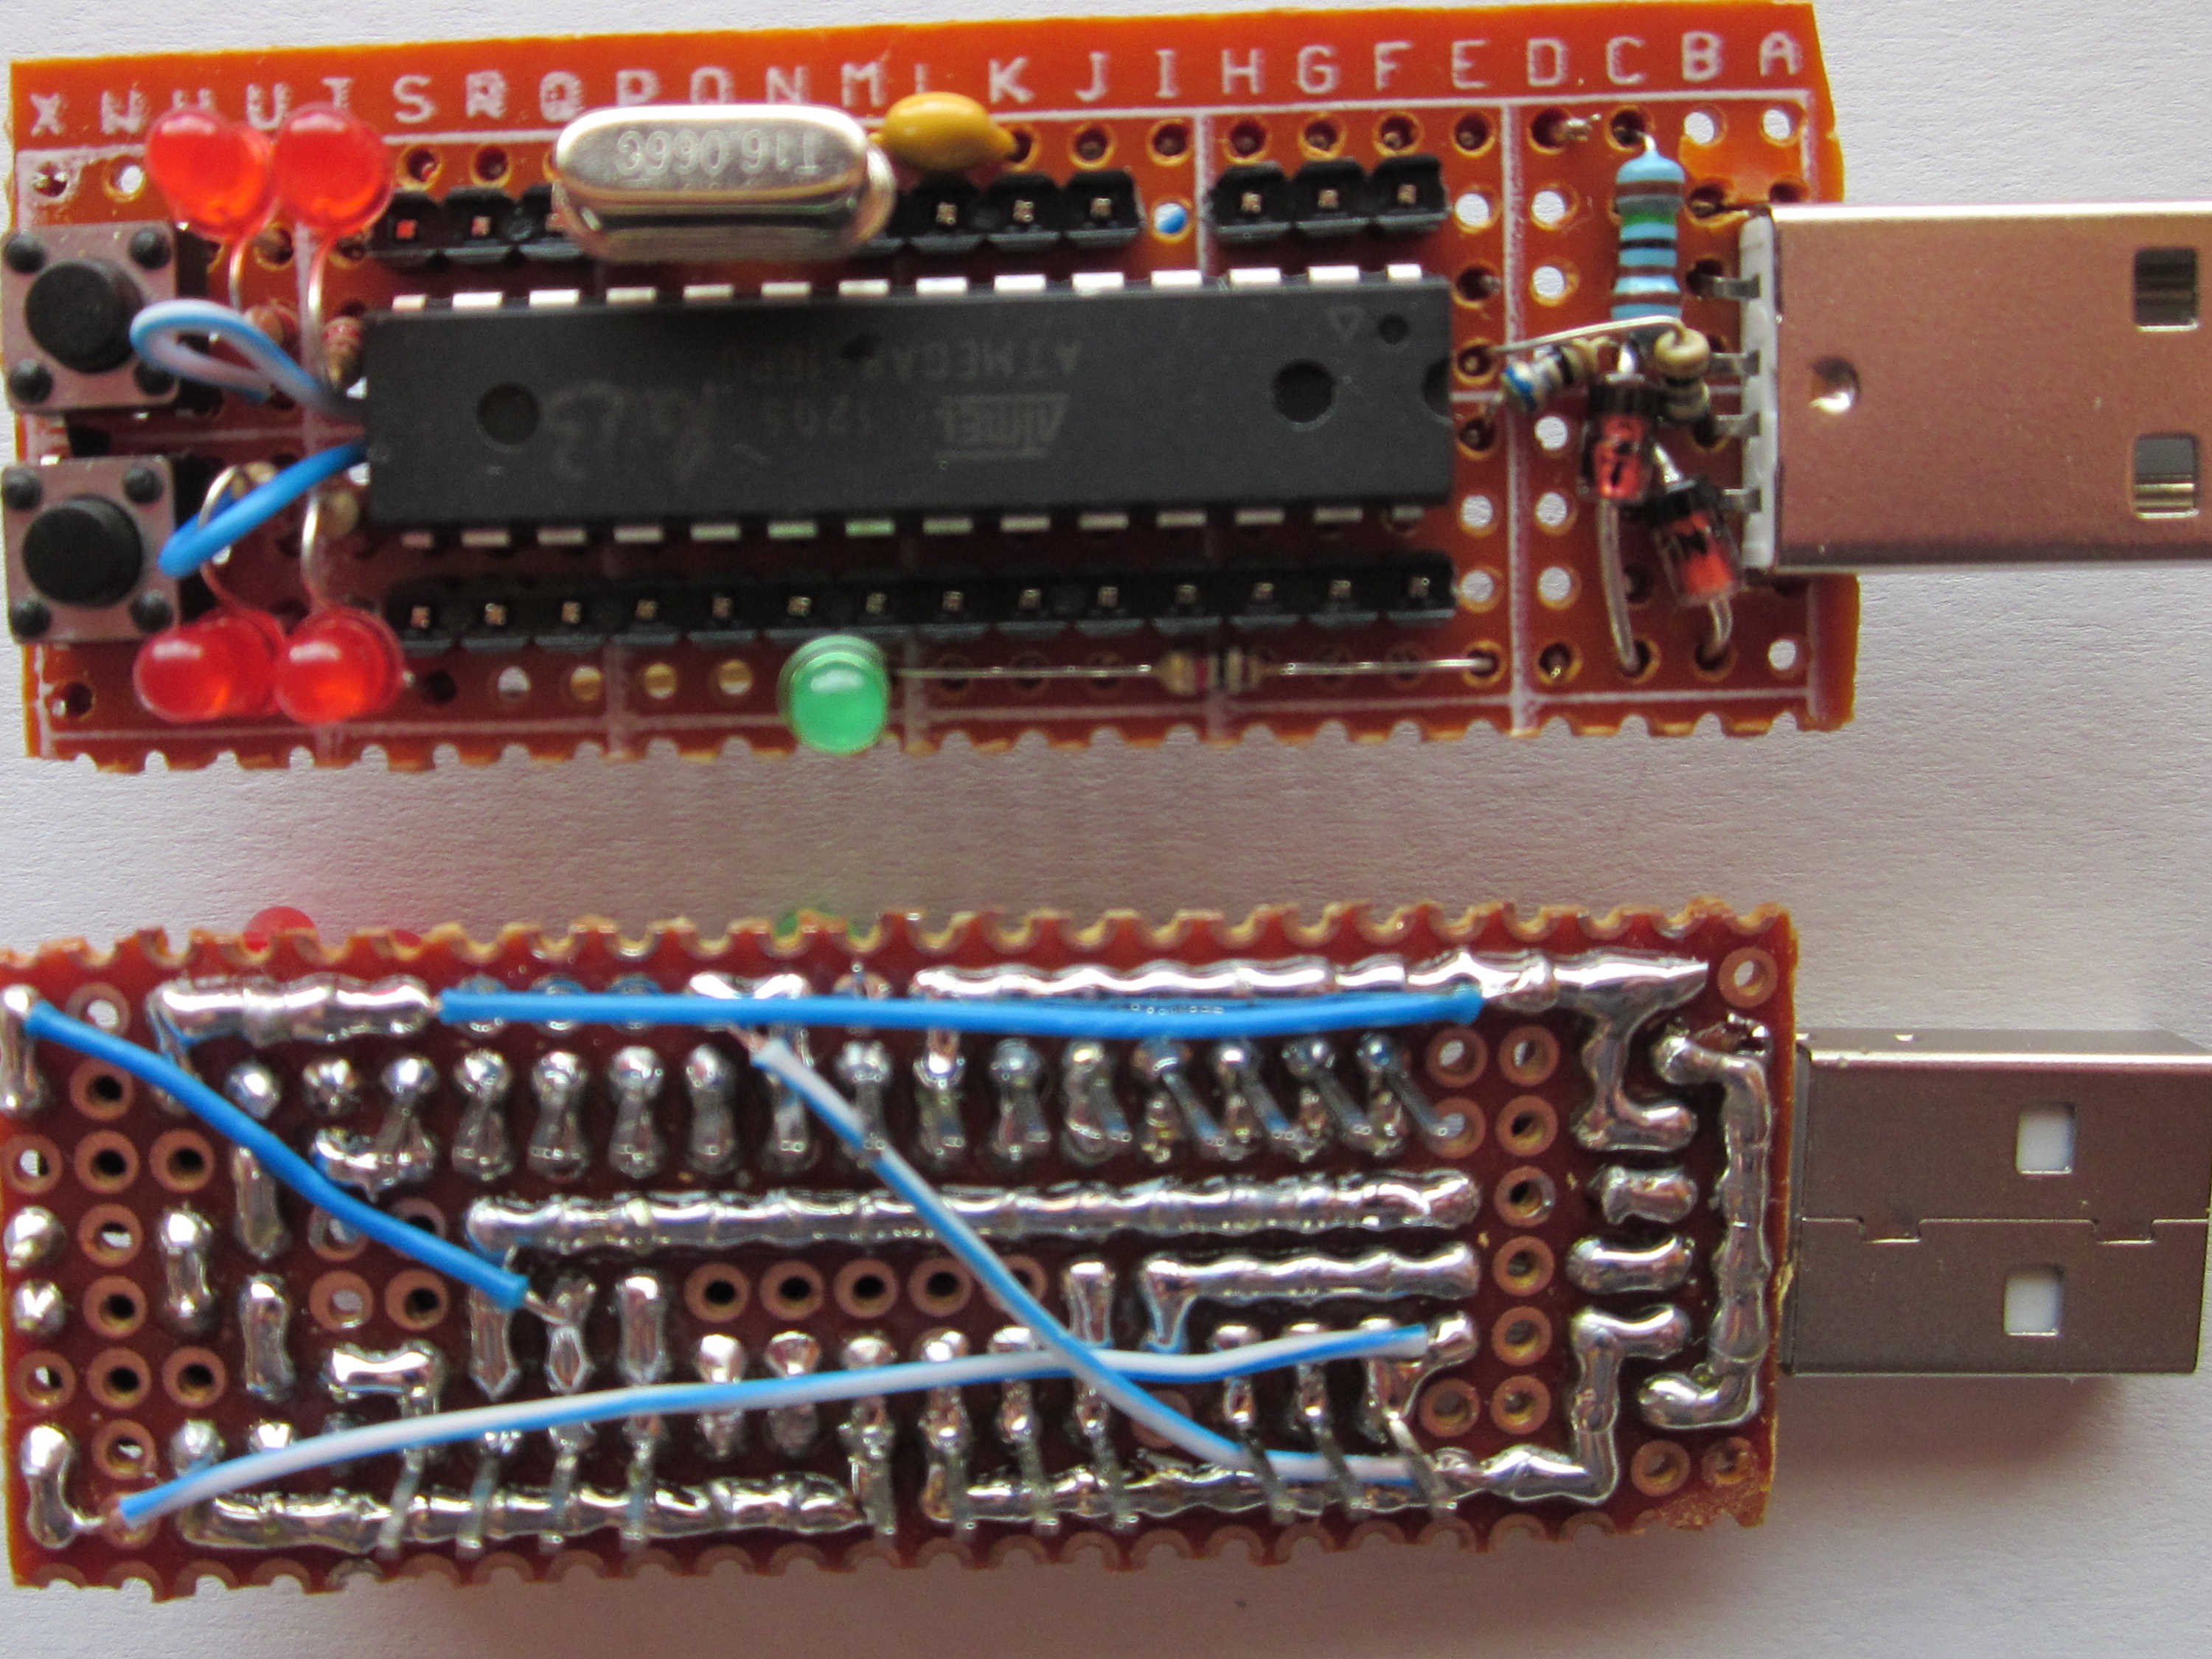
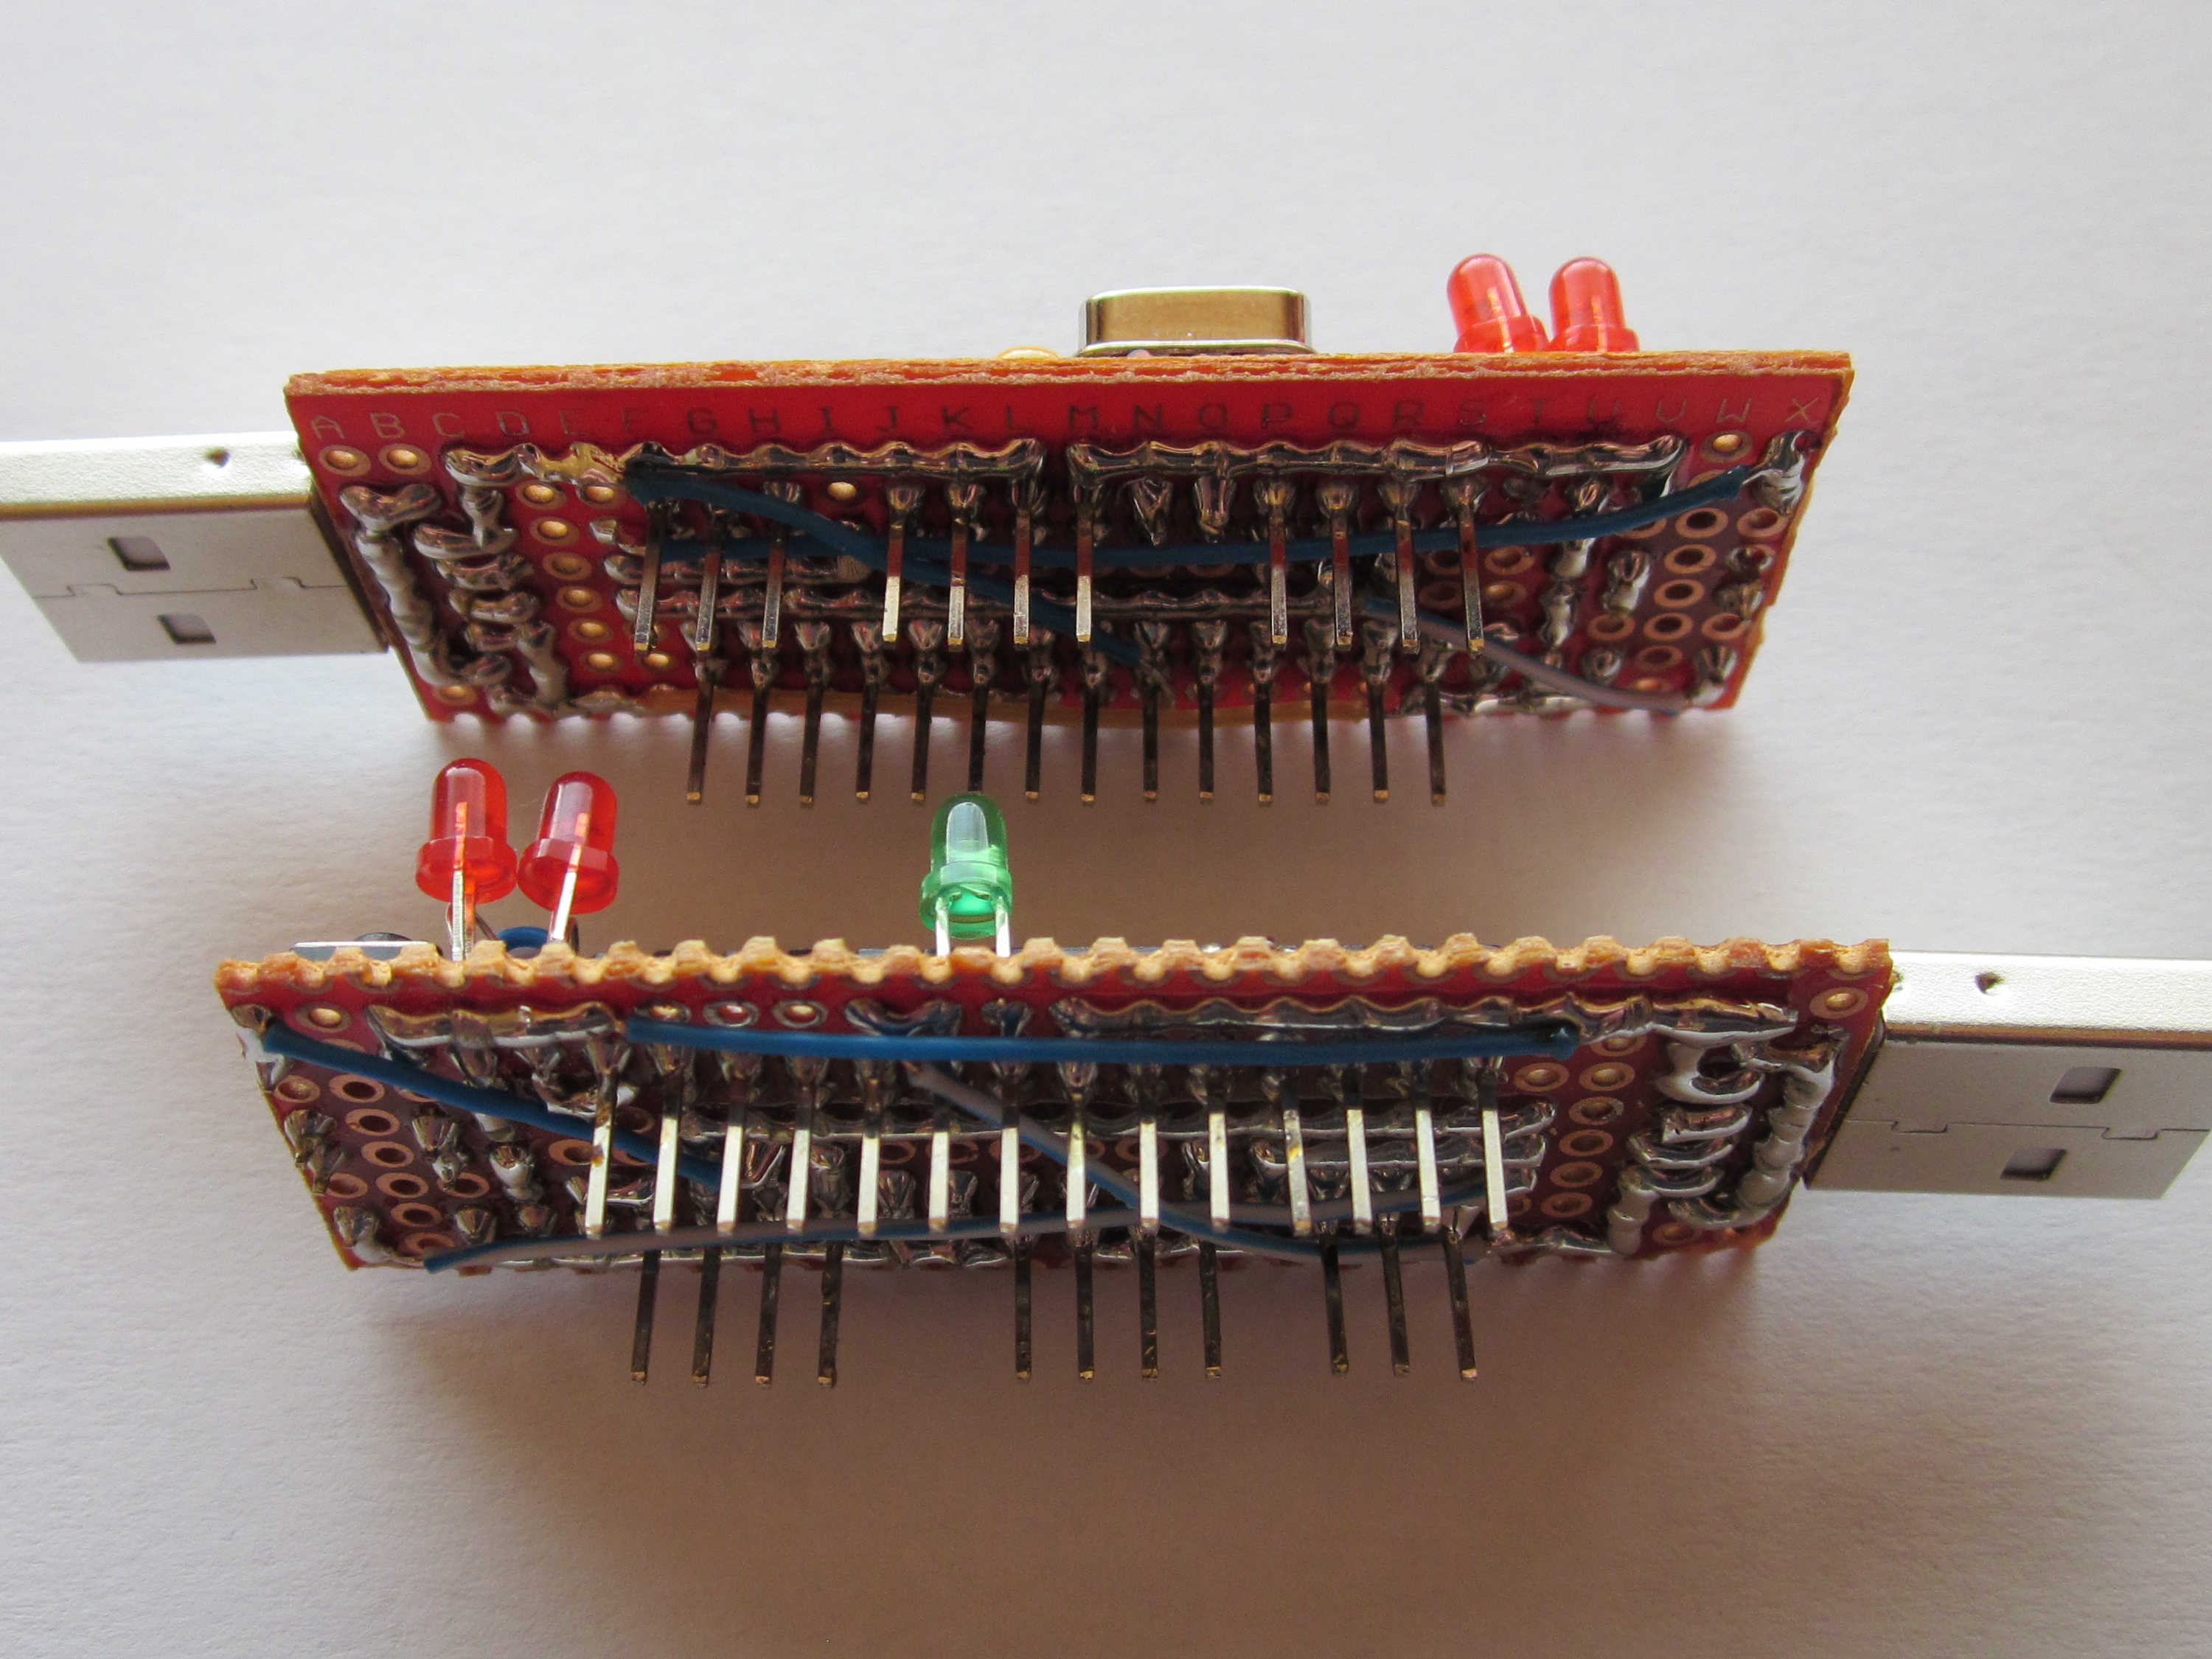
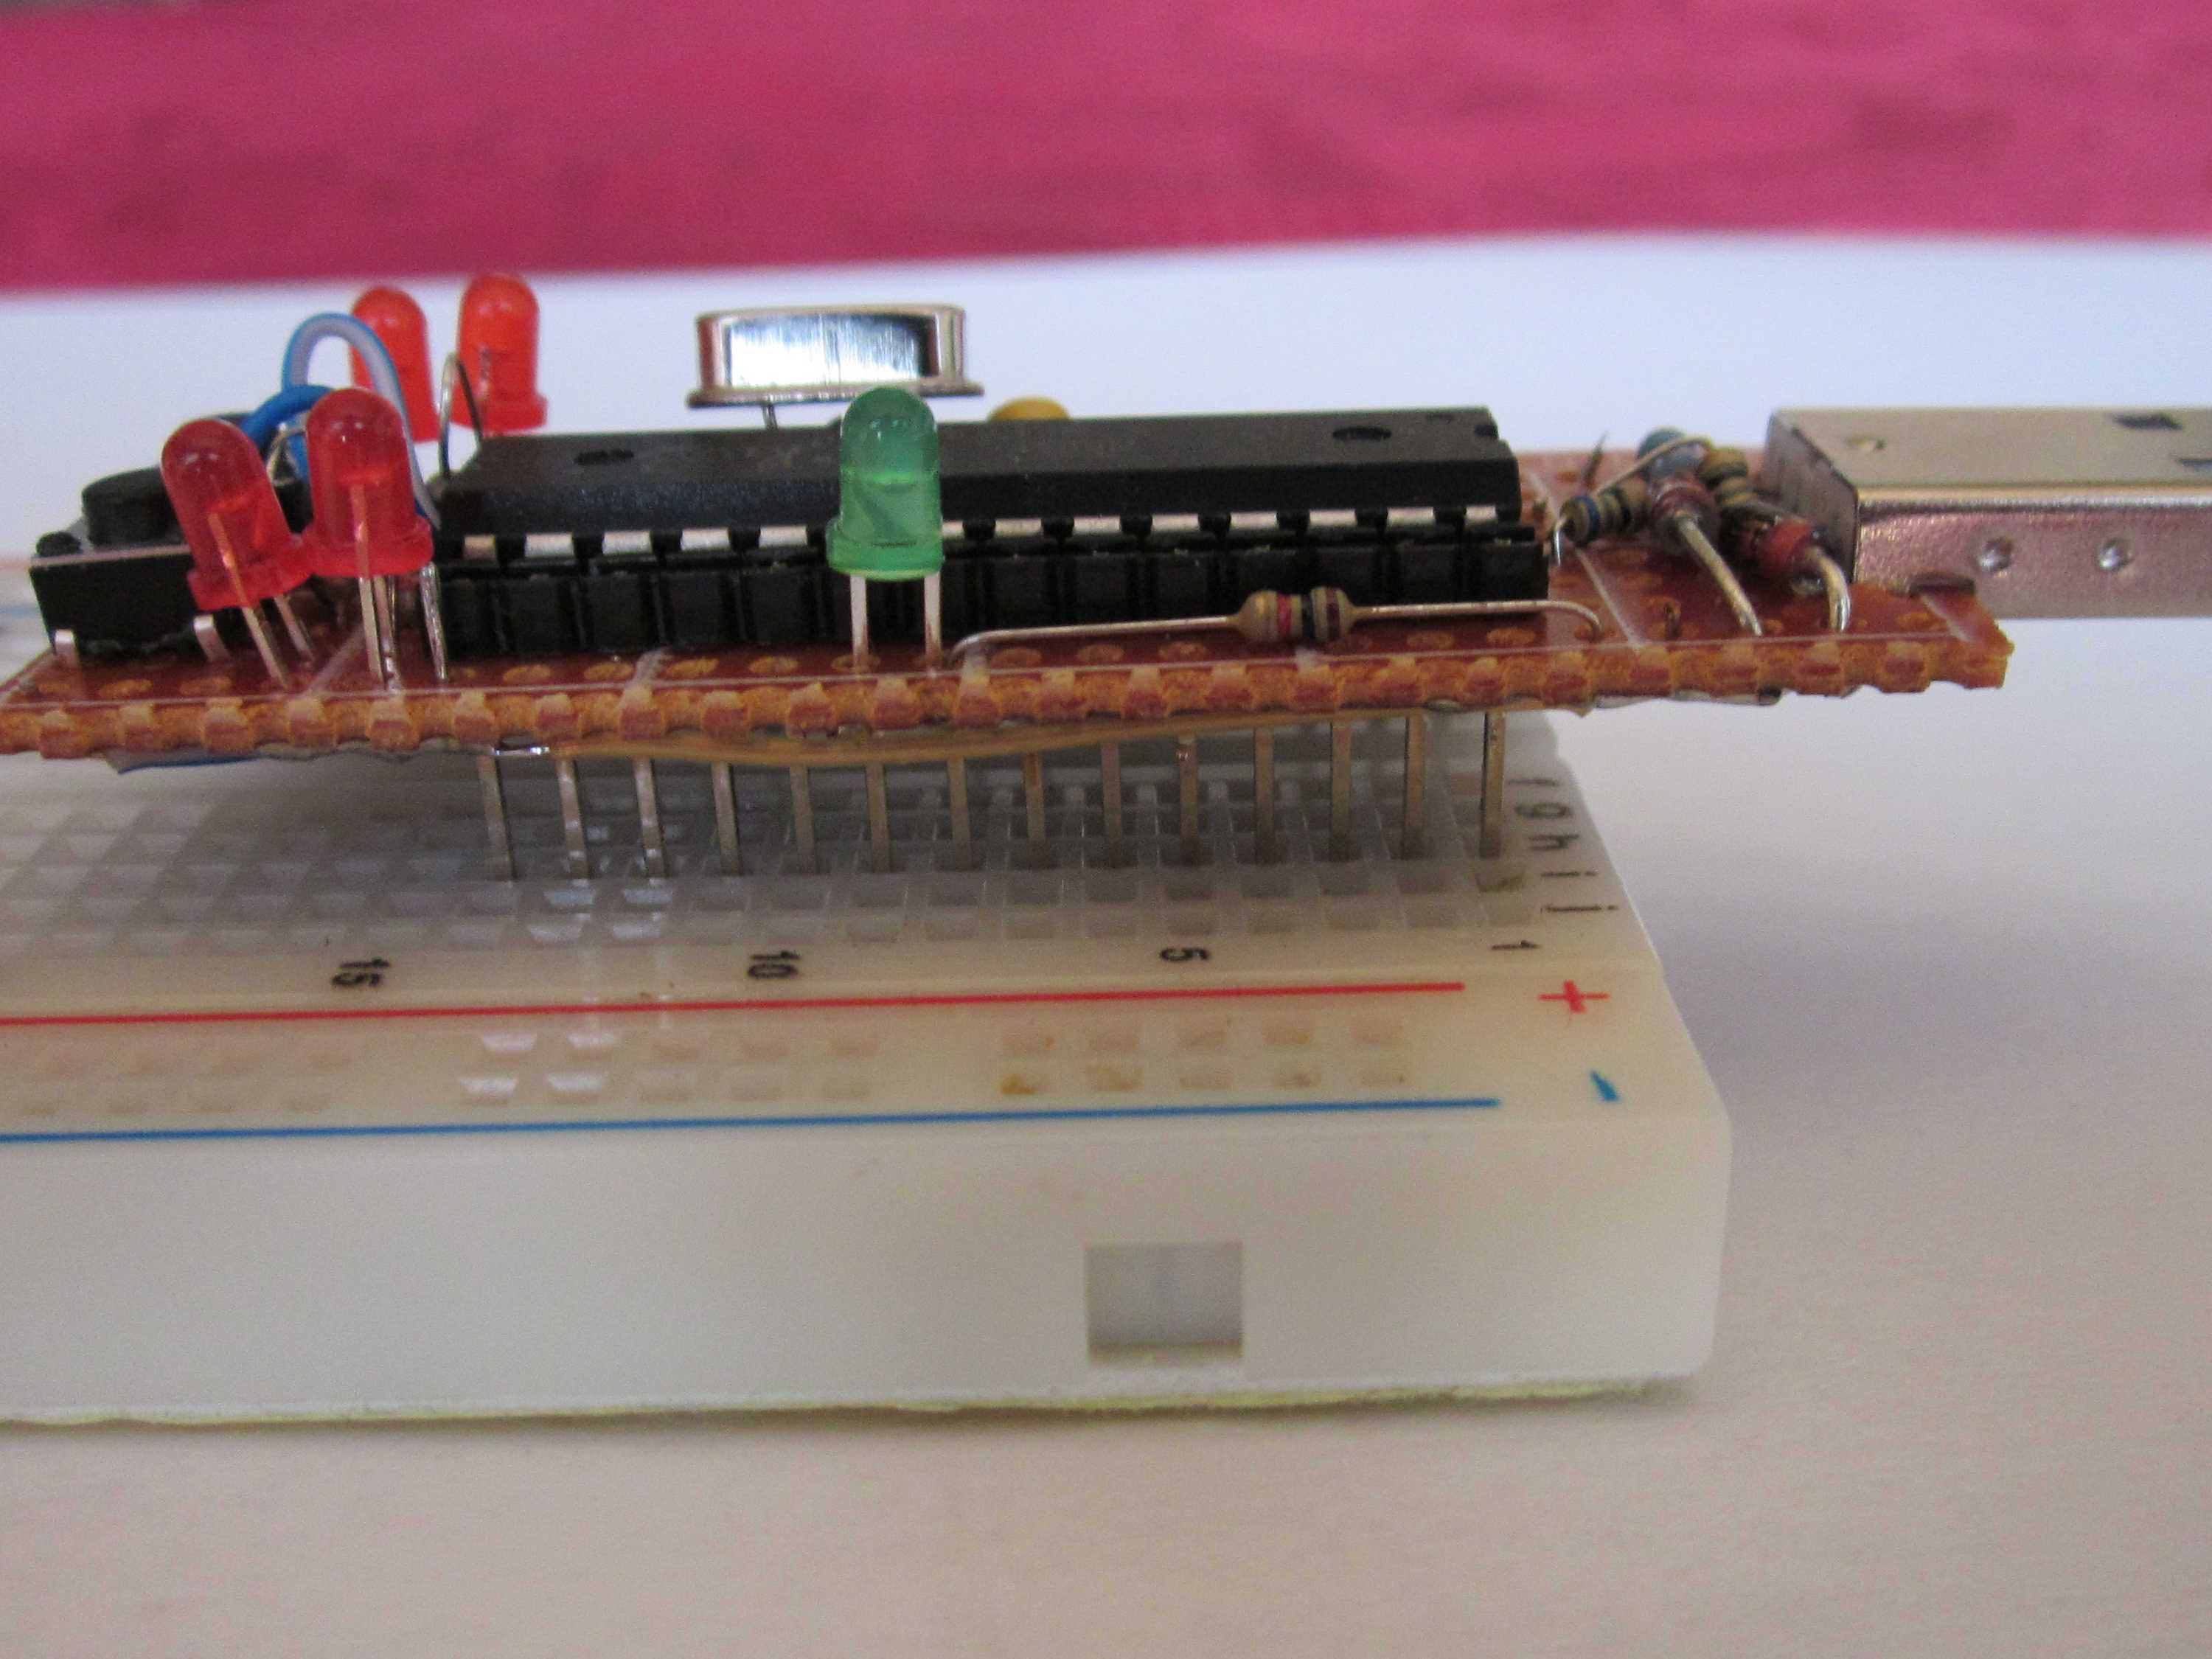
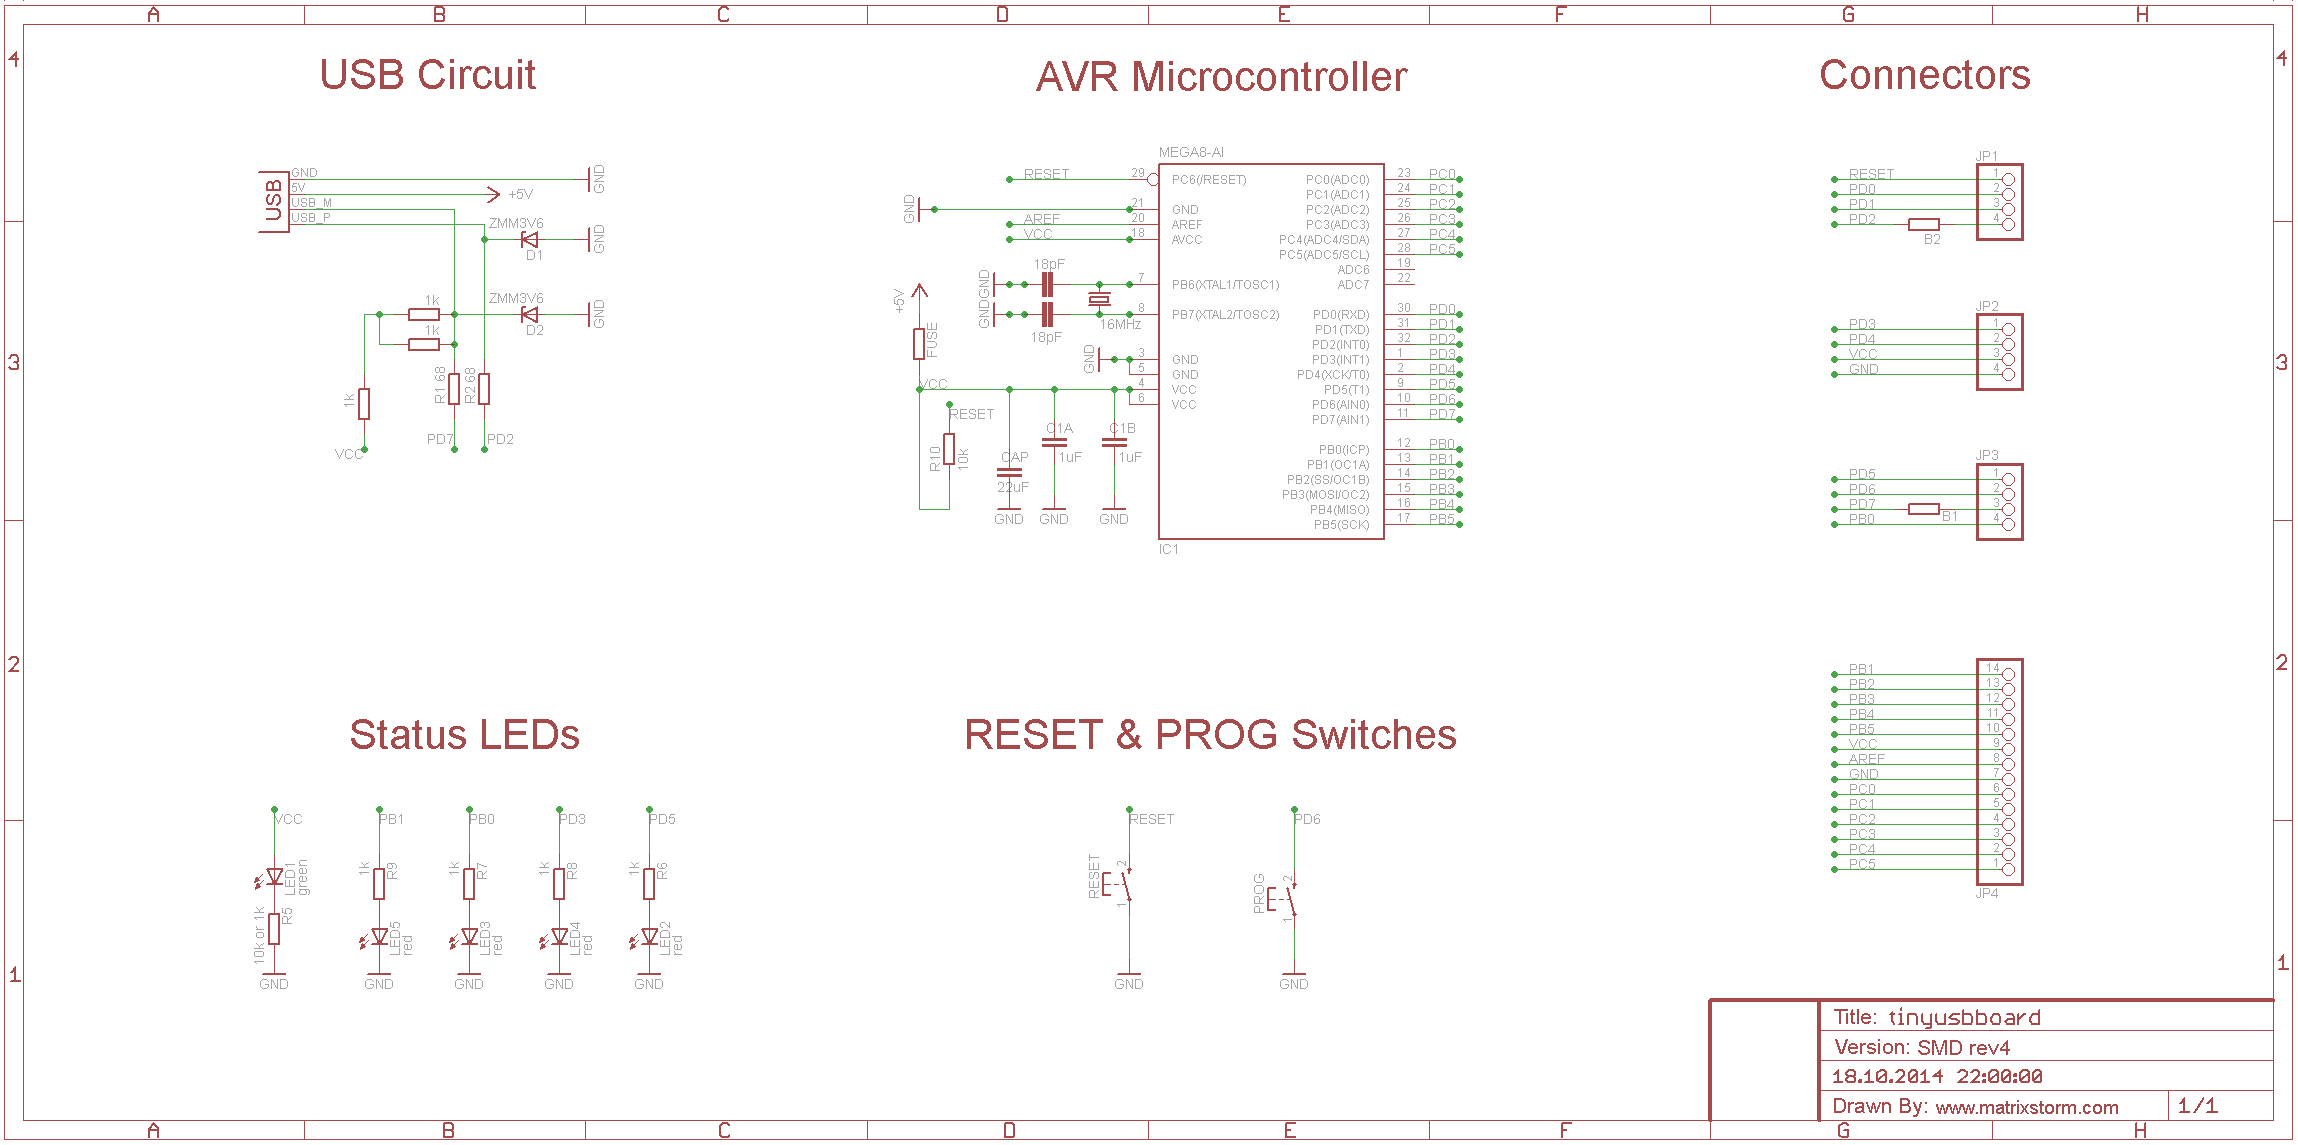
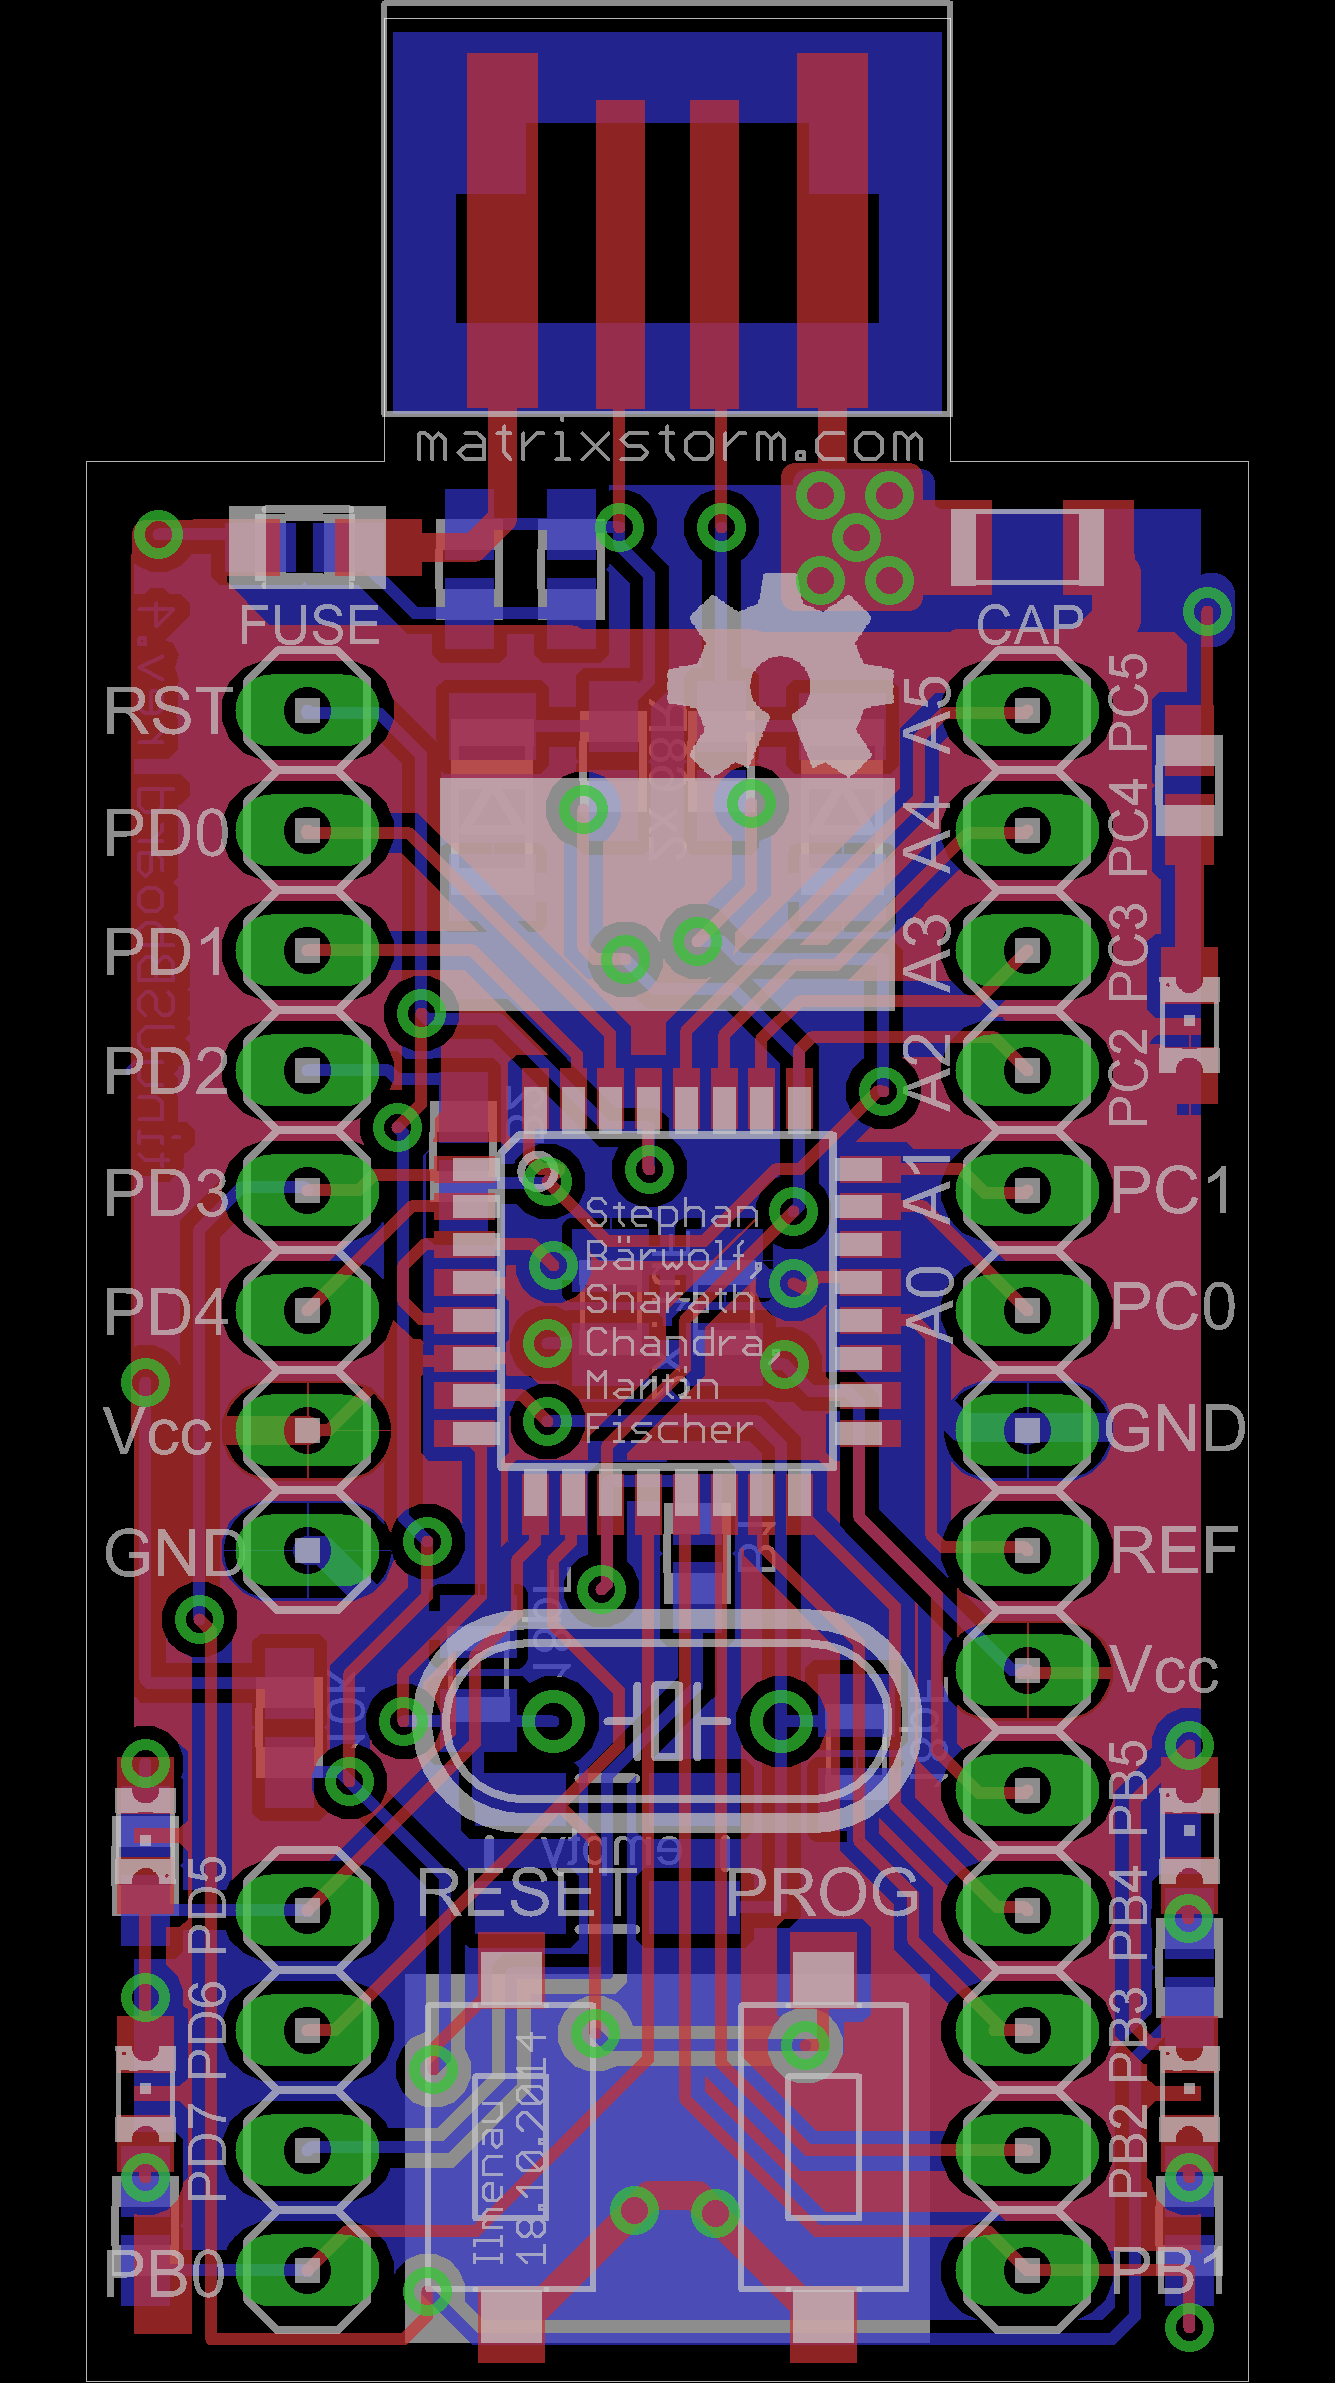
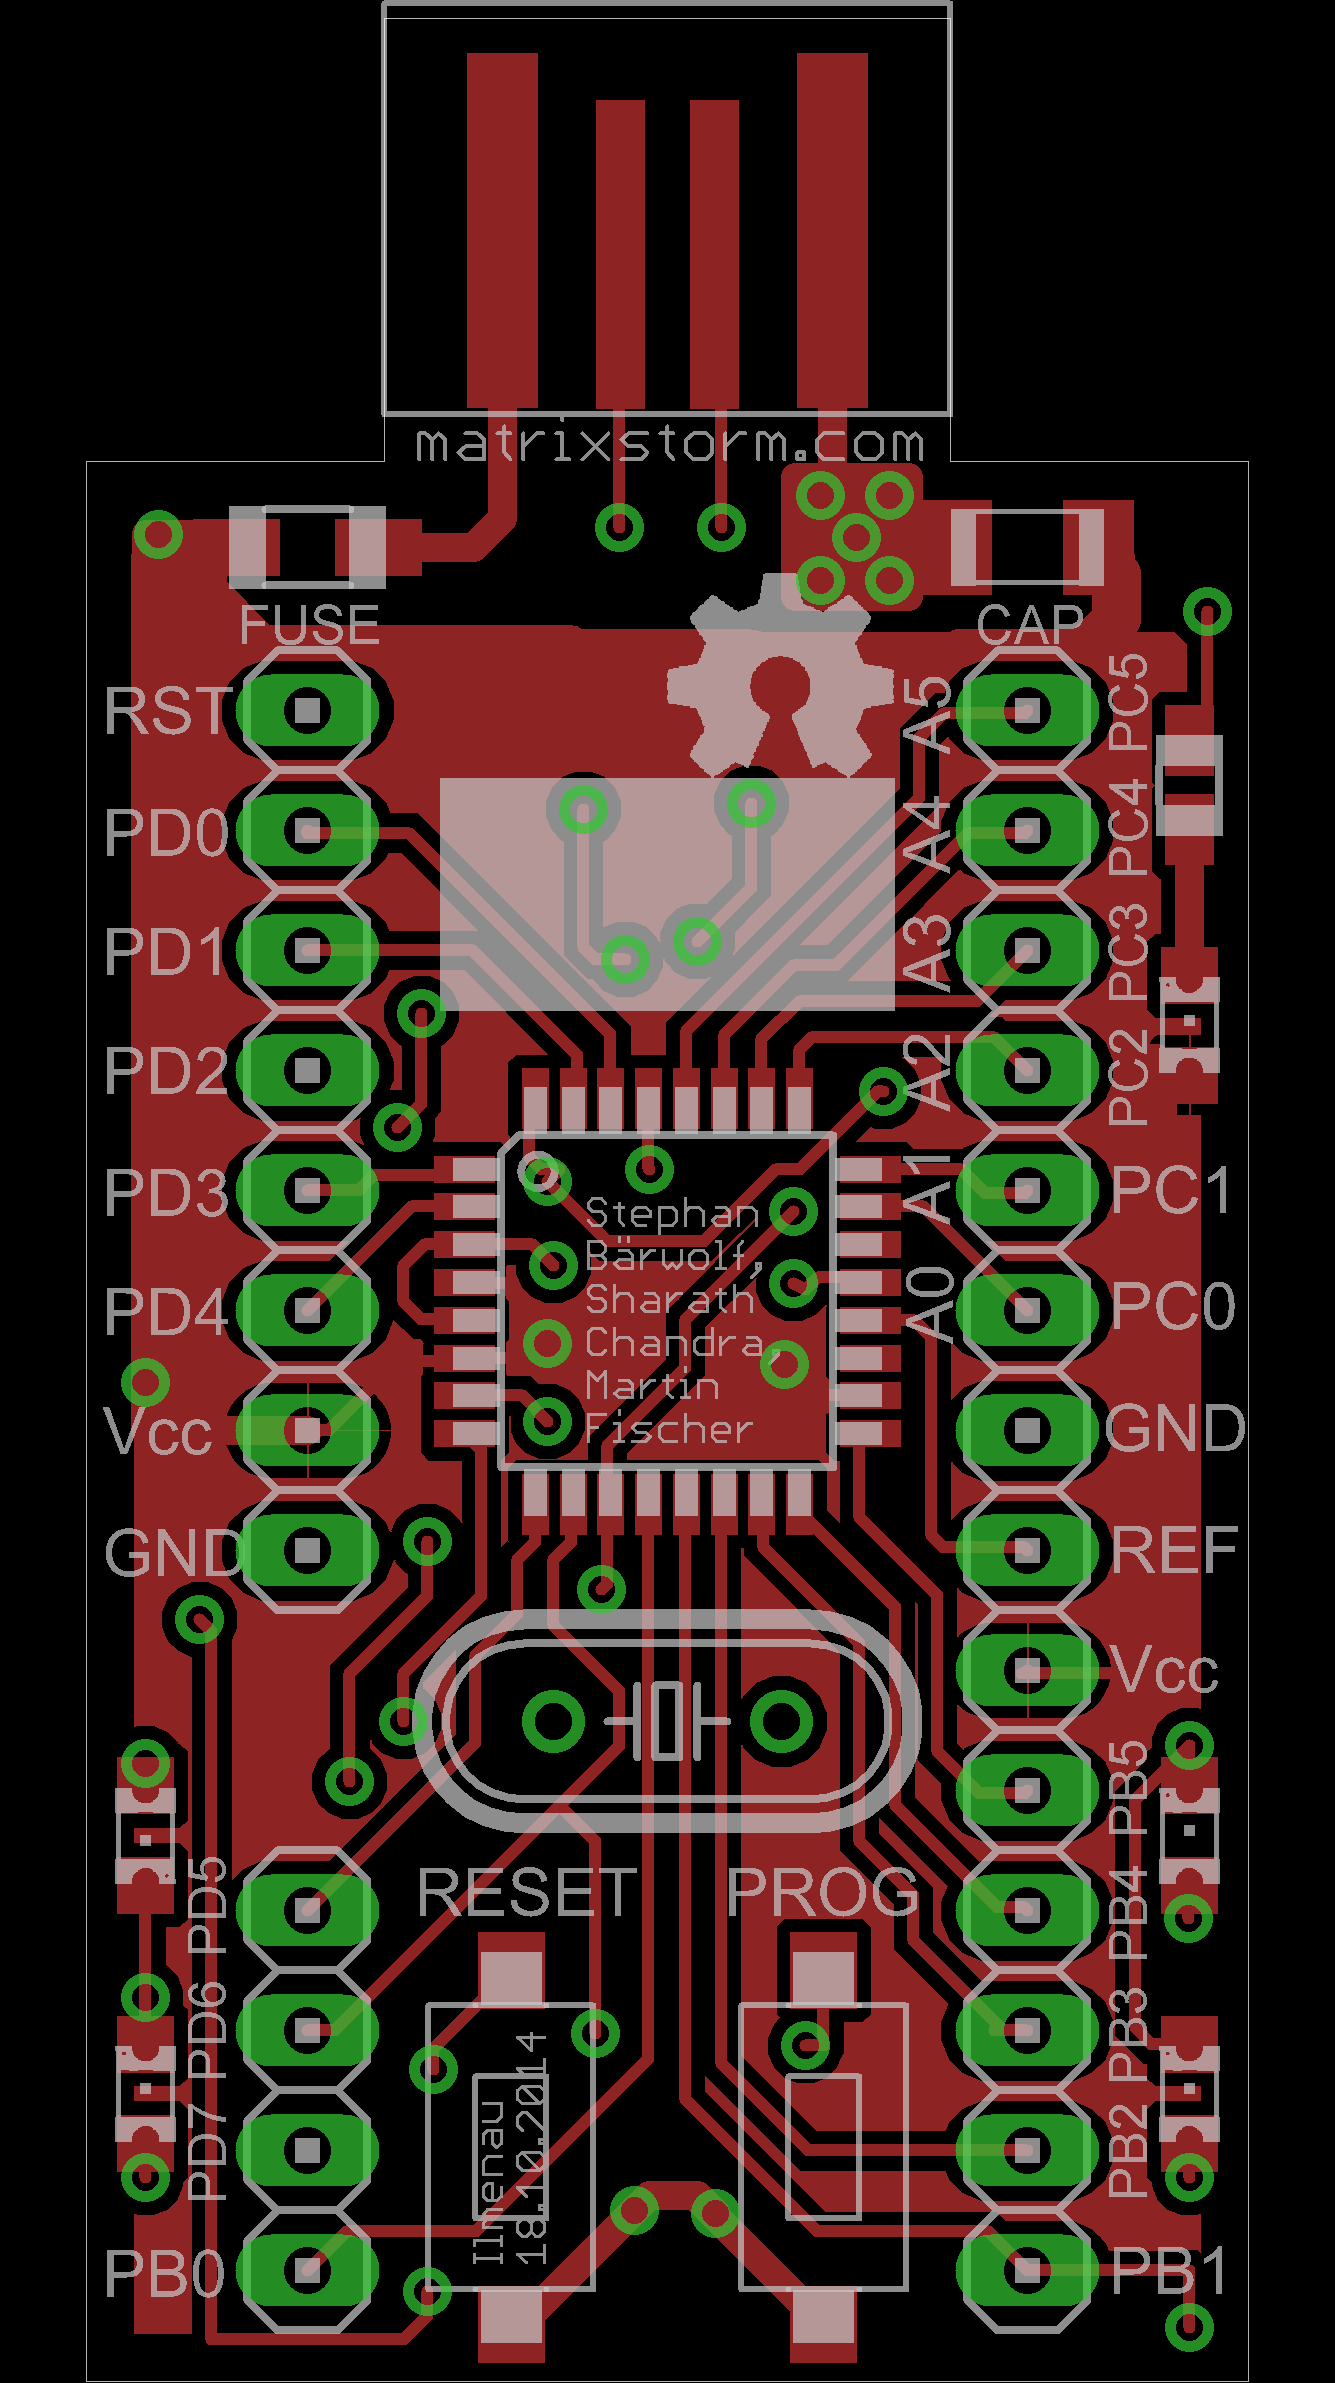
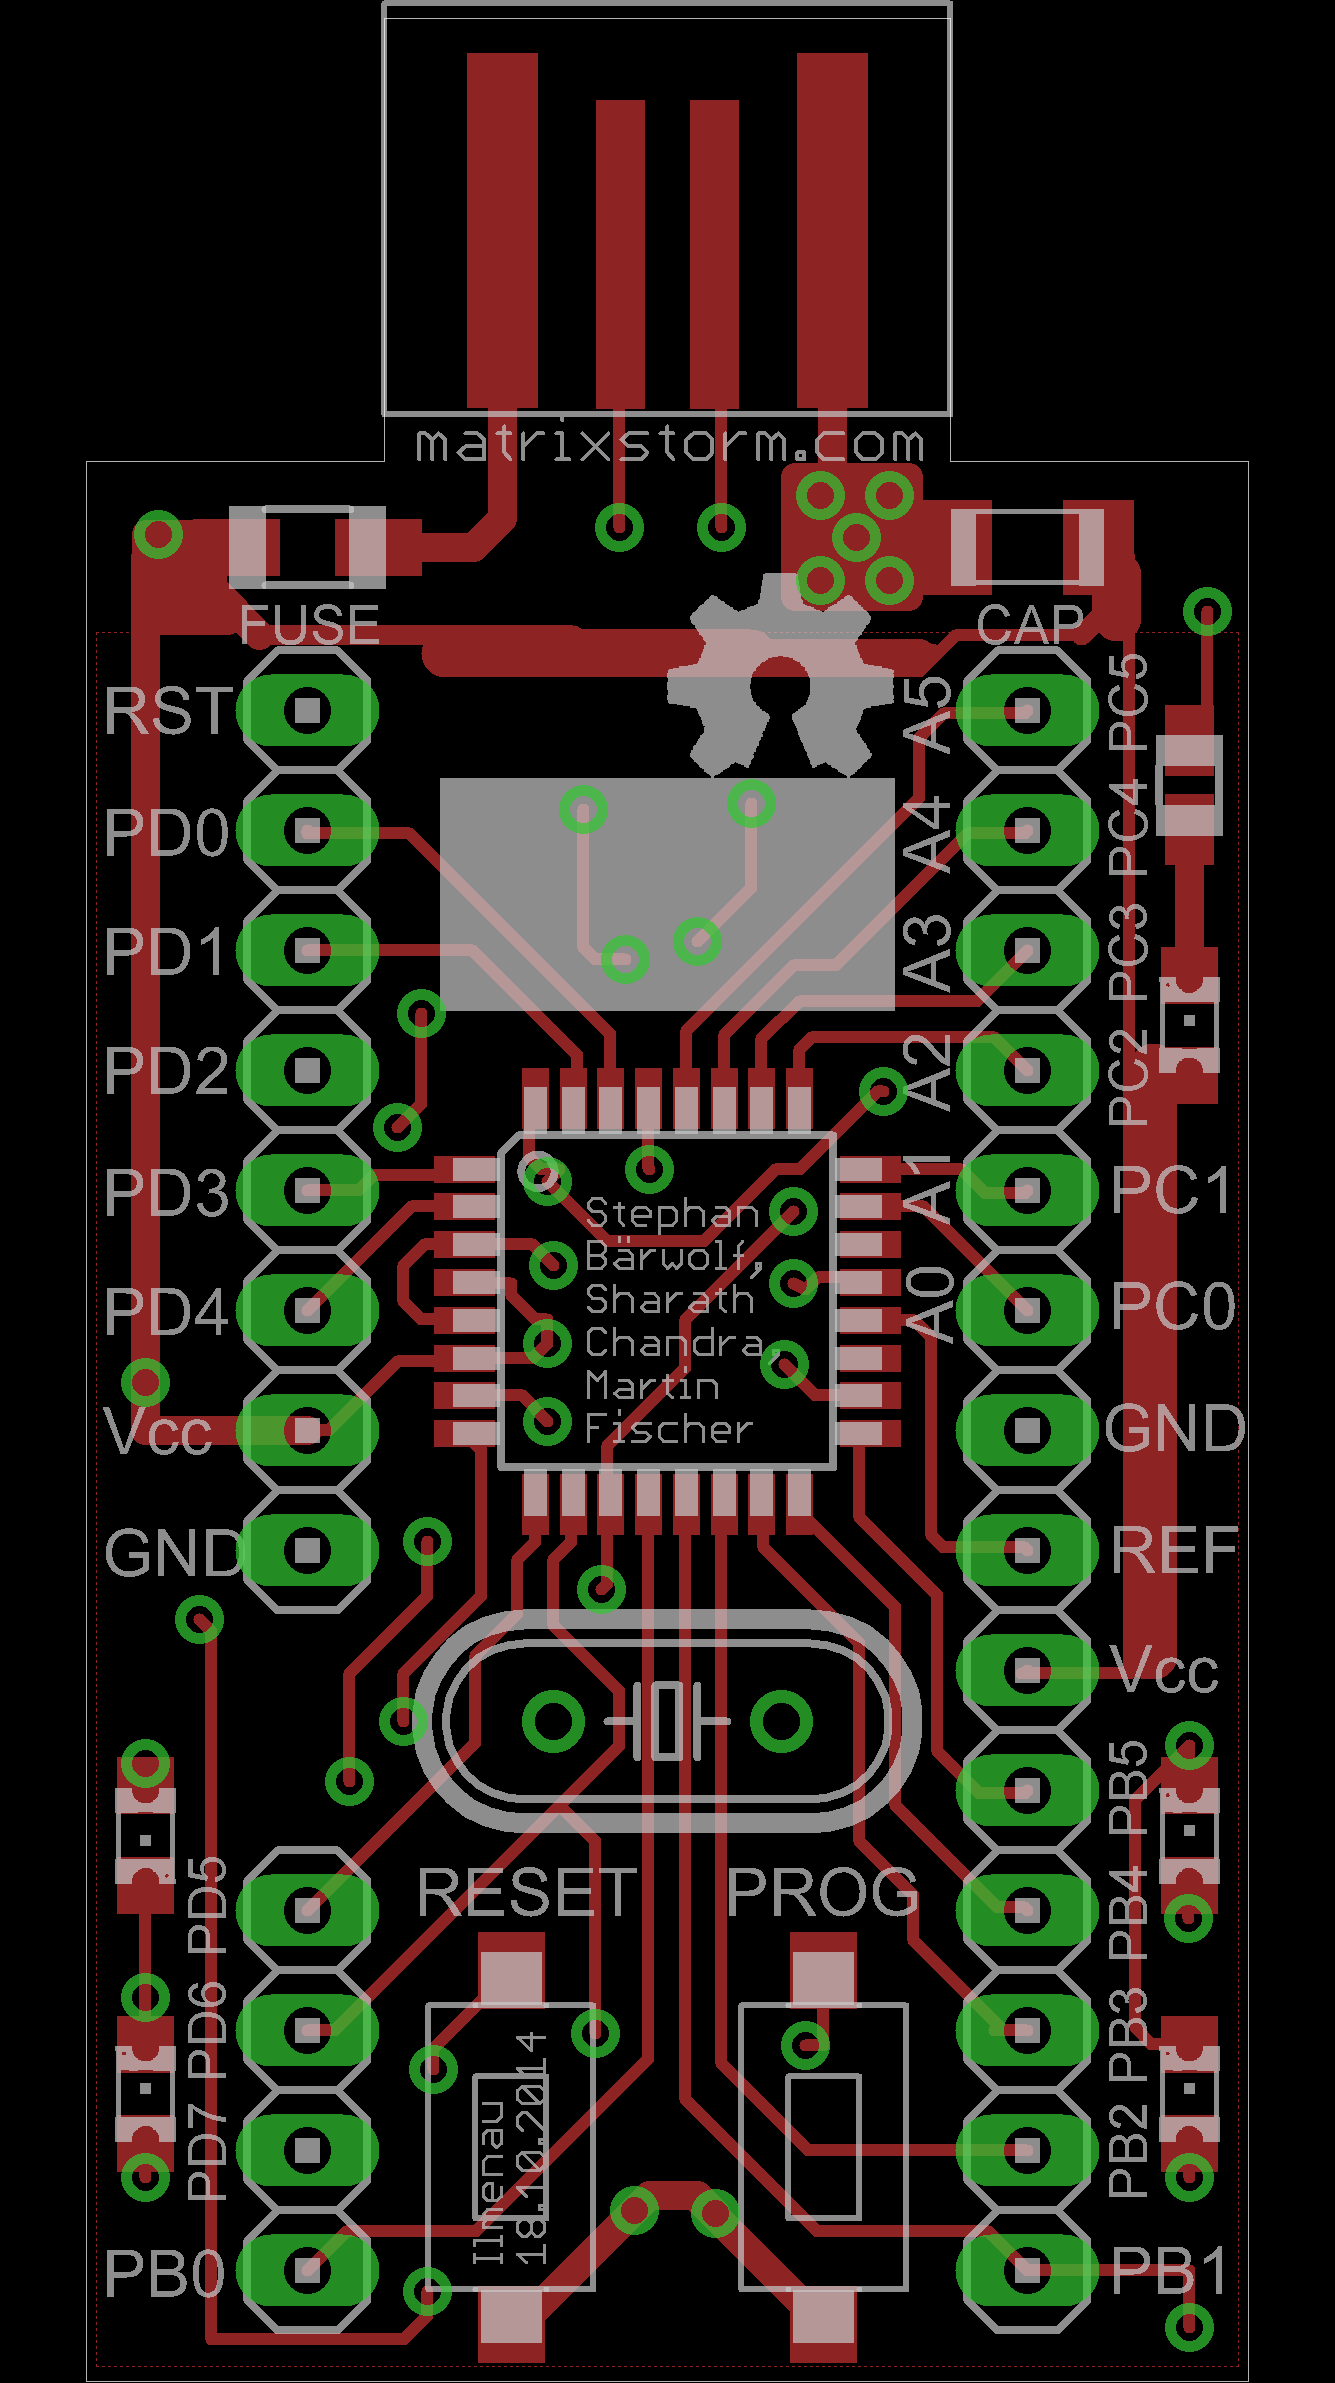
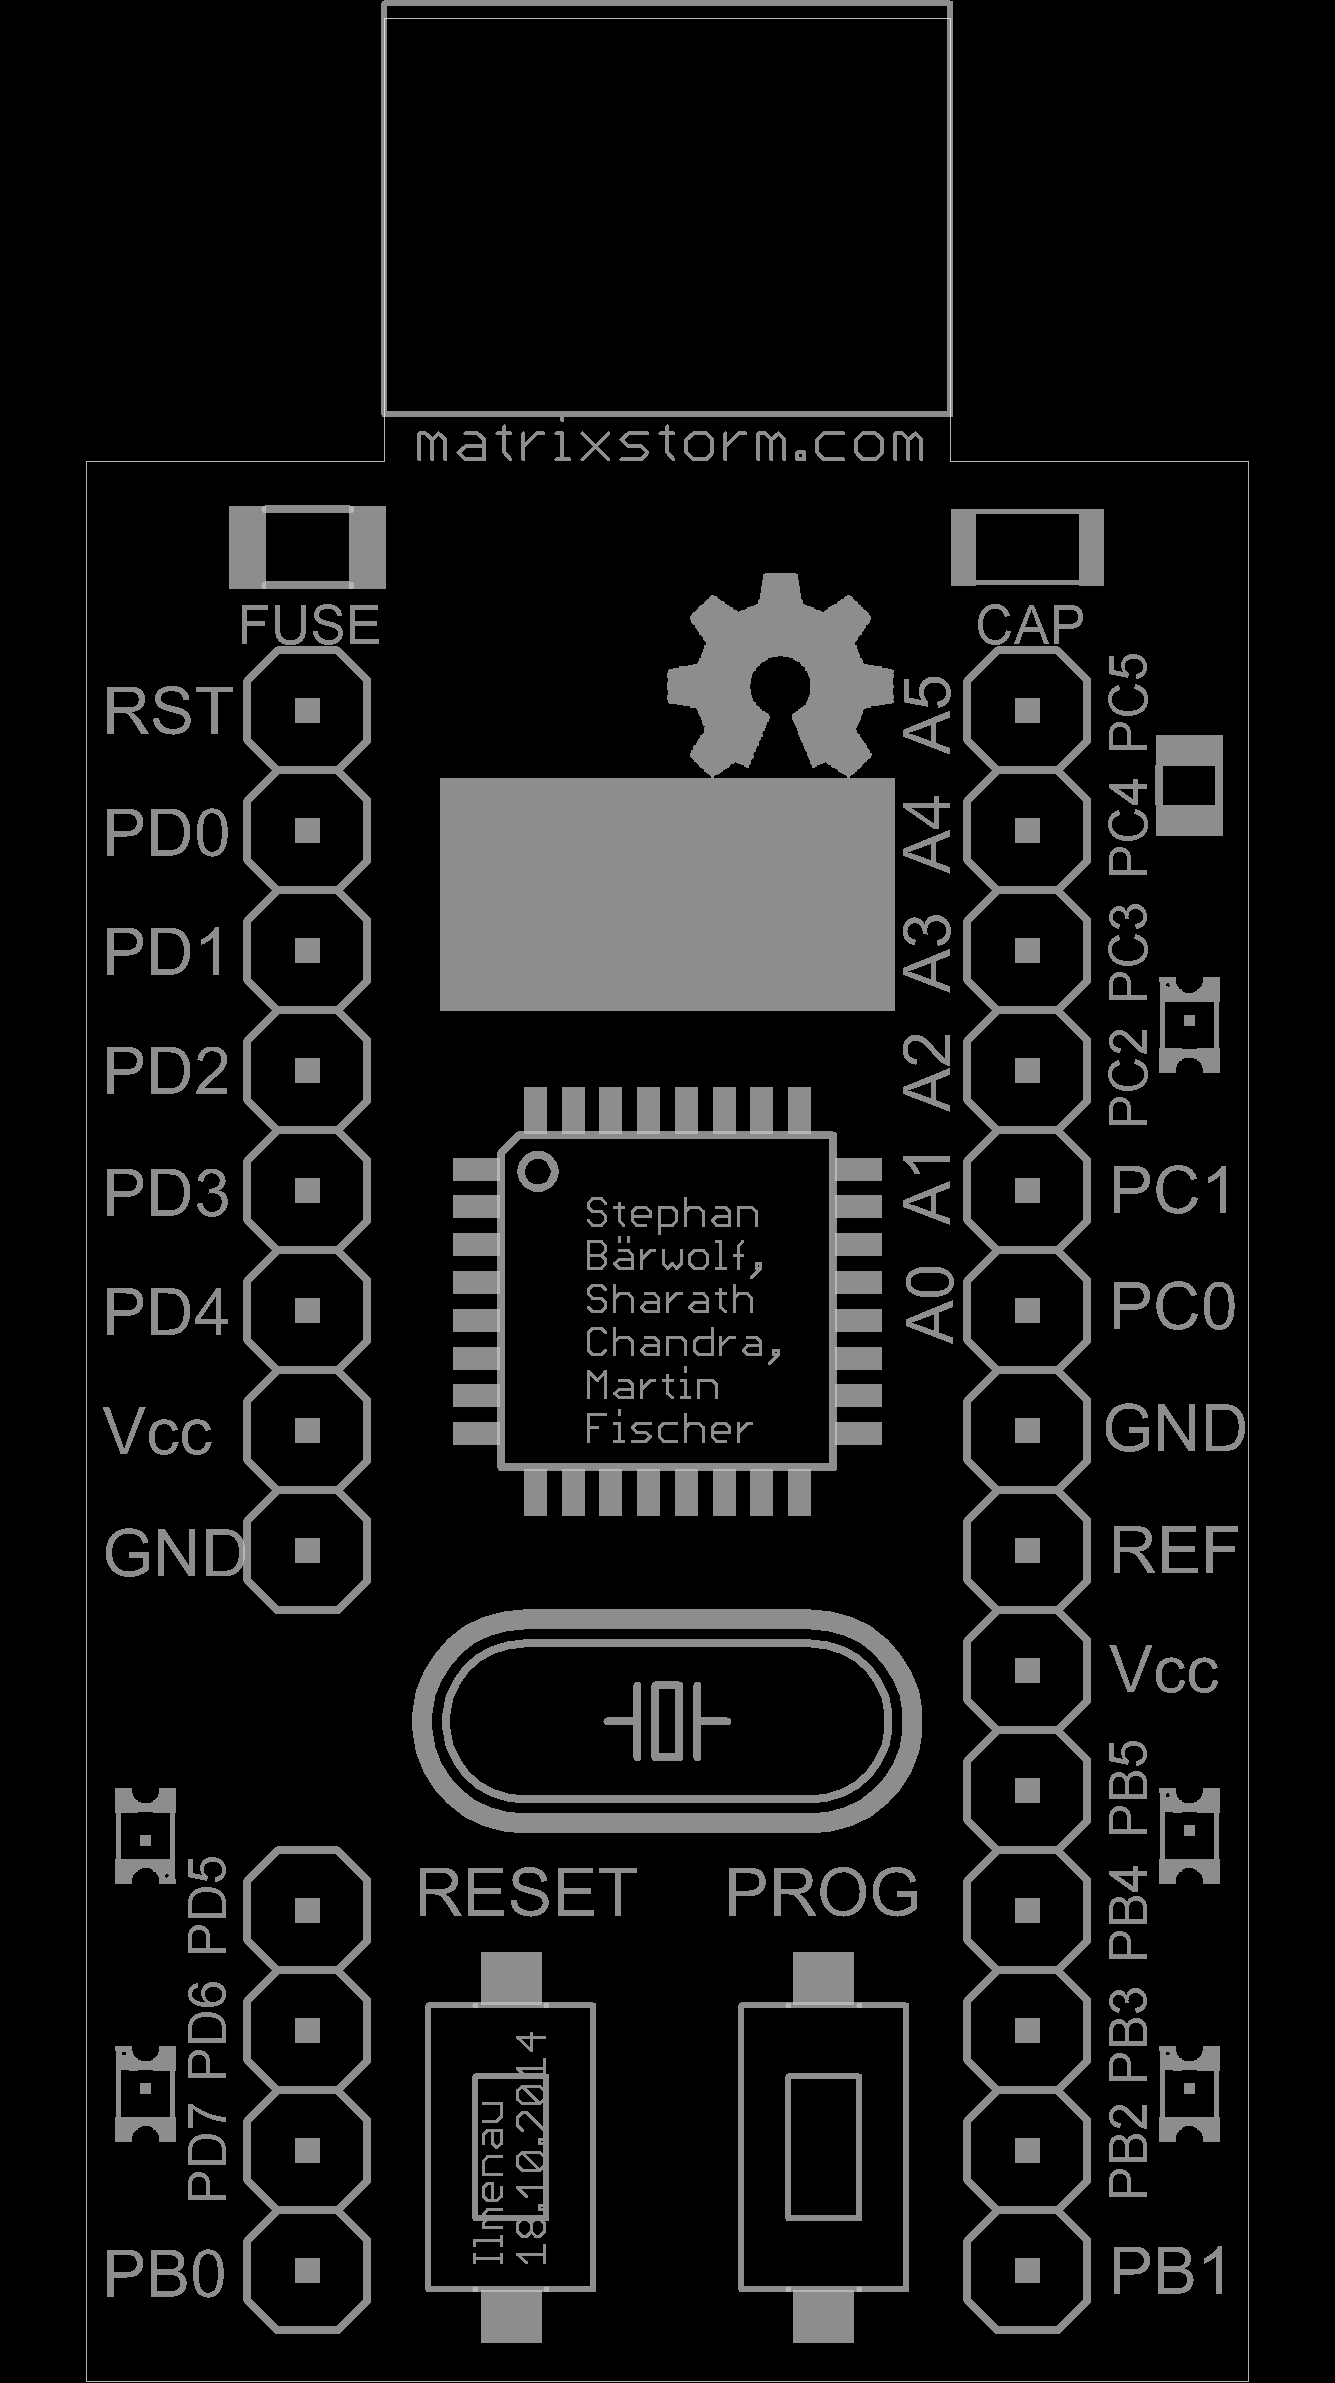
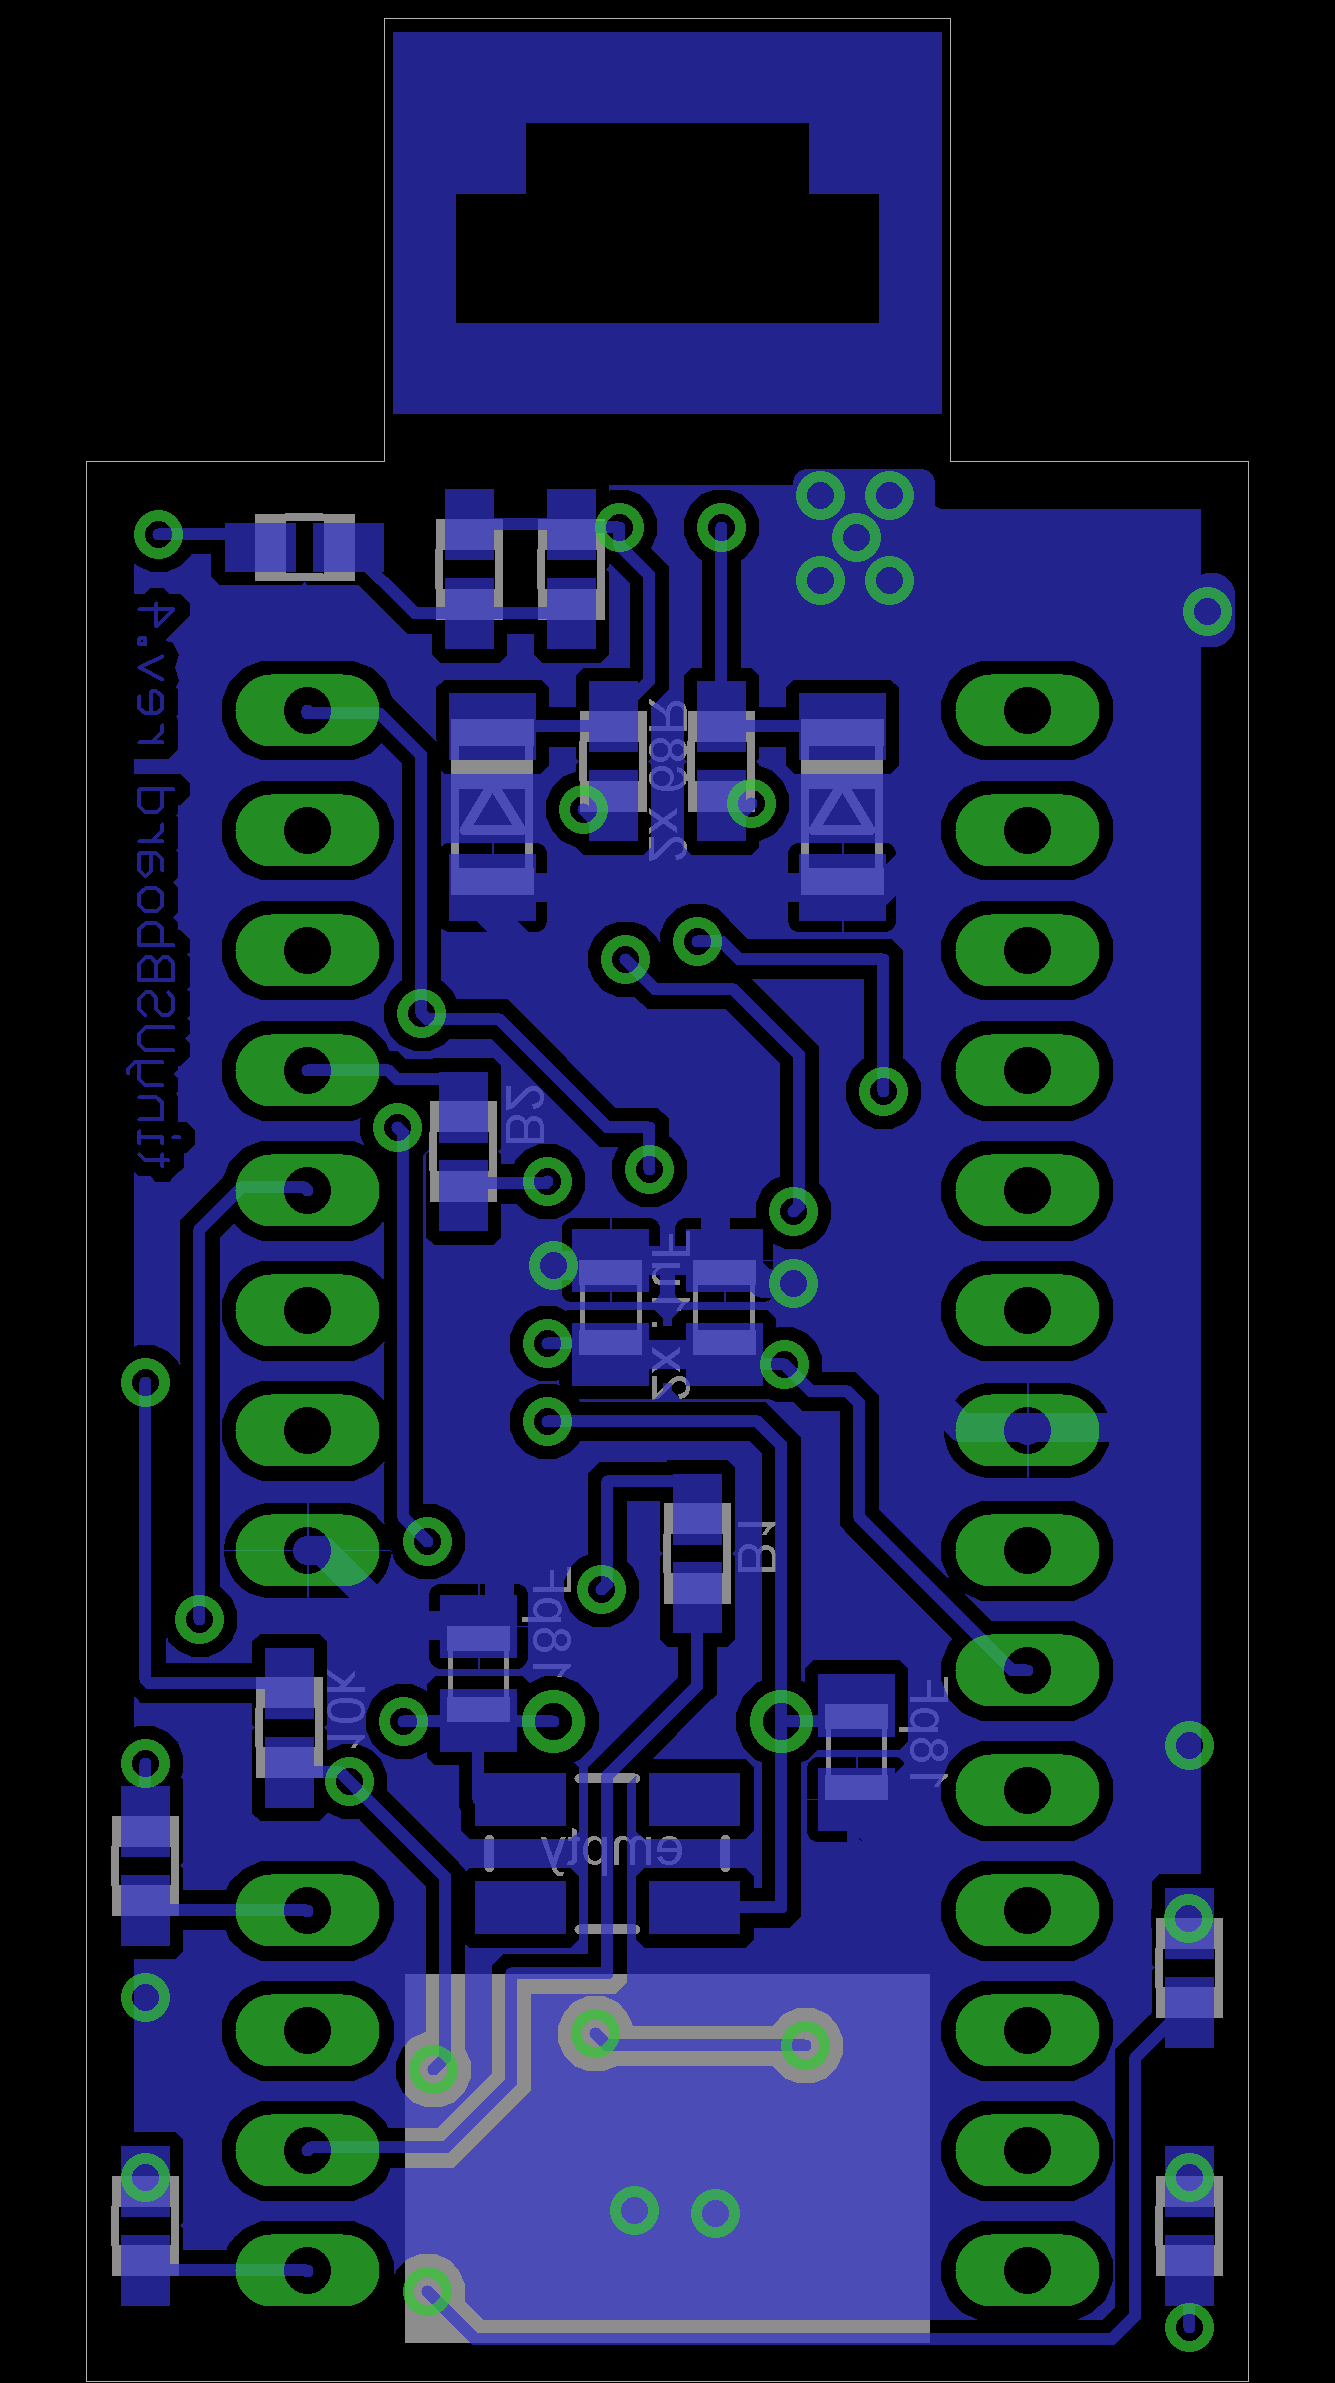
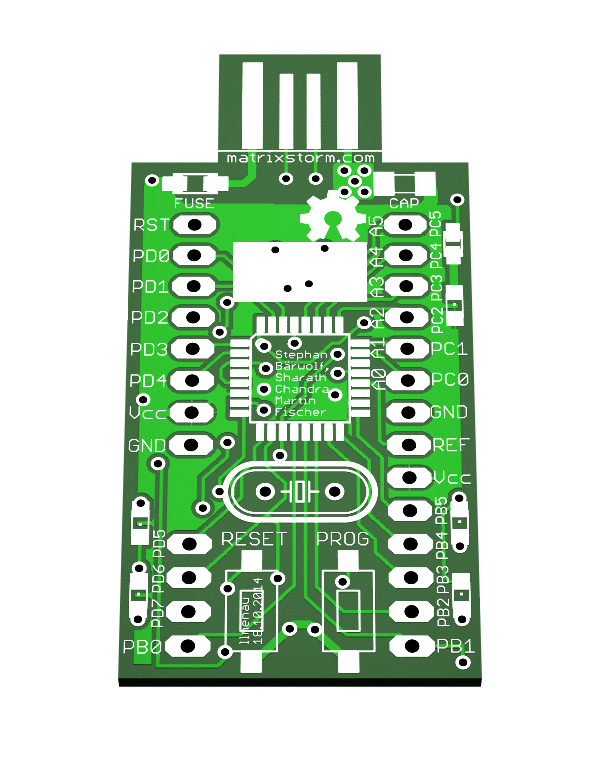
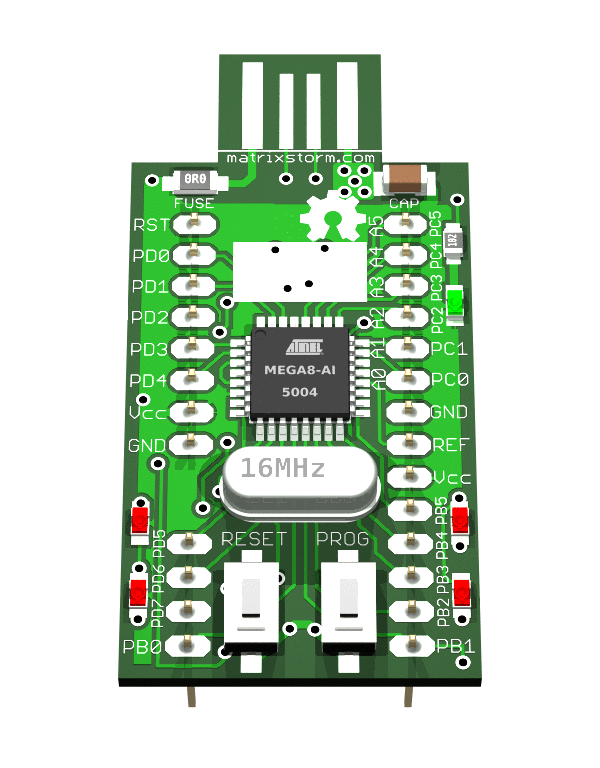
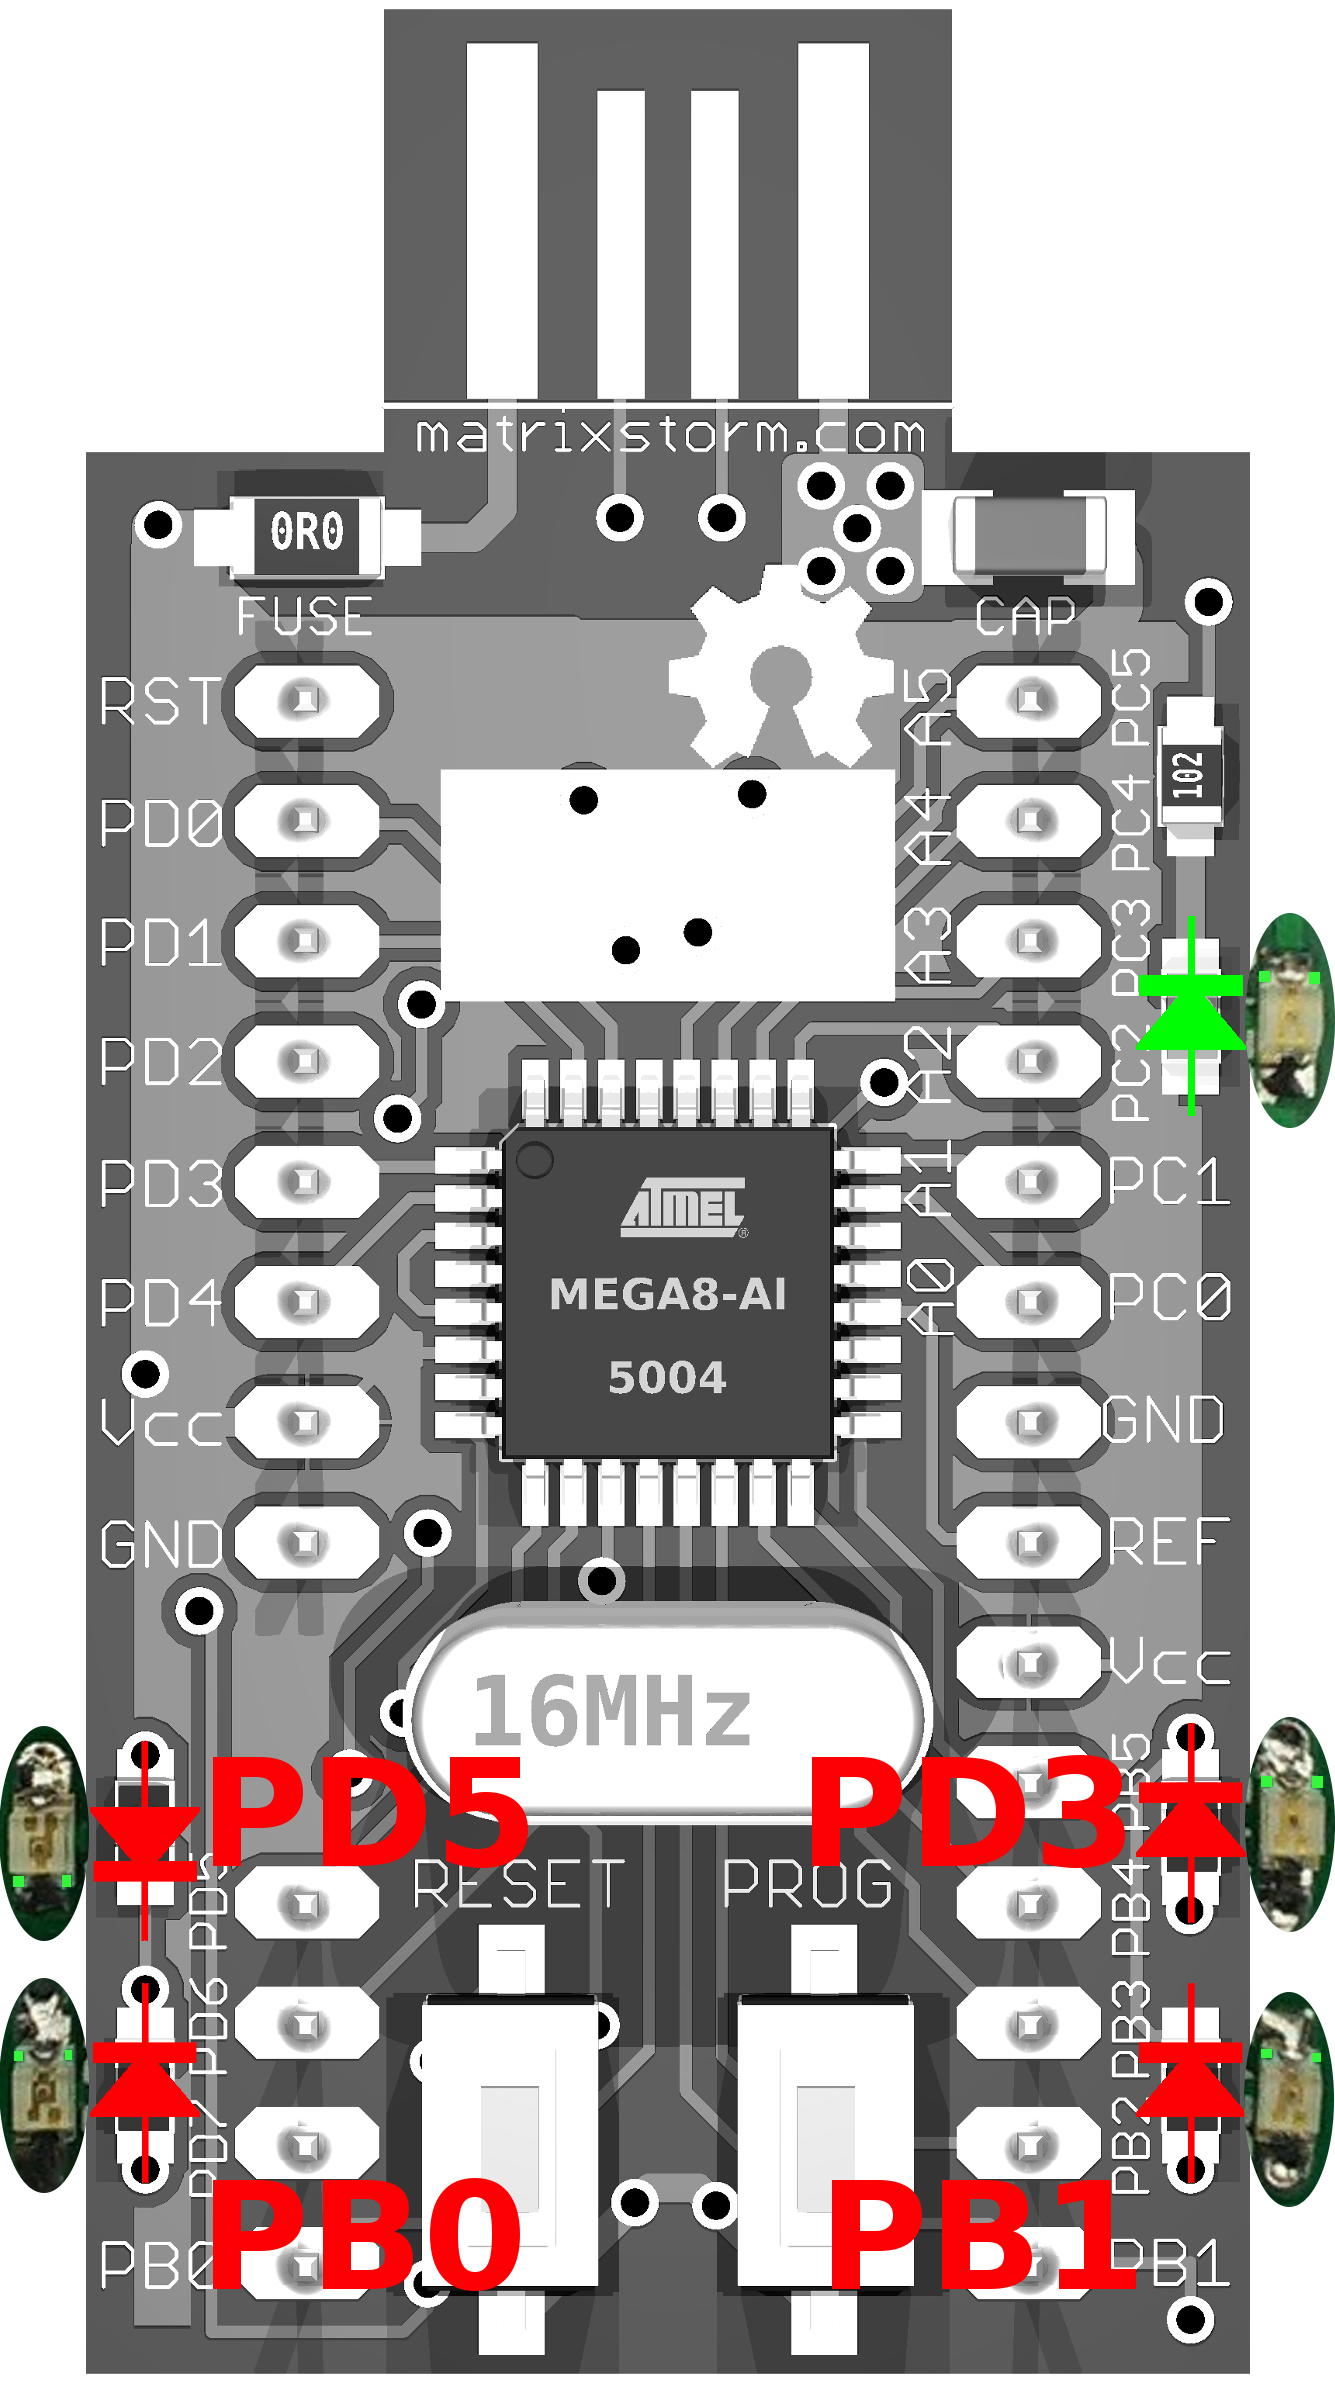
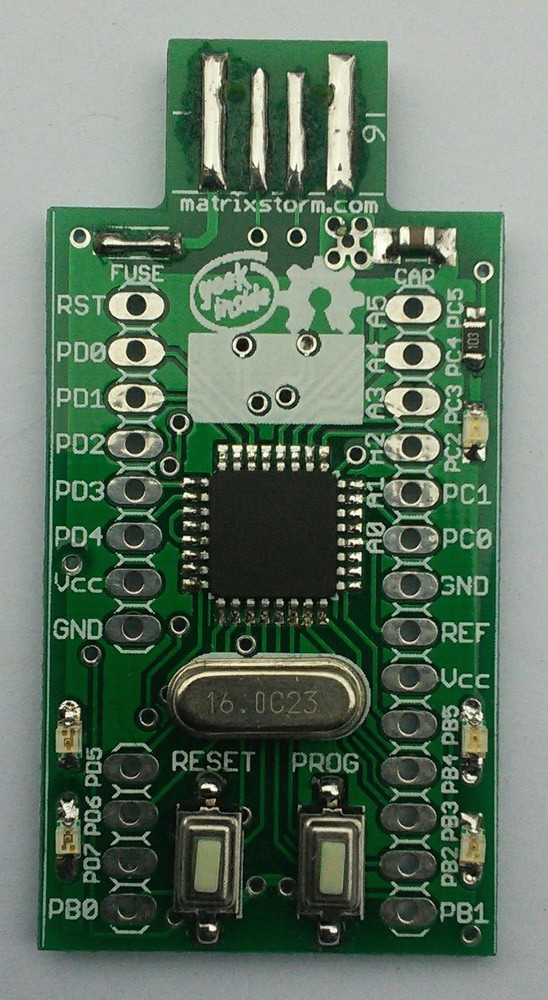
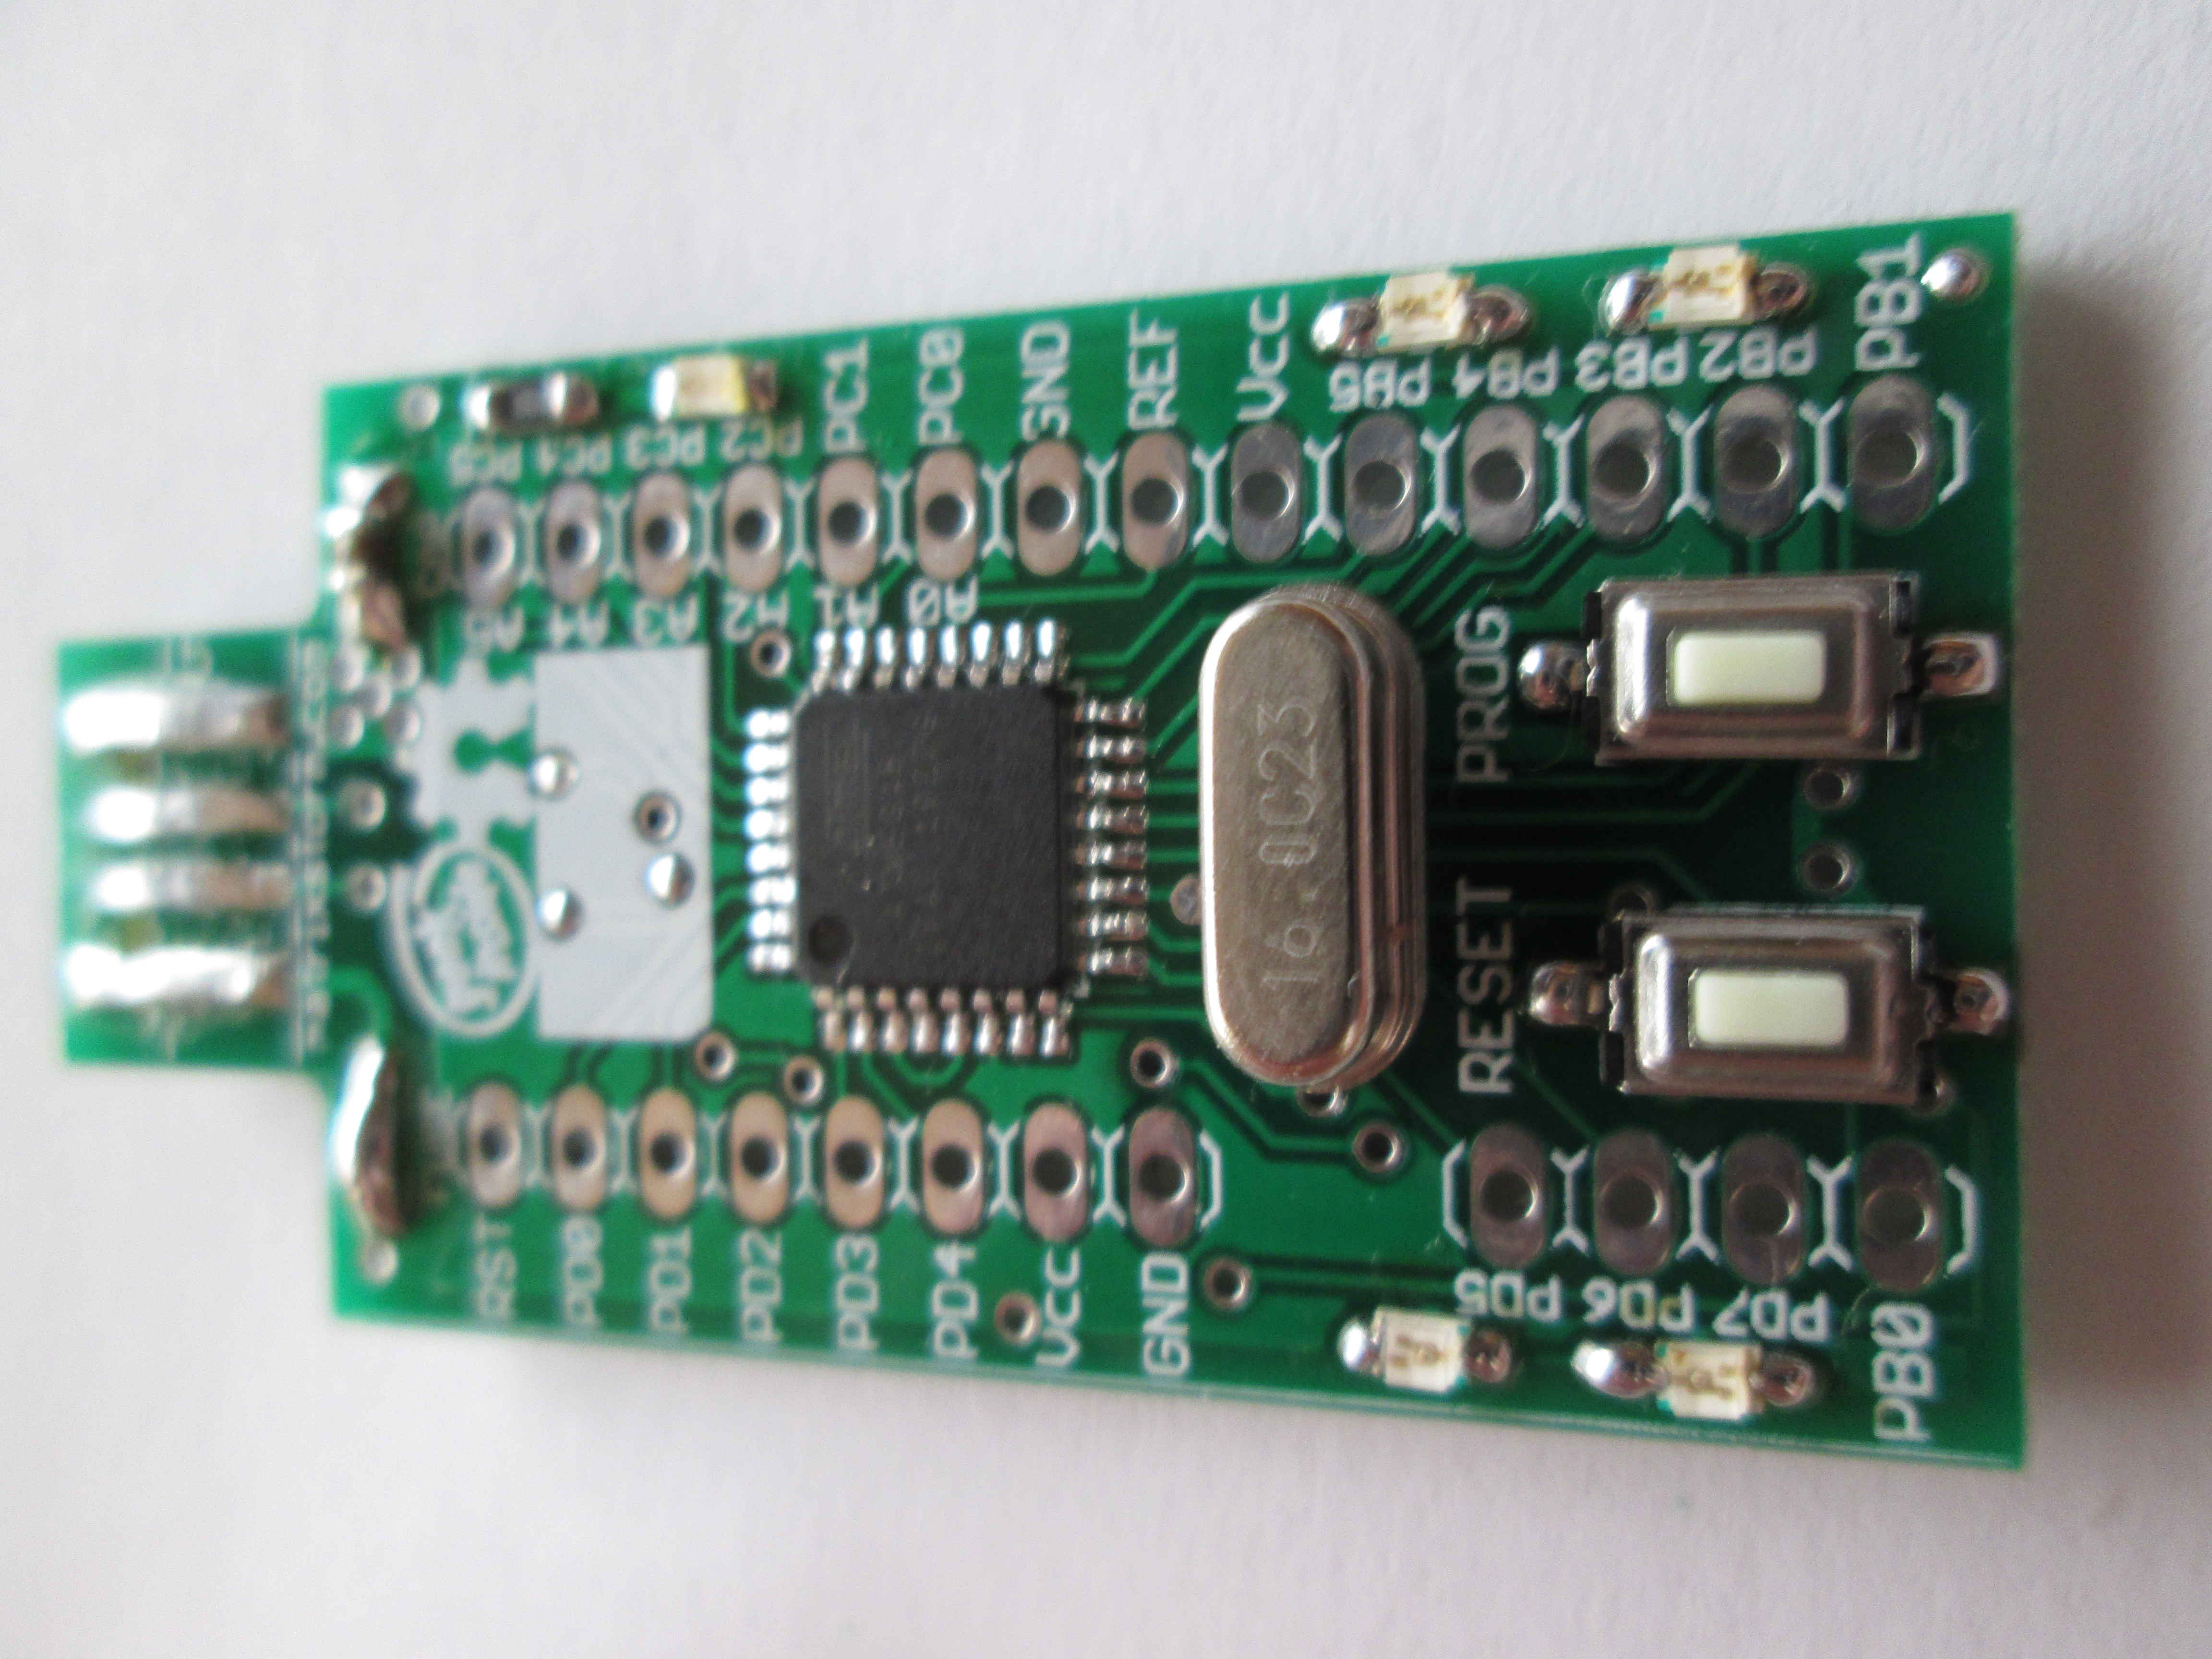
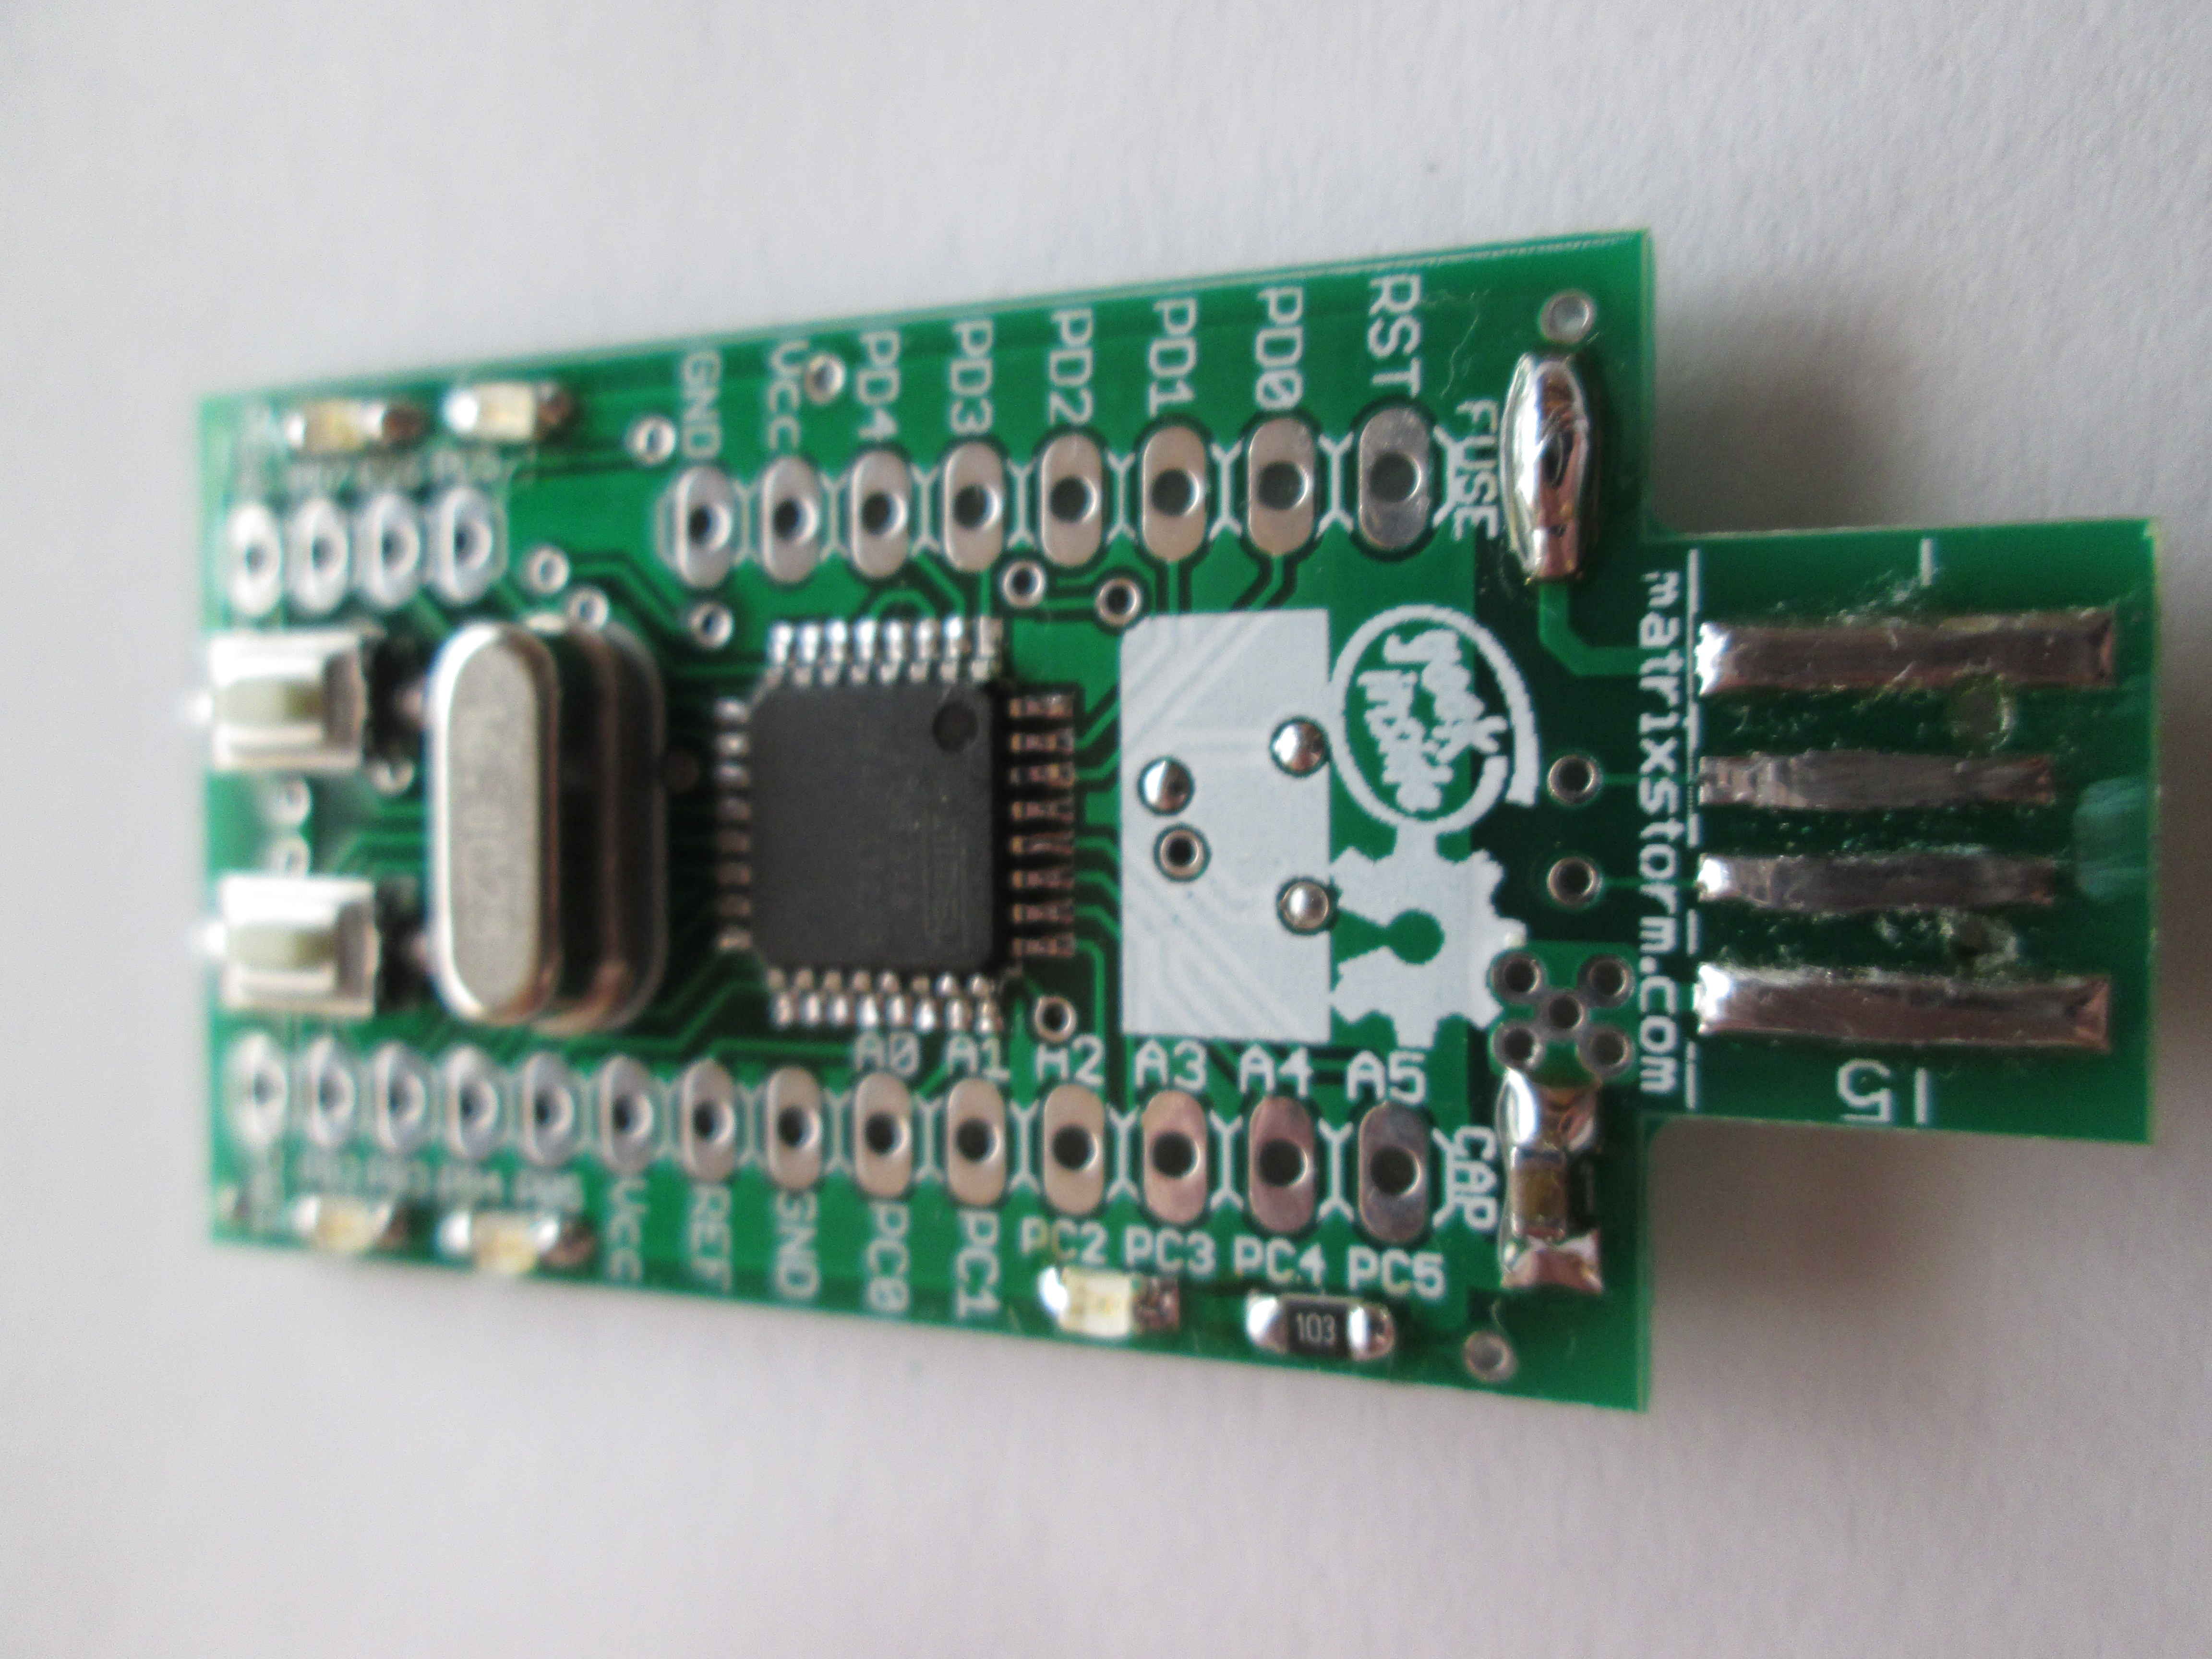
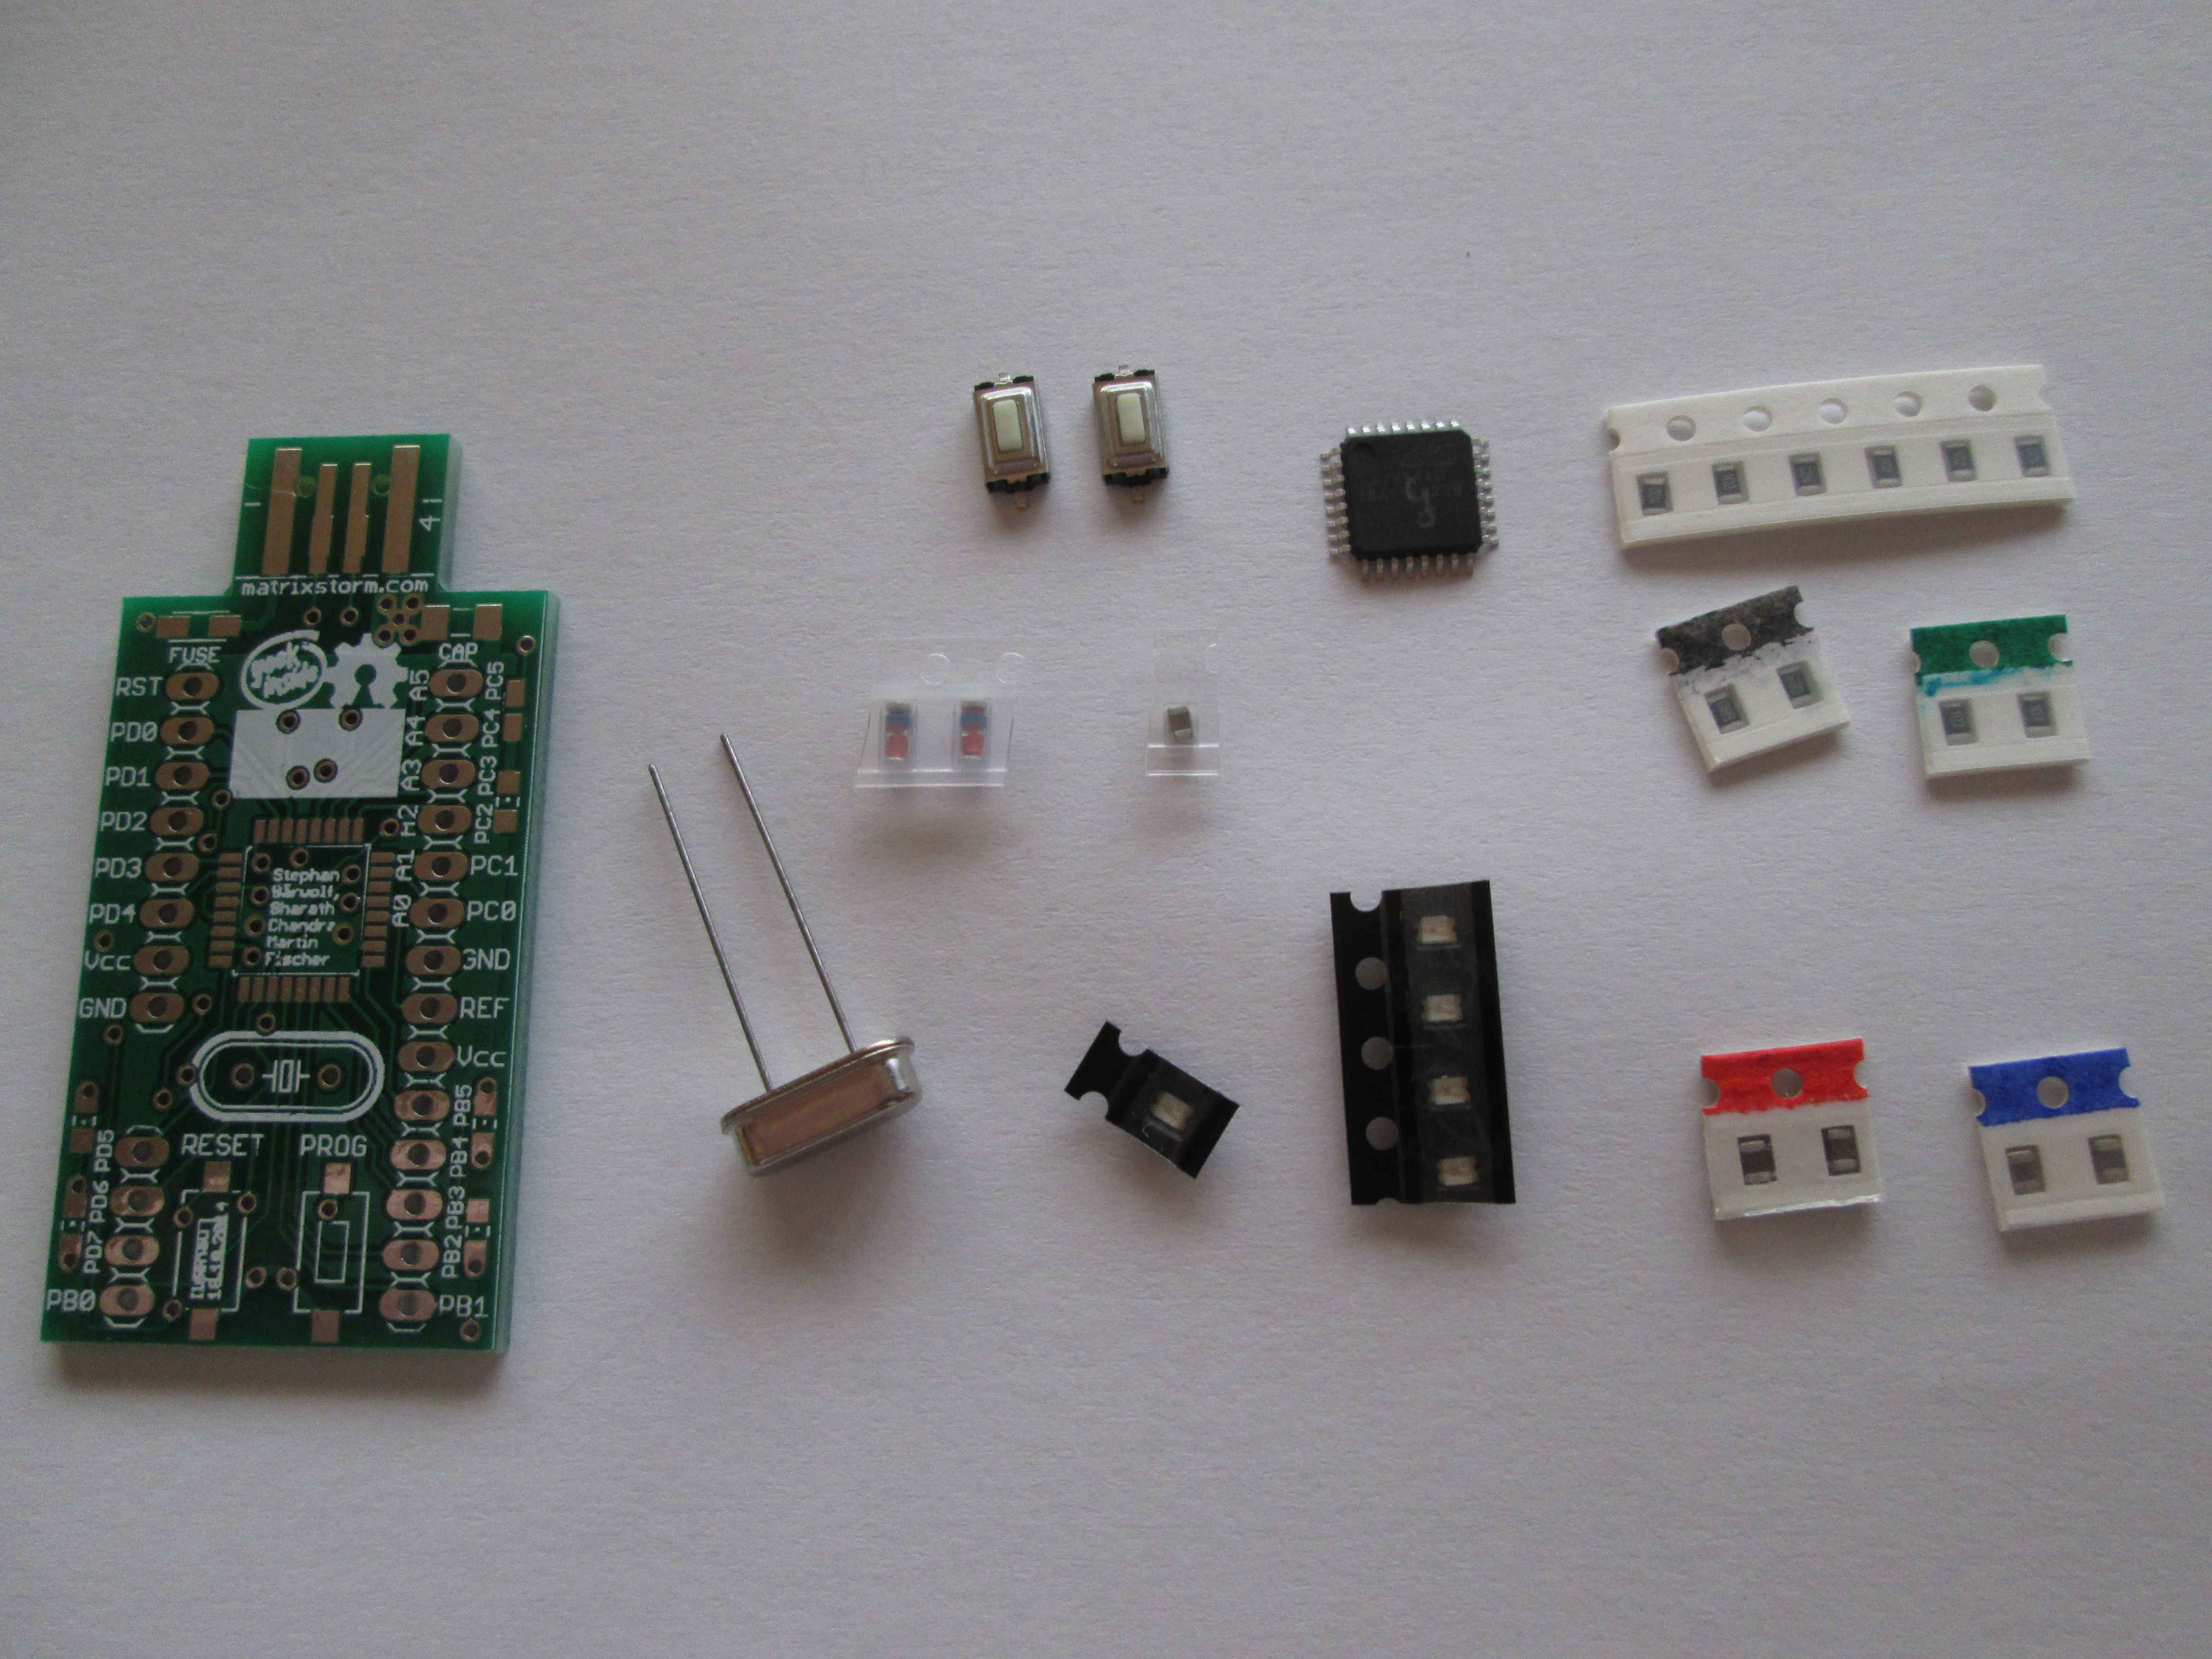
The board (see photo and
layout) in form of a regular stick (approx. 2.5cm x 8.0cm)
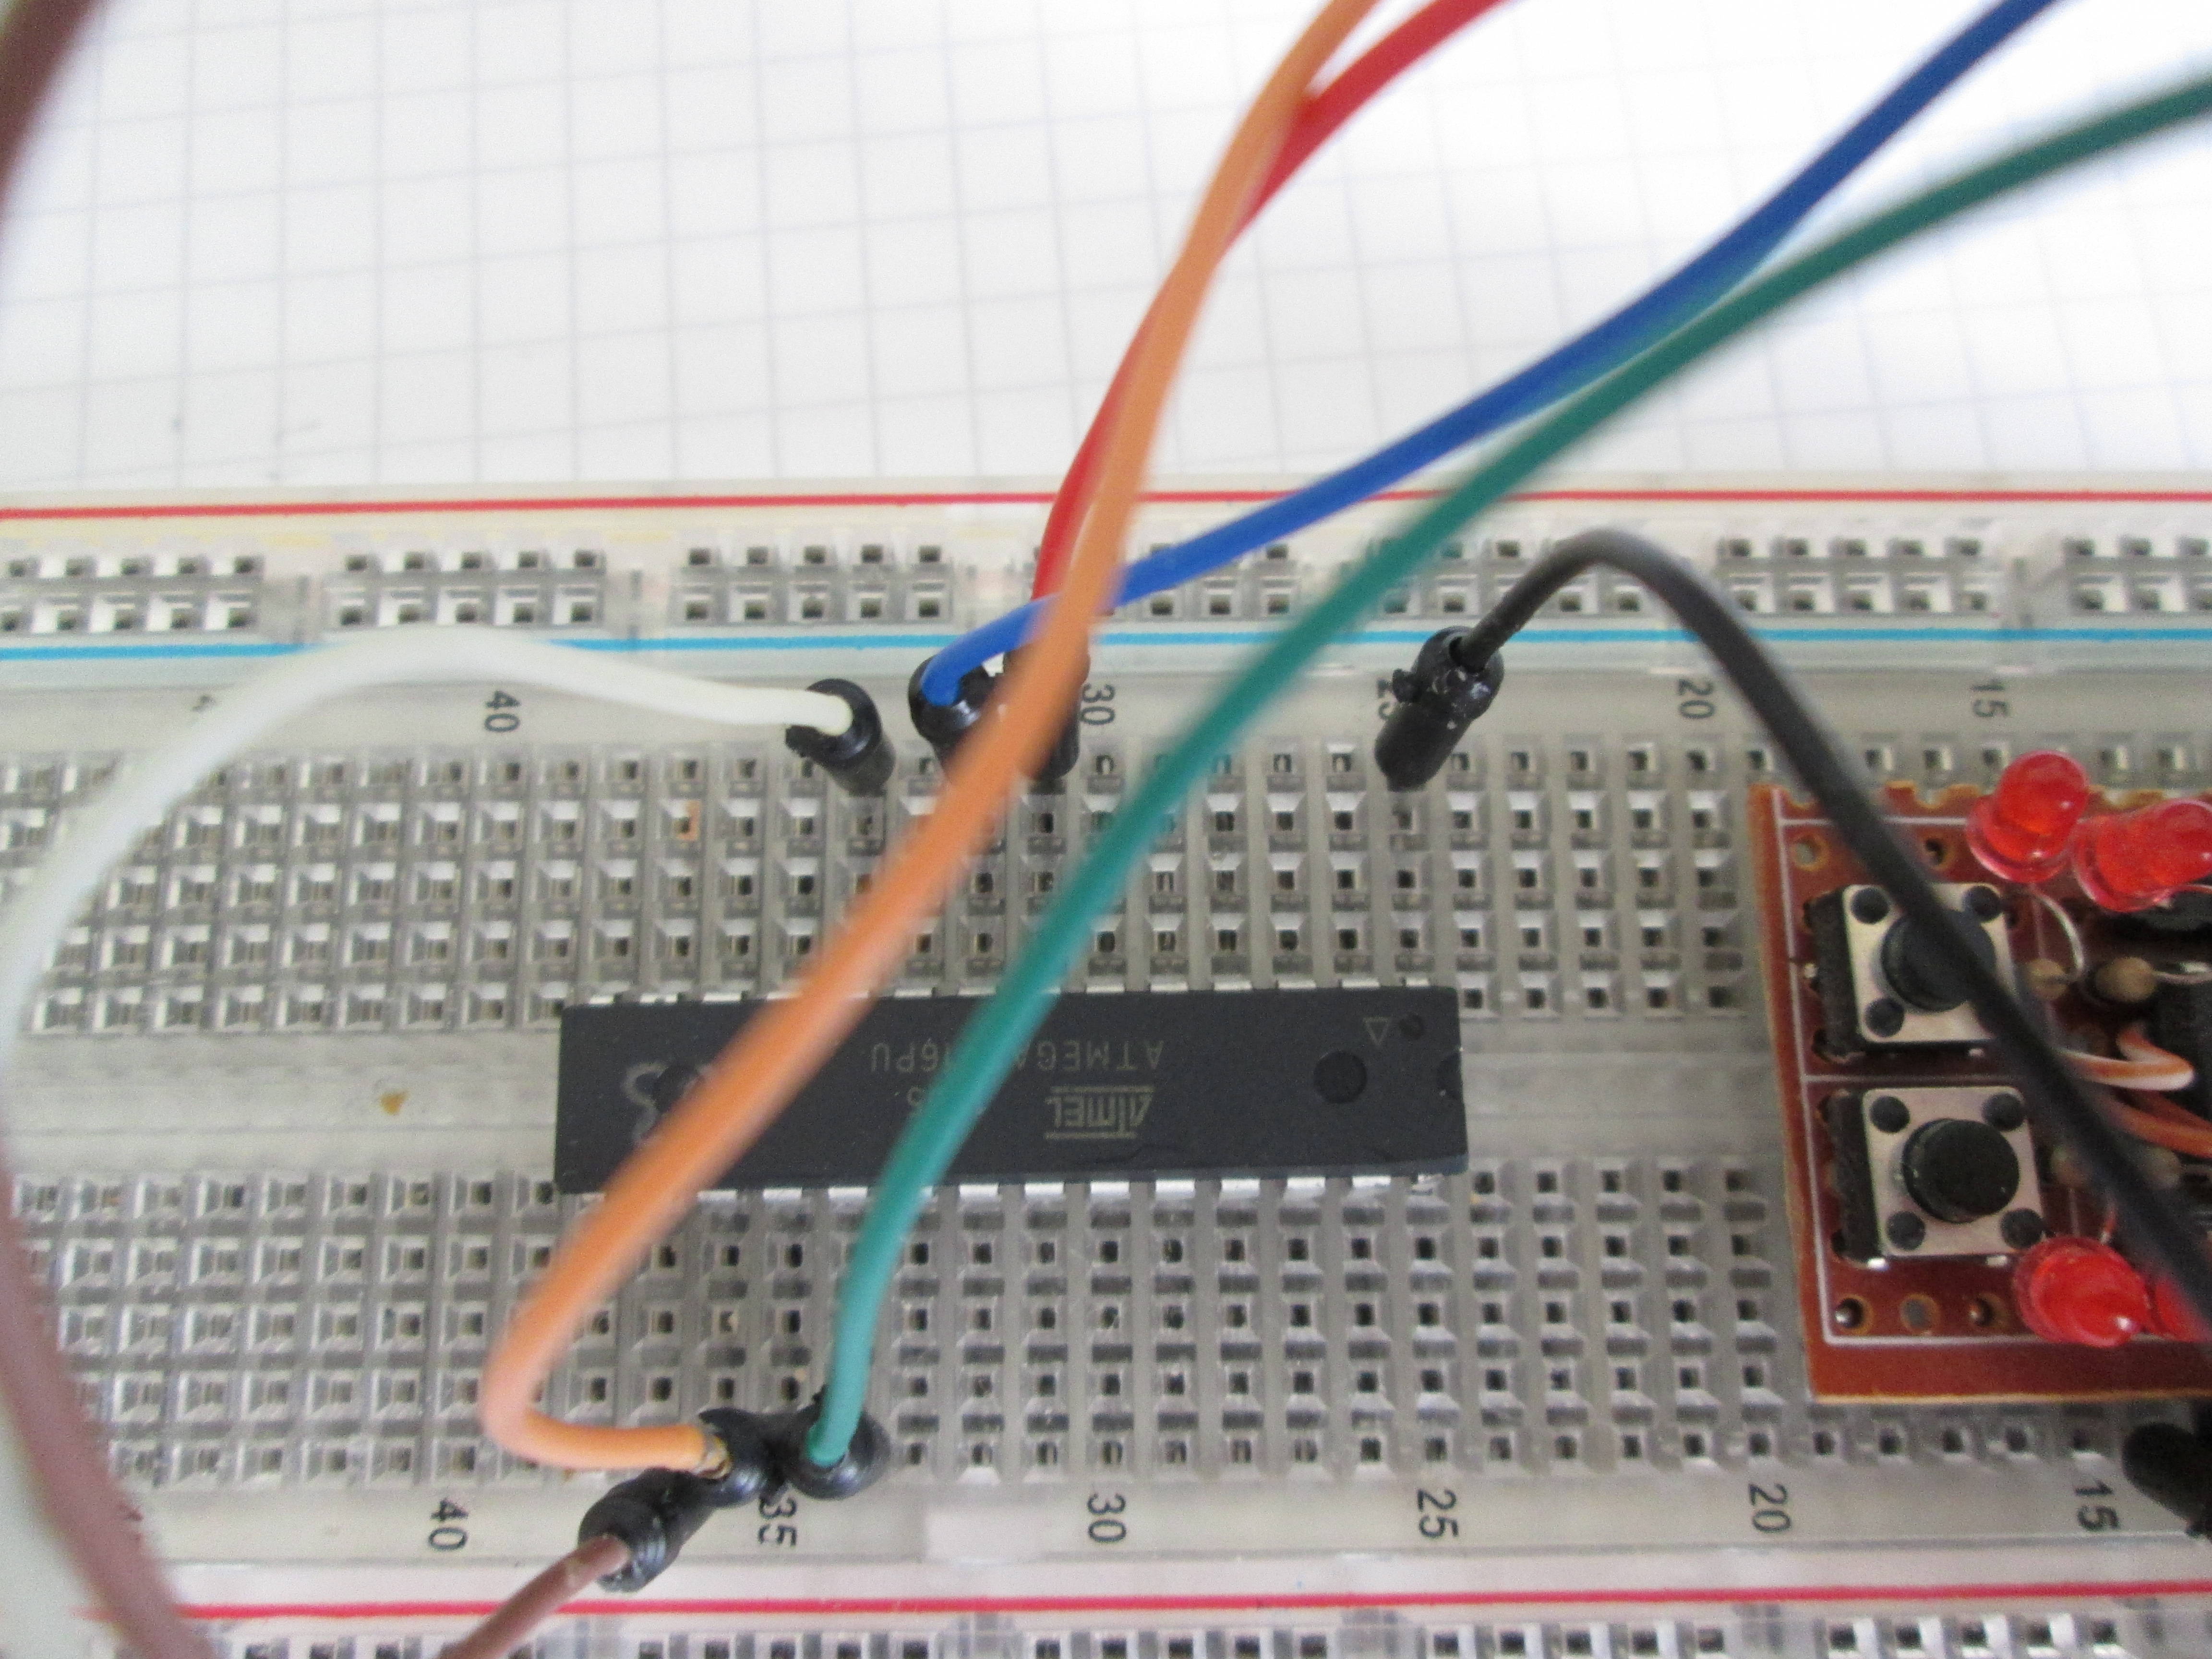
uses an ATmega8-16PU MCU, clocked at 16MHz.
This IC allows up to 8kib of programmed code within its flash-memory.
It also has additional 512byte persistent electronical eraseable memory (EEPROM) and 1kib volatile memory RAM.
(For further features see its datasheet in the datasheet-section).
Of course it is possible to use tinyUSBboard with other microcontrollers (for example ATmega328), too. For details contact me.
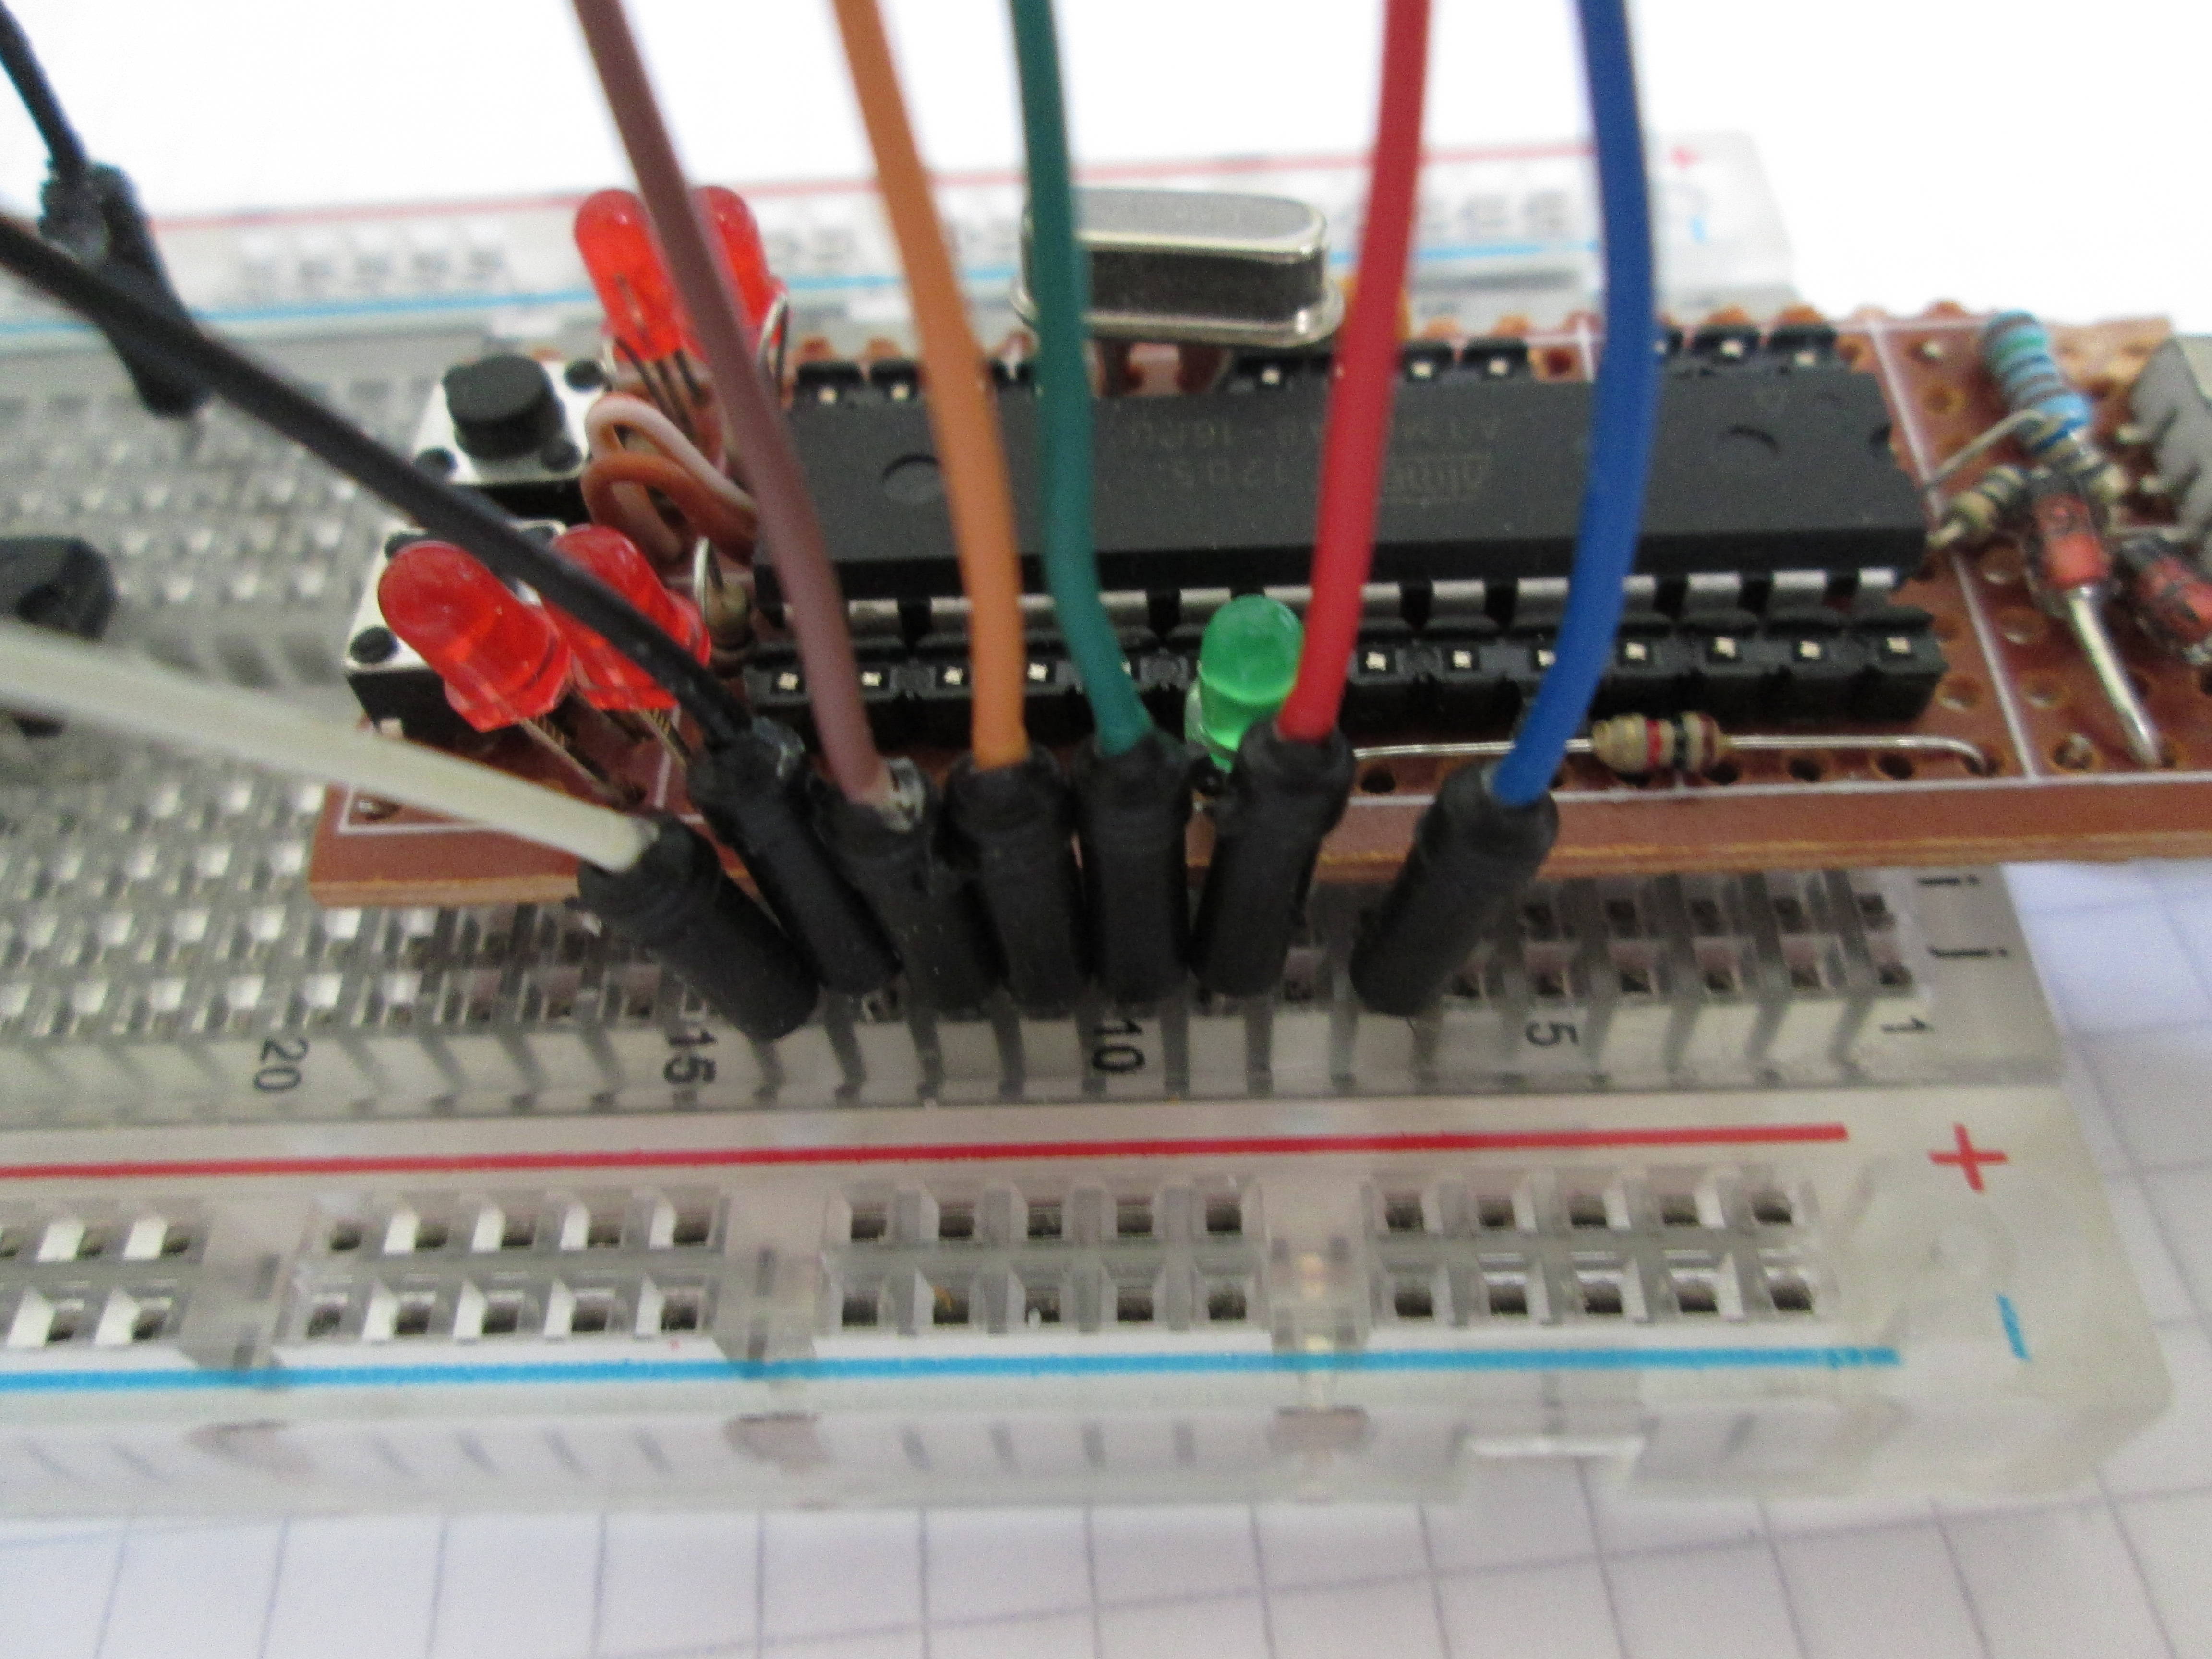
Three of the MCUs pins (PIN2, PIN12 and PIN13) are actually used for the USB interface.
This feature and using the latest, preflashed bootloader "USBaspLoader" (https://github.com/baerwolf/USBaspLoader)
allows convenient and fast programming via USB, again and again:
Just press (keep pressed) the program-button and reset (or powerup) the stick.
The bootloader, emulating an usbasp-programming hardware, will take over and allows (re)programming the MCU.
(Once started, of course, the prog-button can be released. Any repeated press (or "reset") then will exit the bootloader.)
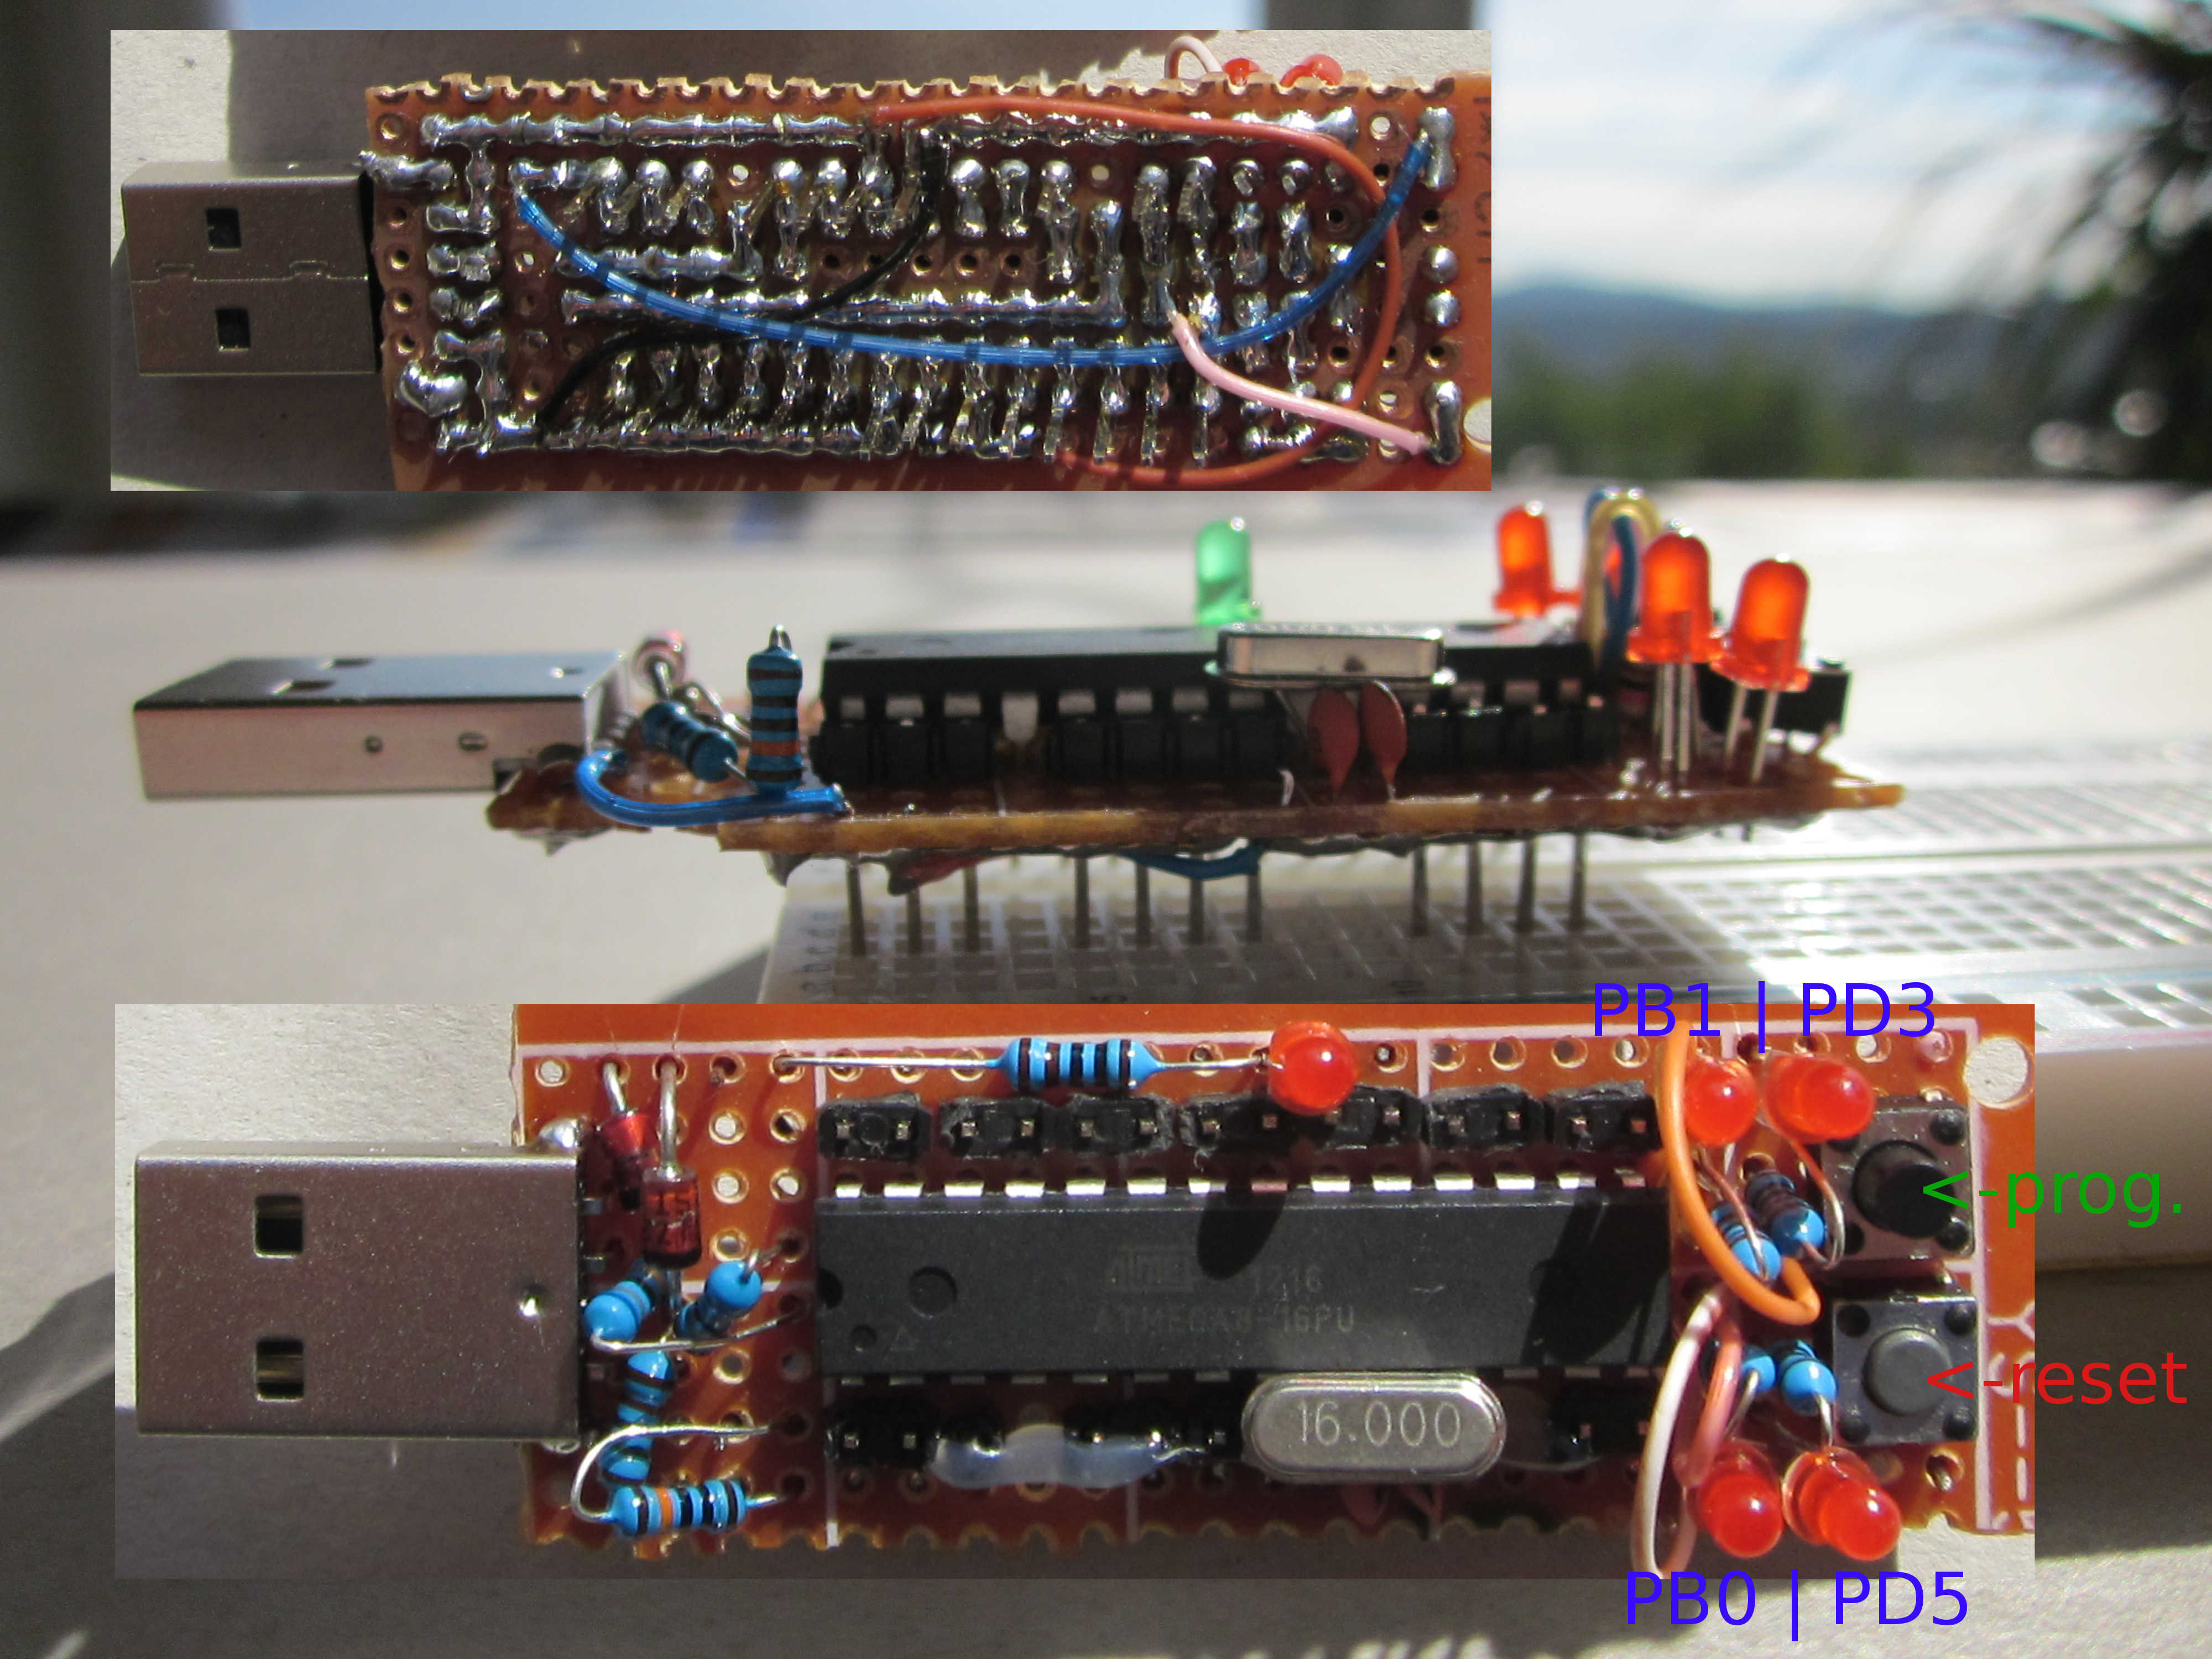
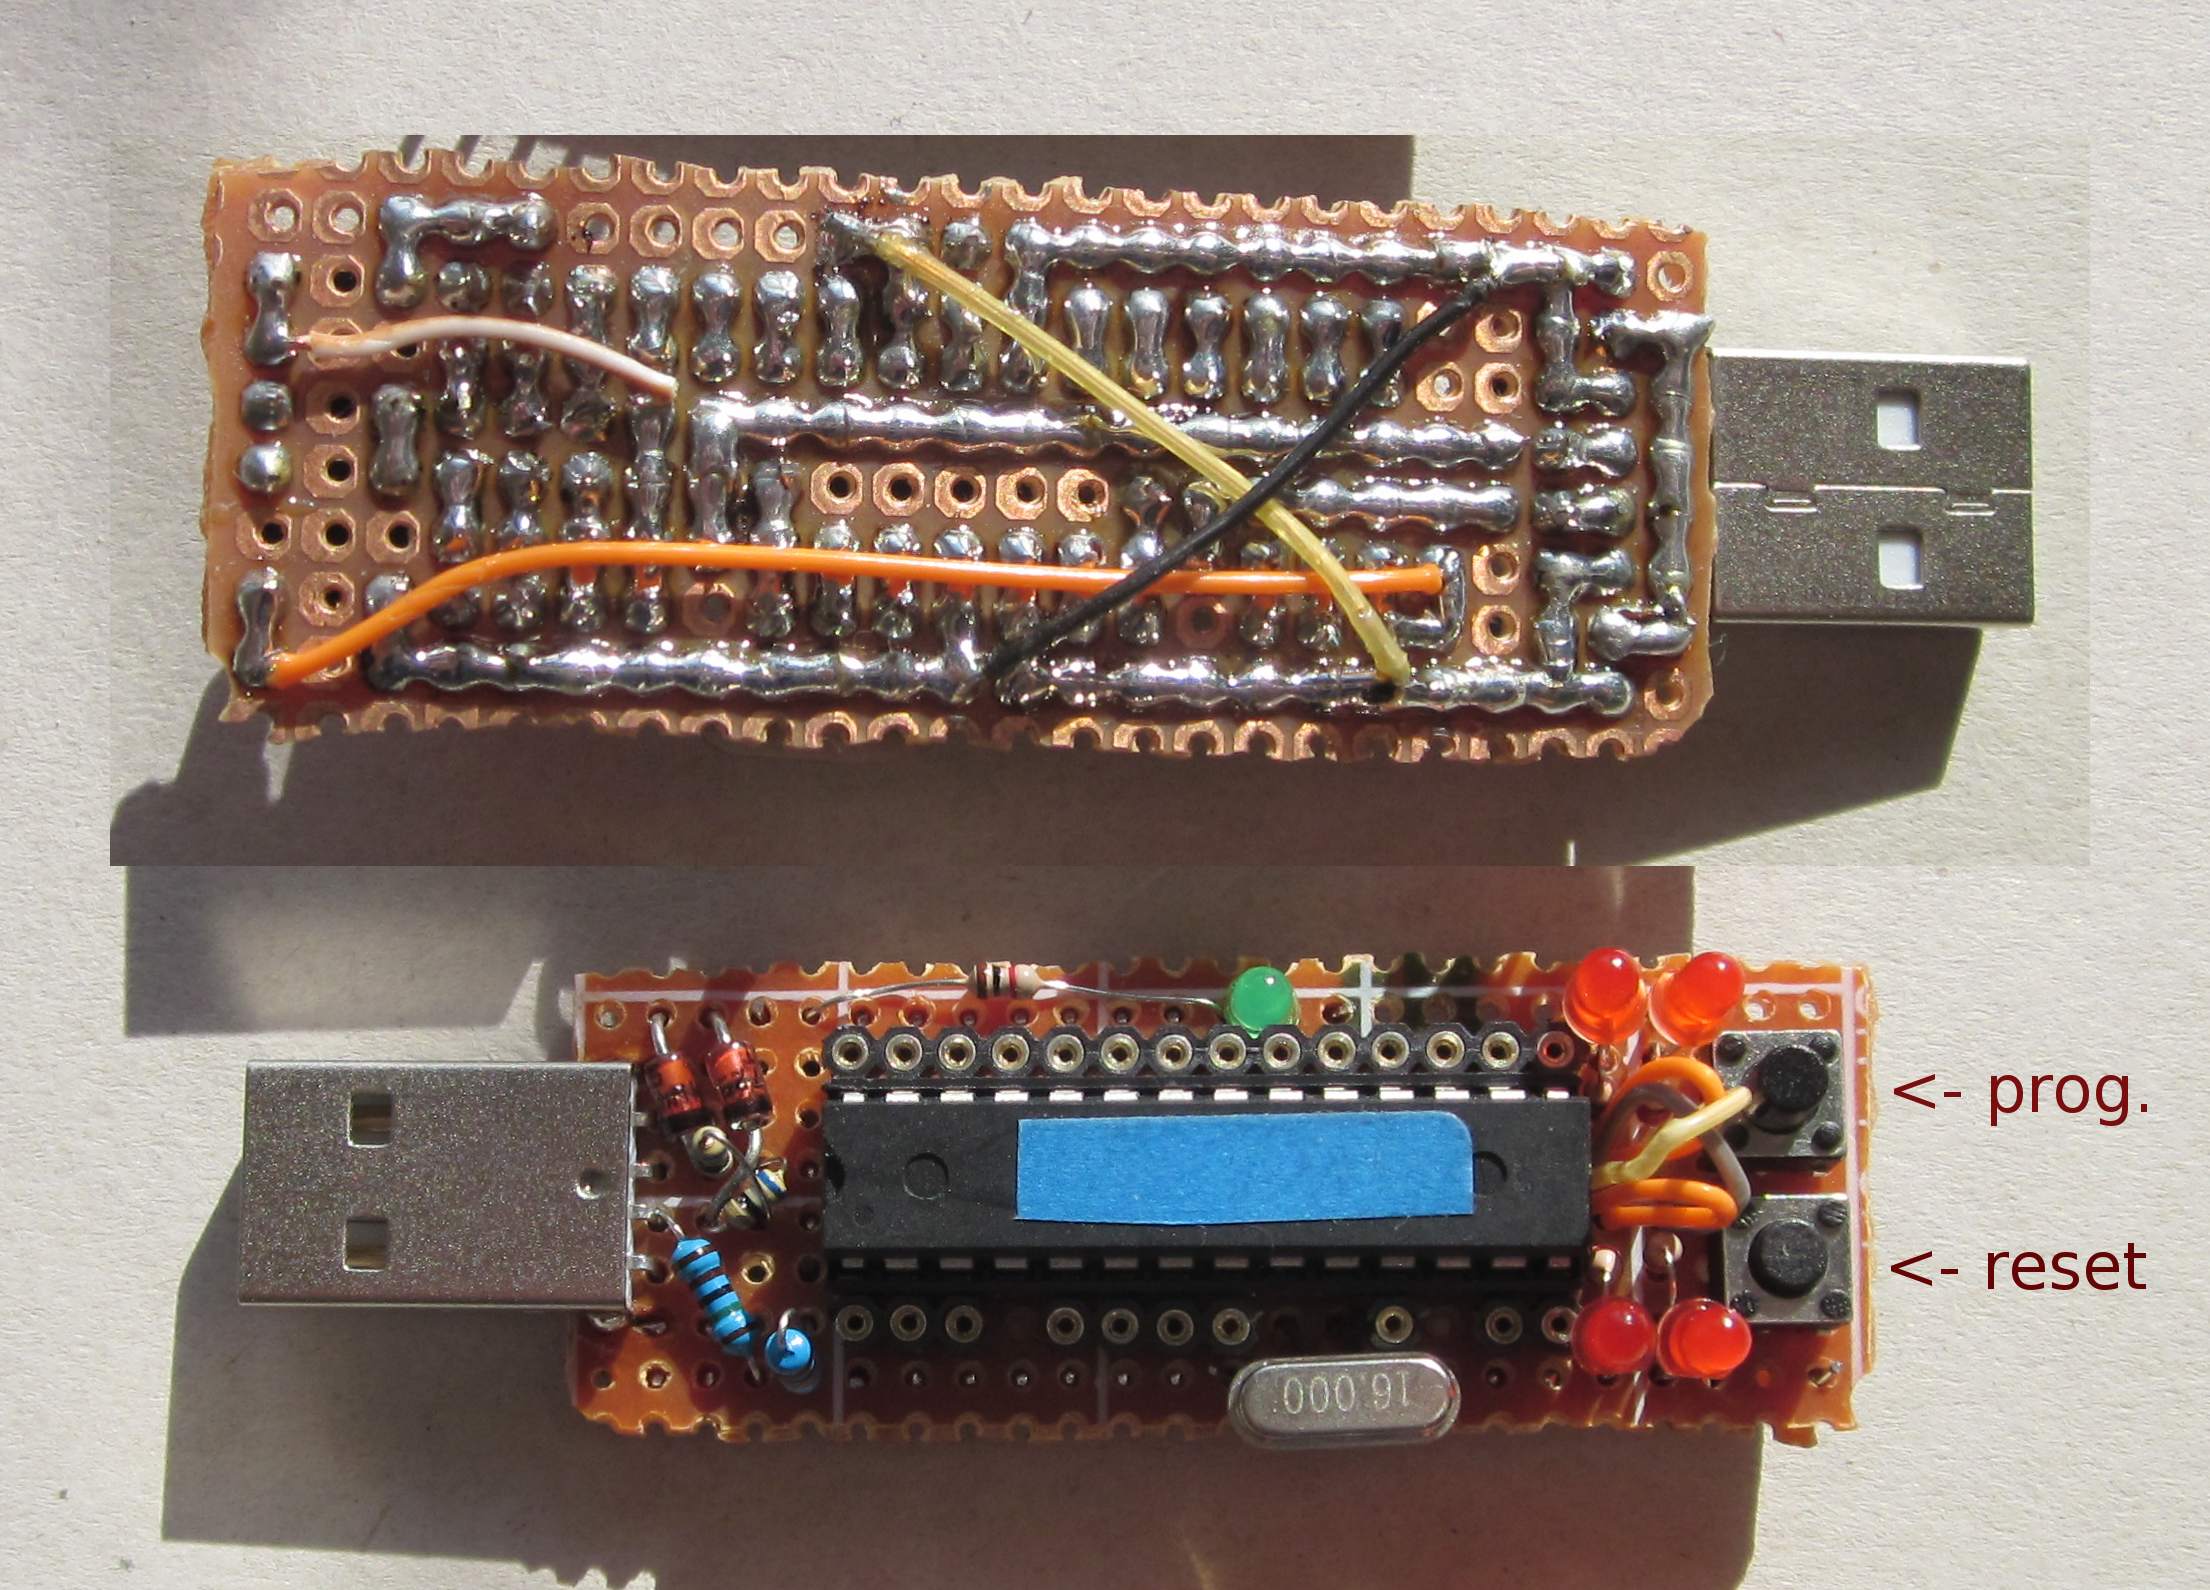
Furthermore, there are five LEDs on the board. One LED indicates the power supply via USB.
The other four (red) LEDs are connected to and can be controlled via the IO of the microcontroller (PB0, PB1, PD3 and PD5).
If in any circumstances only the direct contacts of the controller are required, LEDs can be disconnected permanently.
Althought there are lots of AVR boards available, tinyUSBboard has because of its special design and the complete revised sourcecode of USBaspLoader some unique advantages against other AVR VUSB boards. A list with the most outstanding ones is collected here.
Hardware advantages:
Software advantages:
In case you have some comments to this section (more advantages? disadvantages?) please share them with me.


Revision 3 will swap connections of PD6 and PD7 in order to enable even more functions of the MCU.
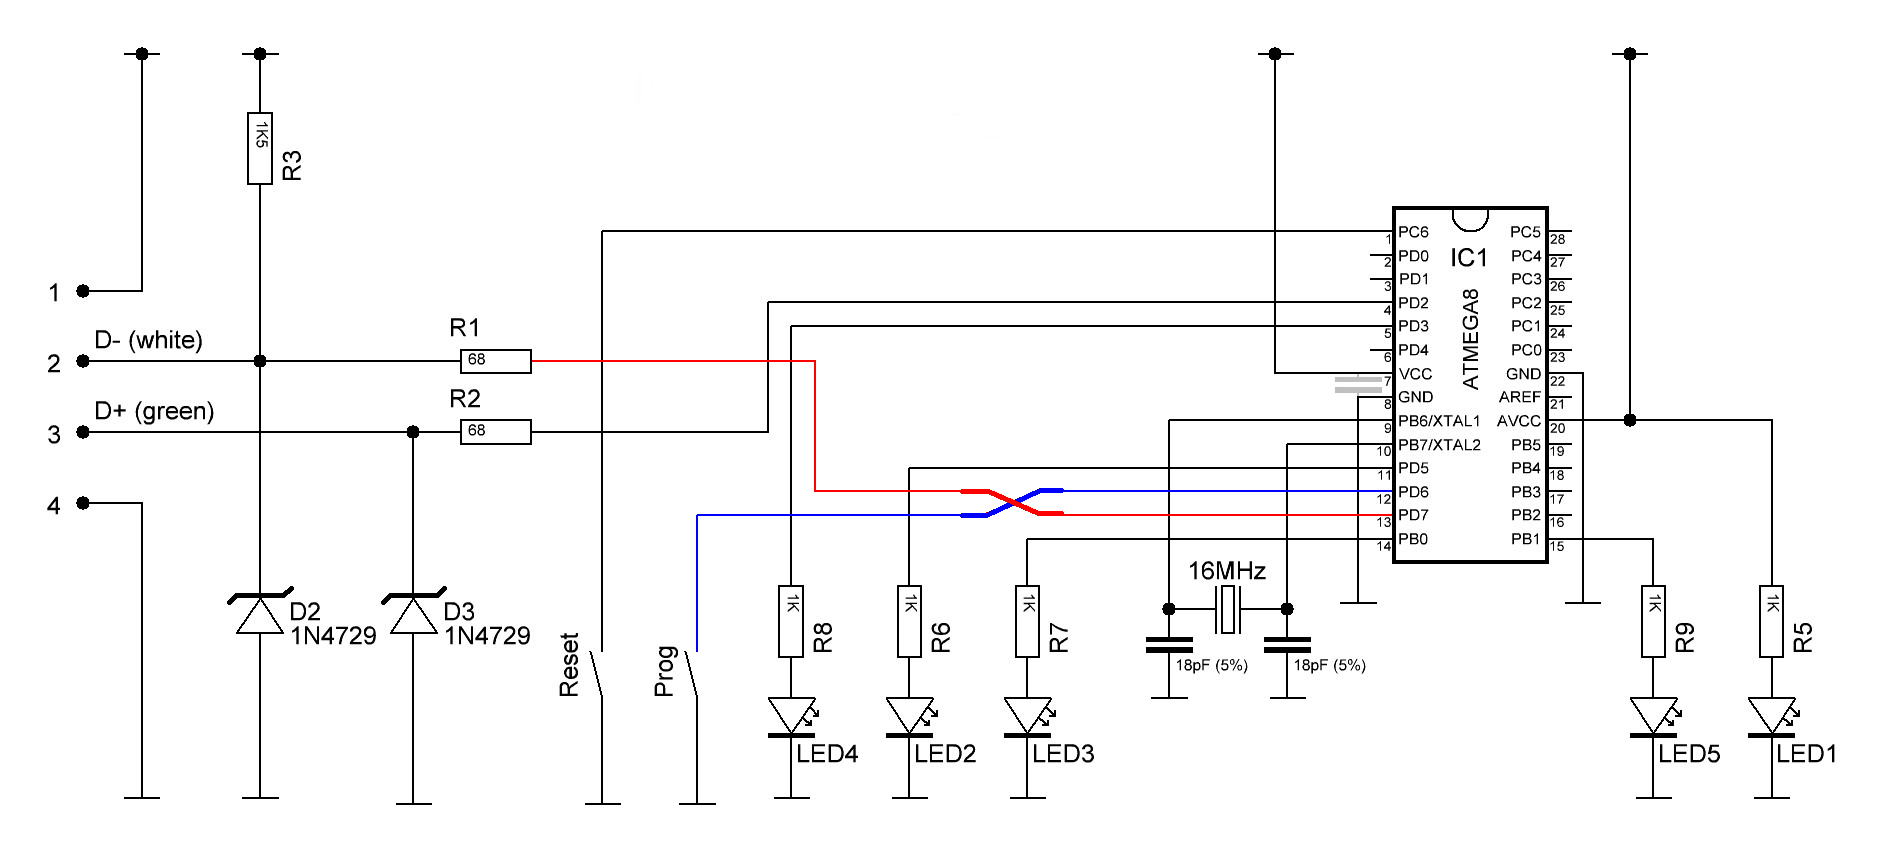
If you experiencing instabilities during operation (ATmega8A, ATmega328p?) put some capacitor with 0.1uF or more somewhere near the microcontroller between Vcc and GND. (For example between PIN 7 and PIN 8)


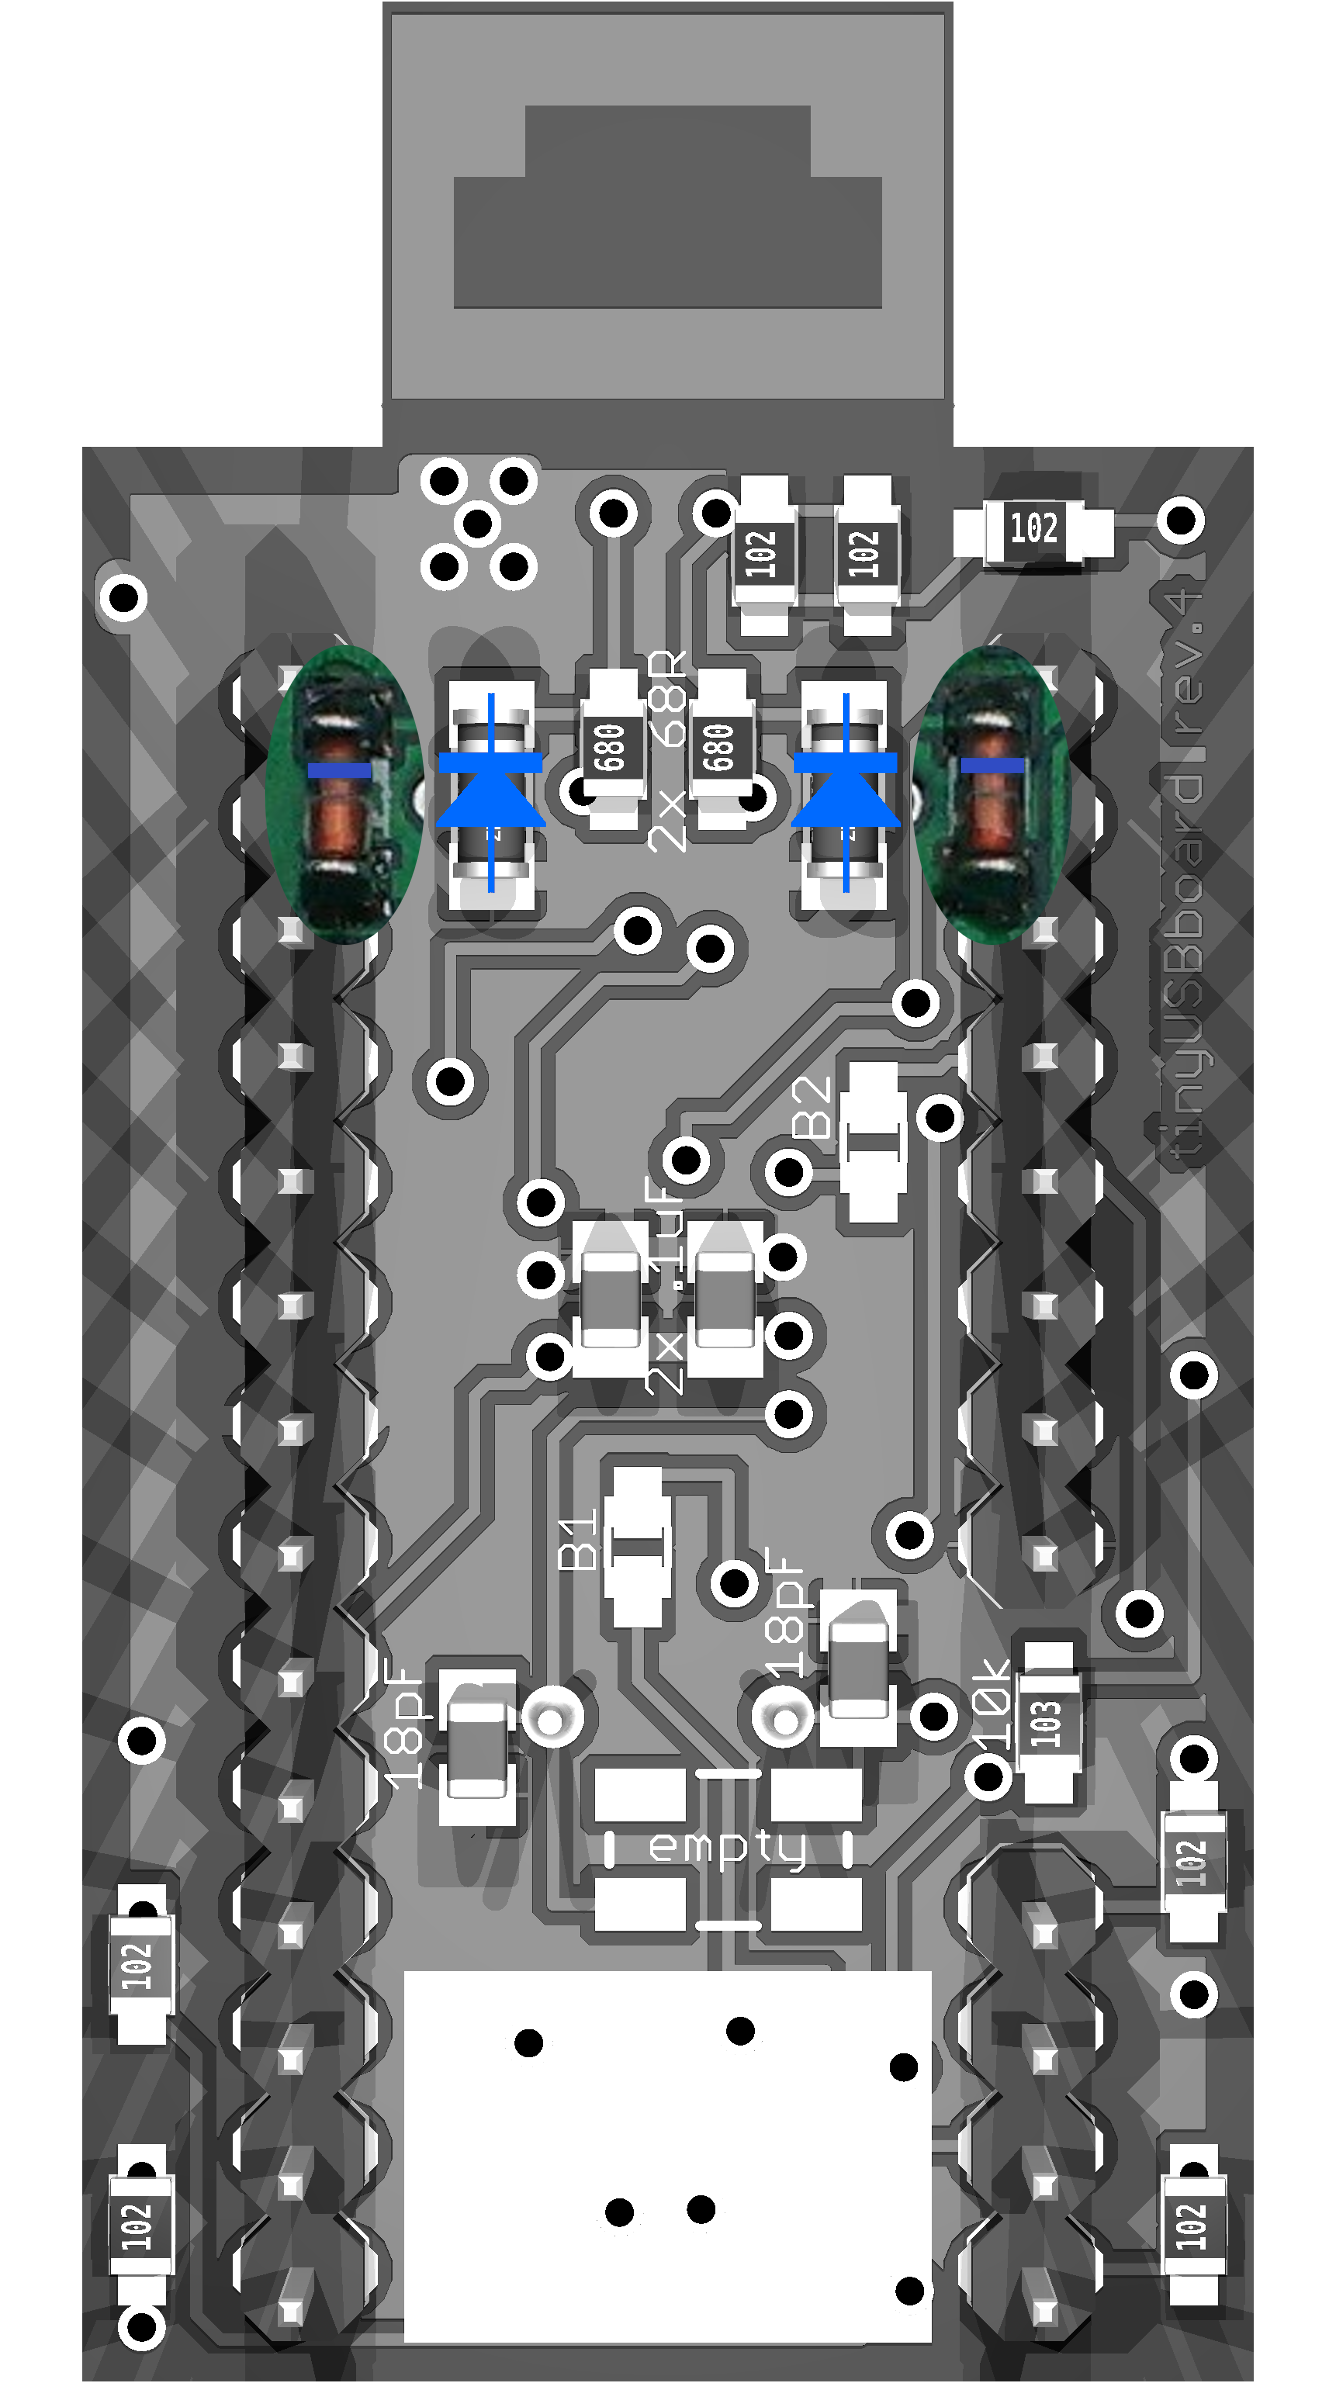
(Using as USBasp programmer: White cable is optional 4MHz rectangular clock.)
Revision 4 is 100% compatible to its predecessor revision 3. You CAN use revision 3 firm-/software.
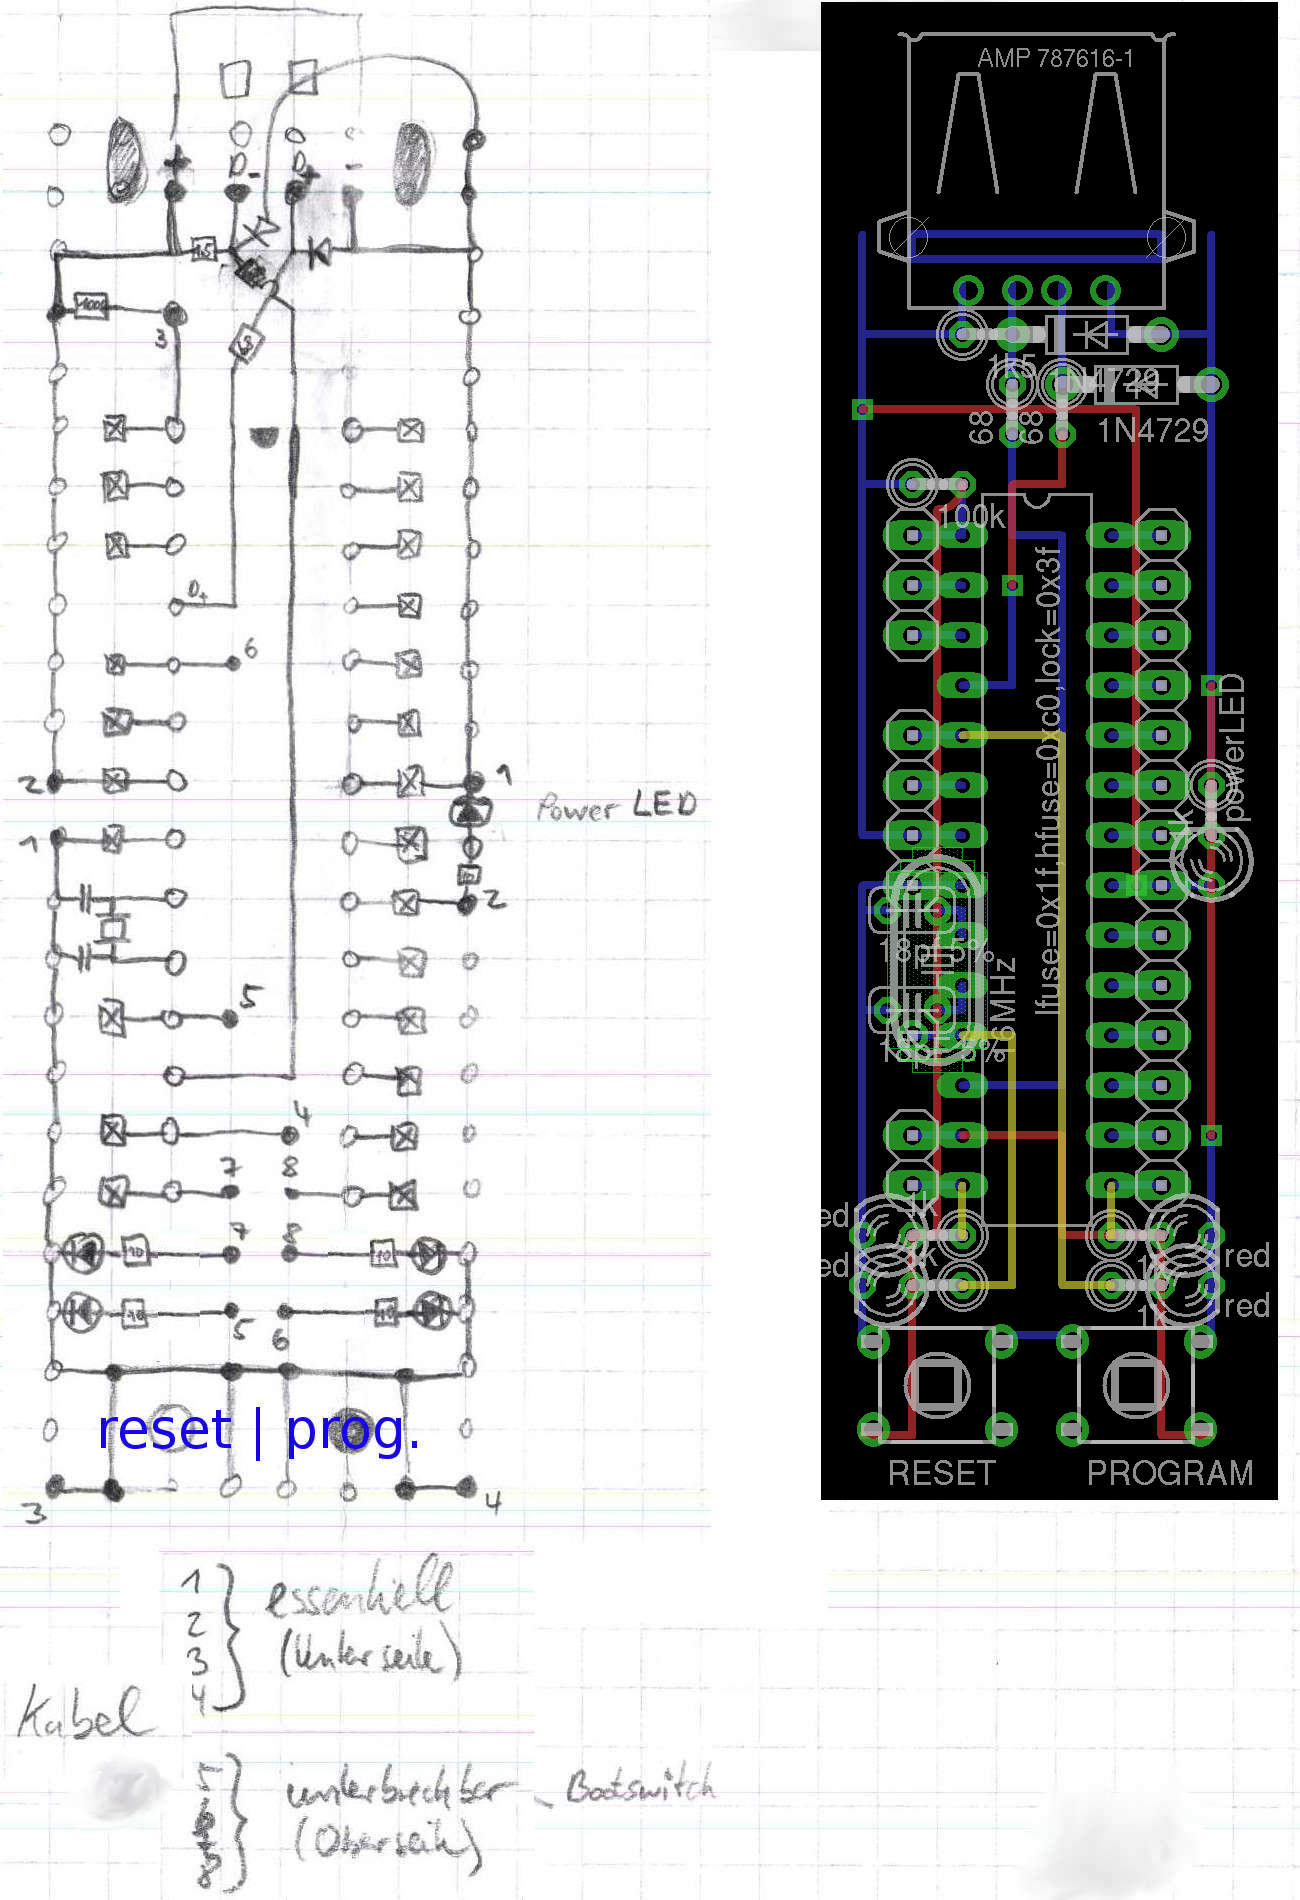
However, the schematic has been pimped (even they are mostly identical).
The new schematic also is available in PDF or EAGLE (tinyusbboard.sch, tinyusbboard.brd) formats.
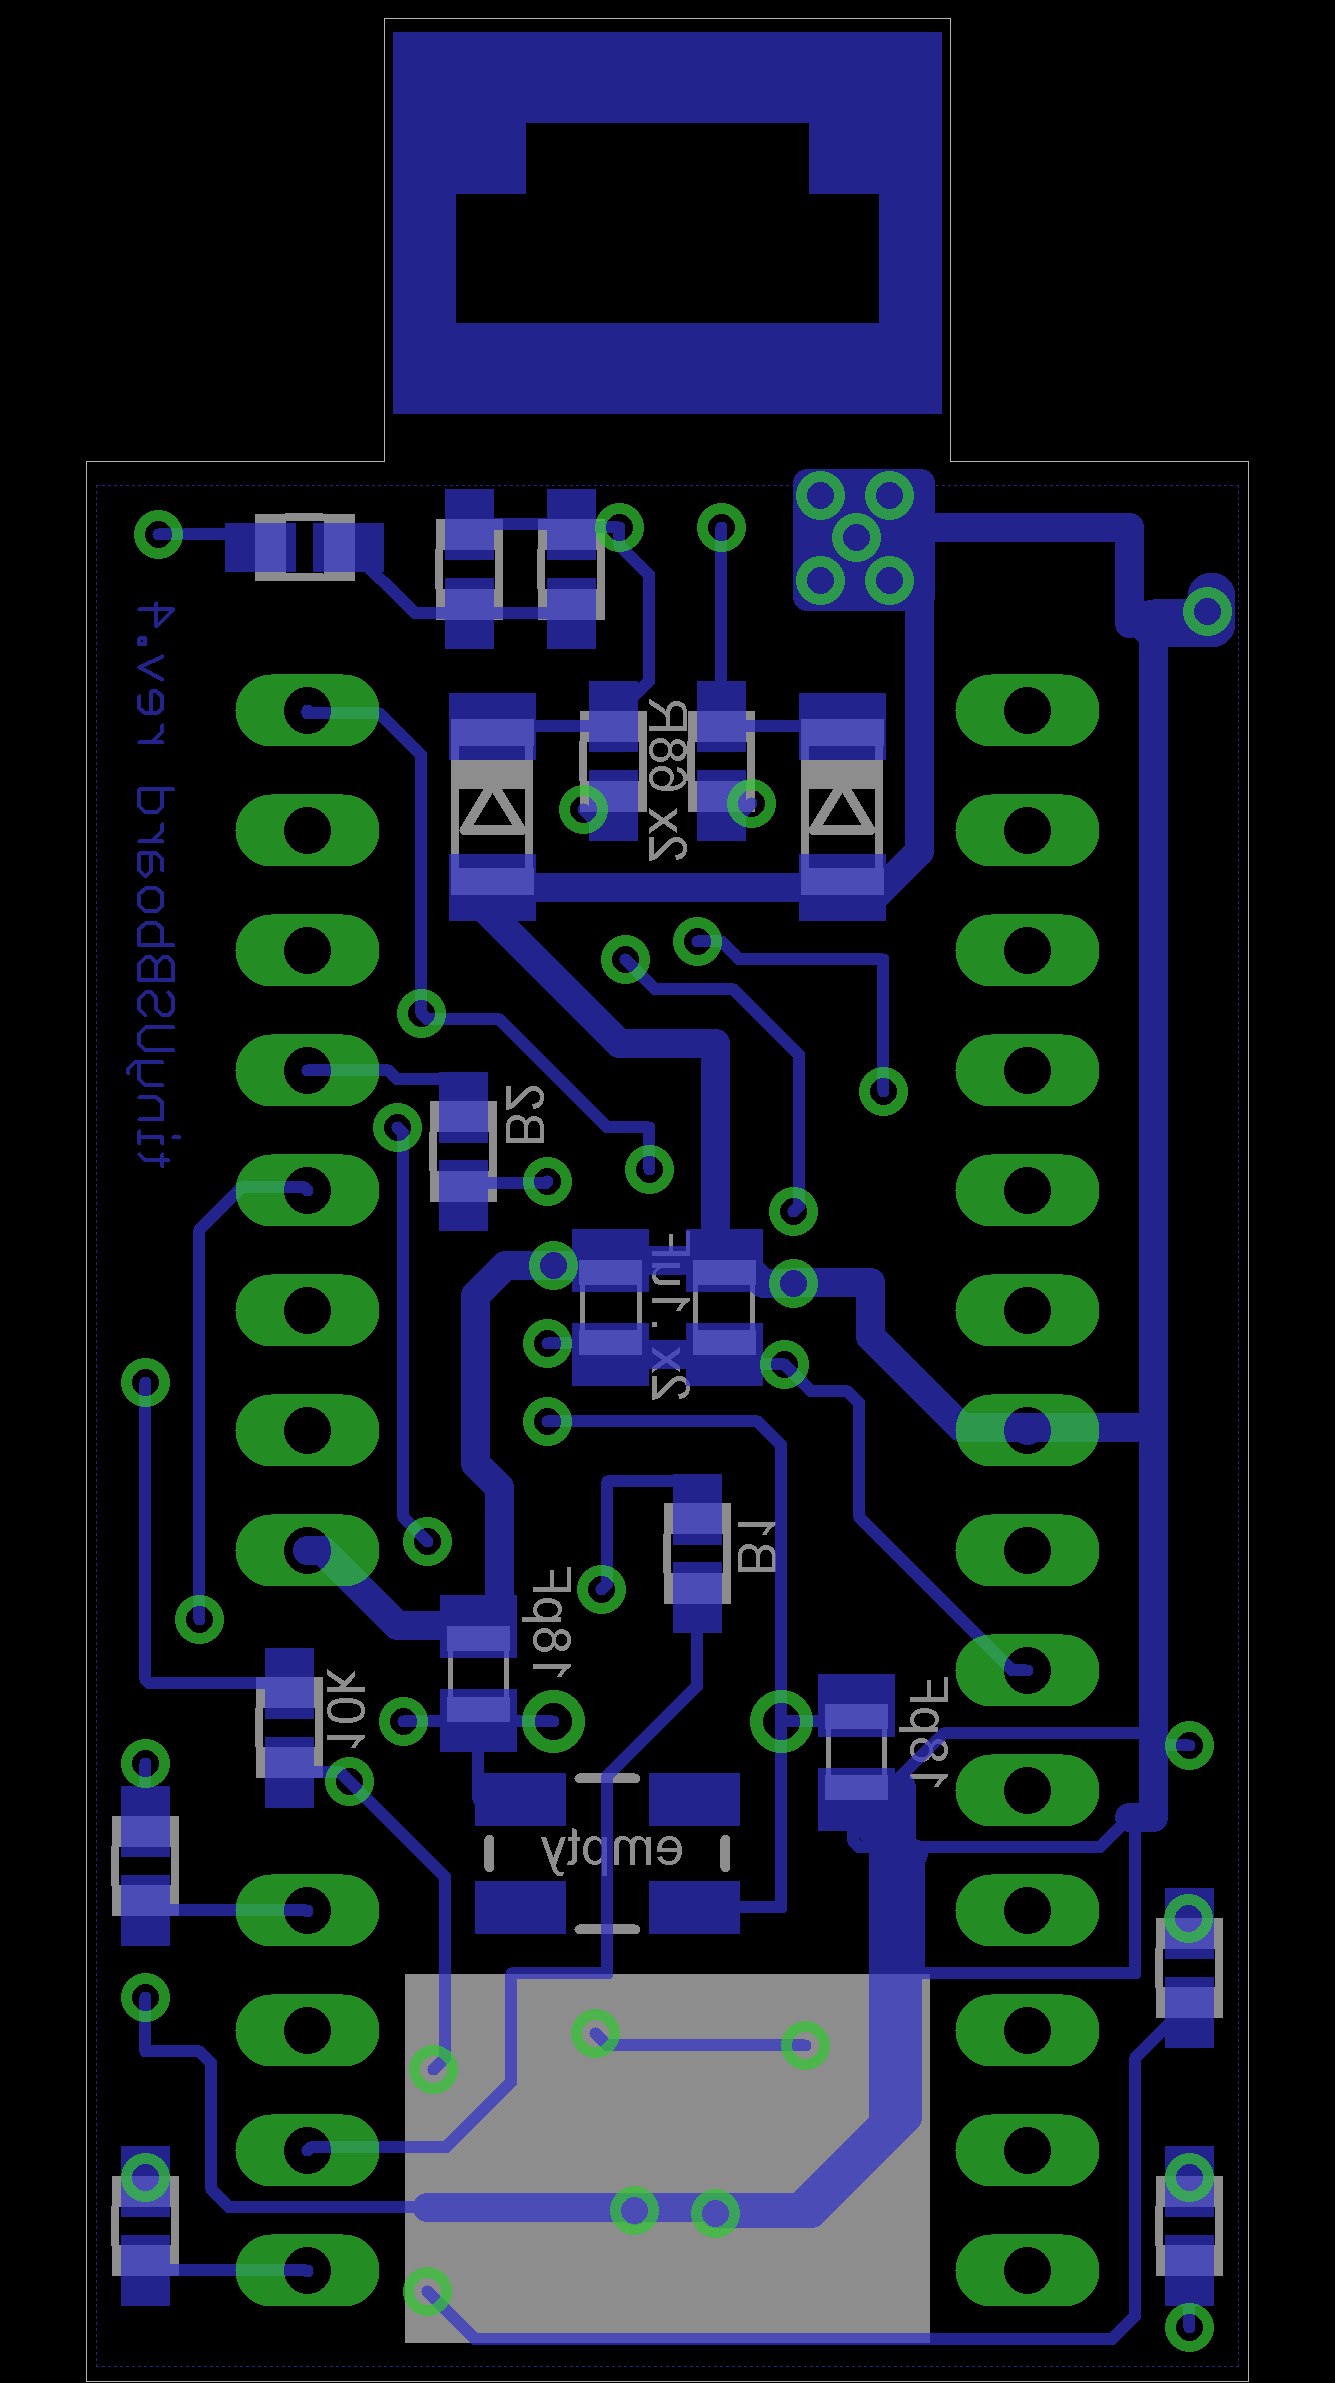
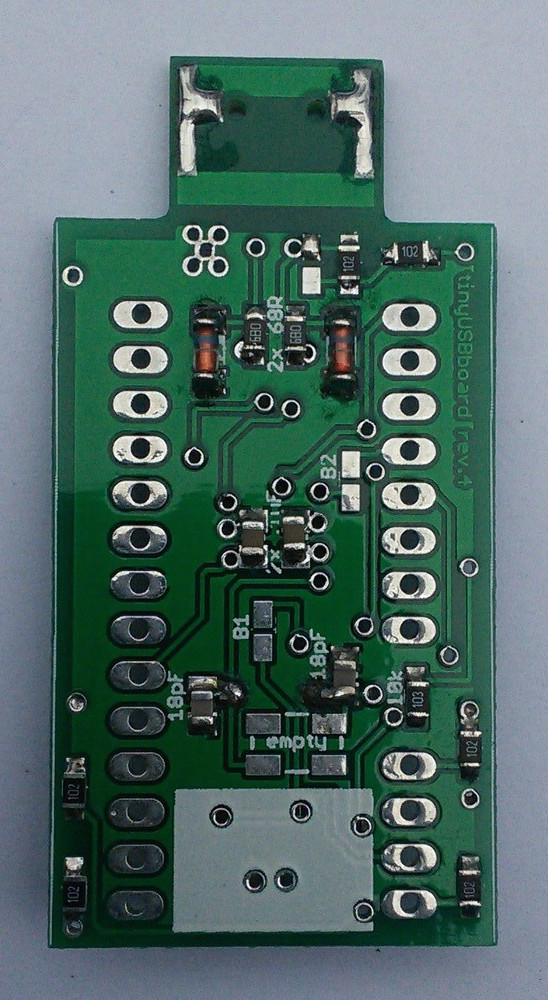
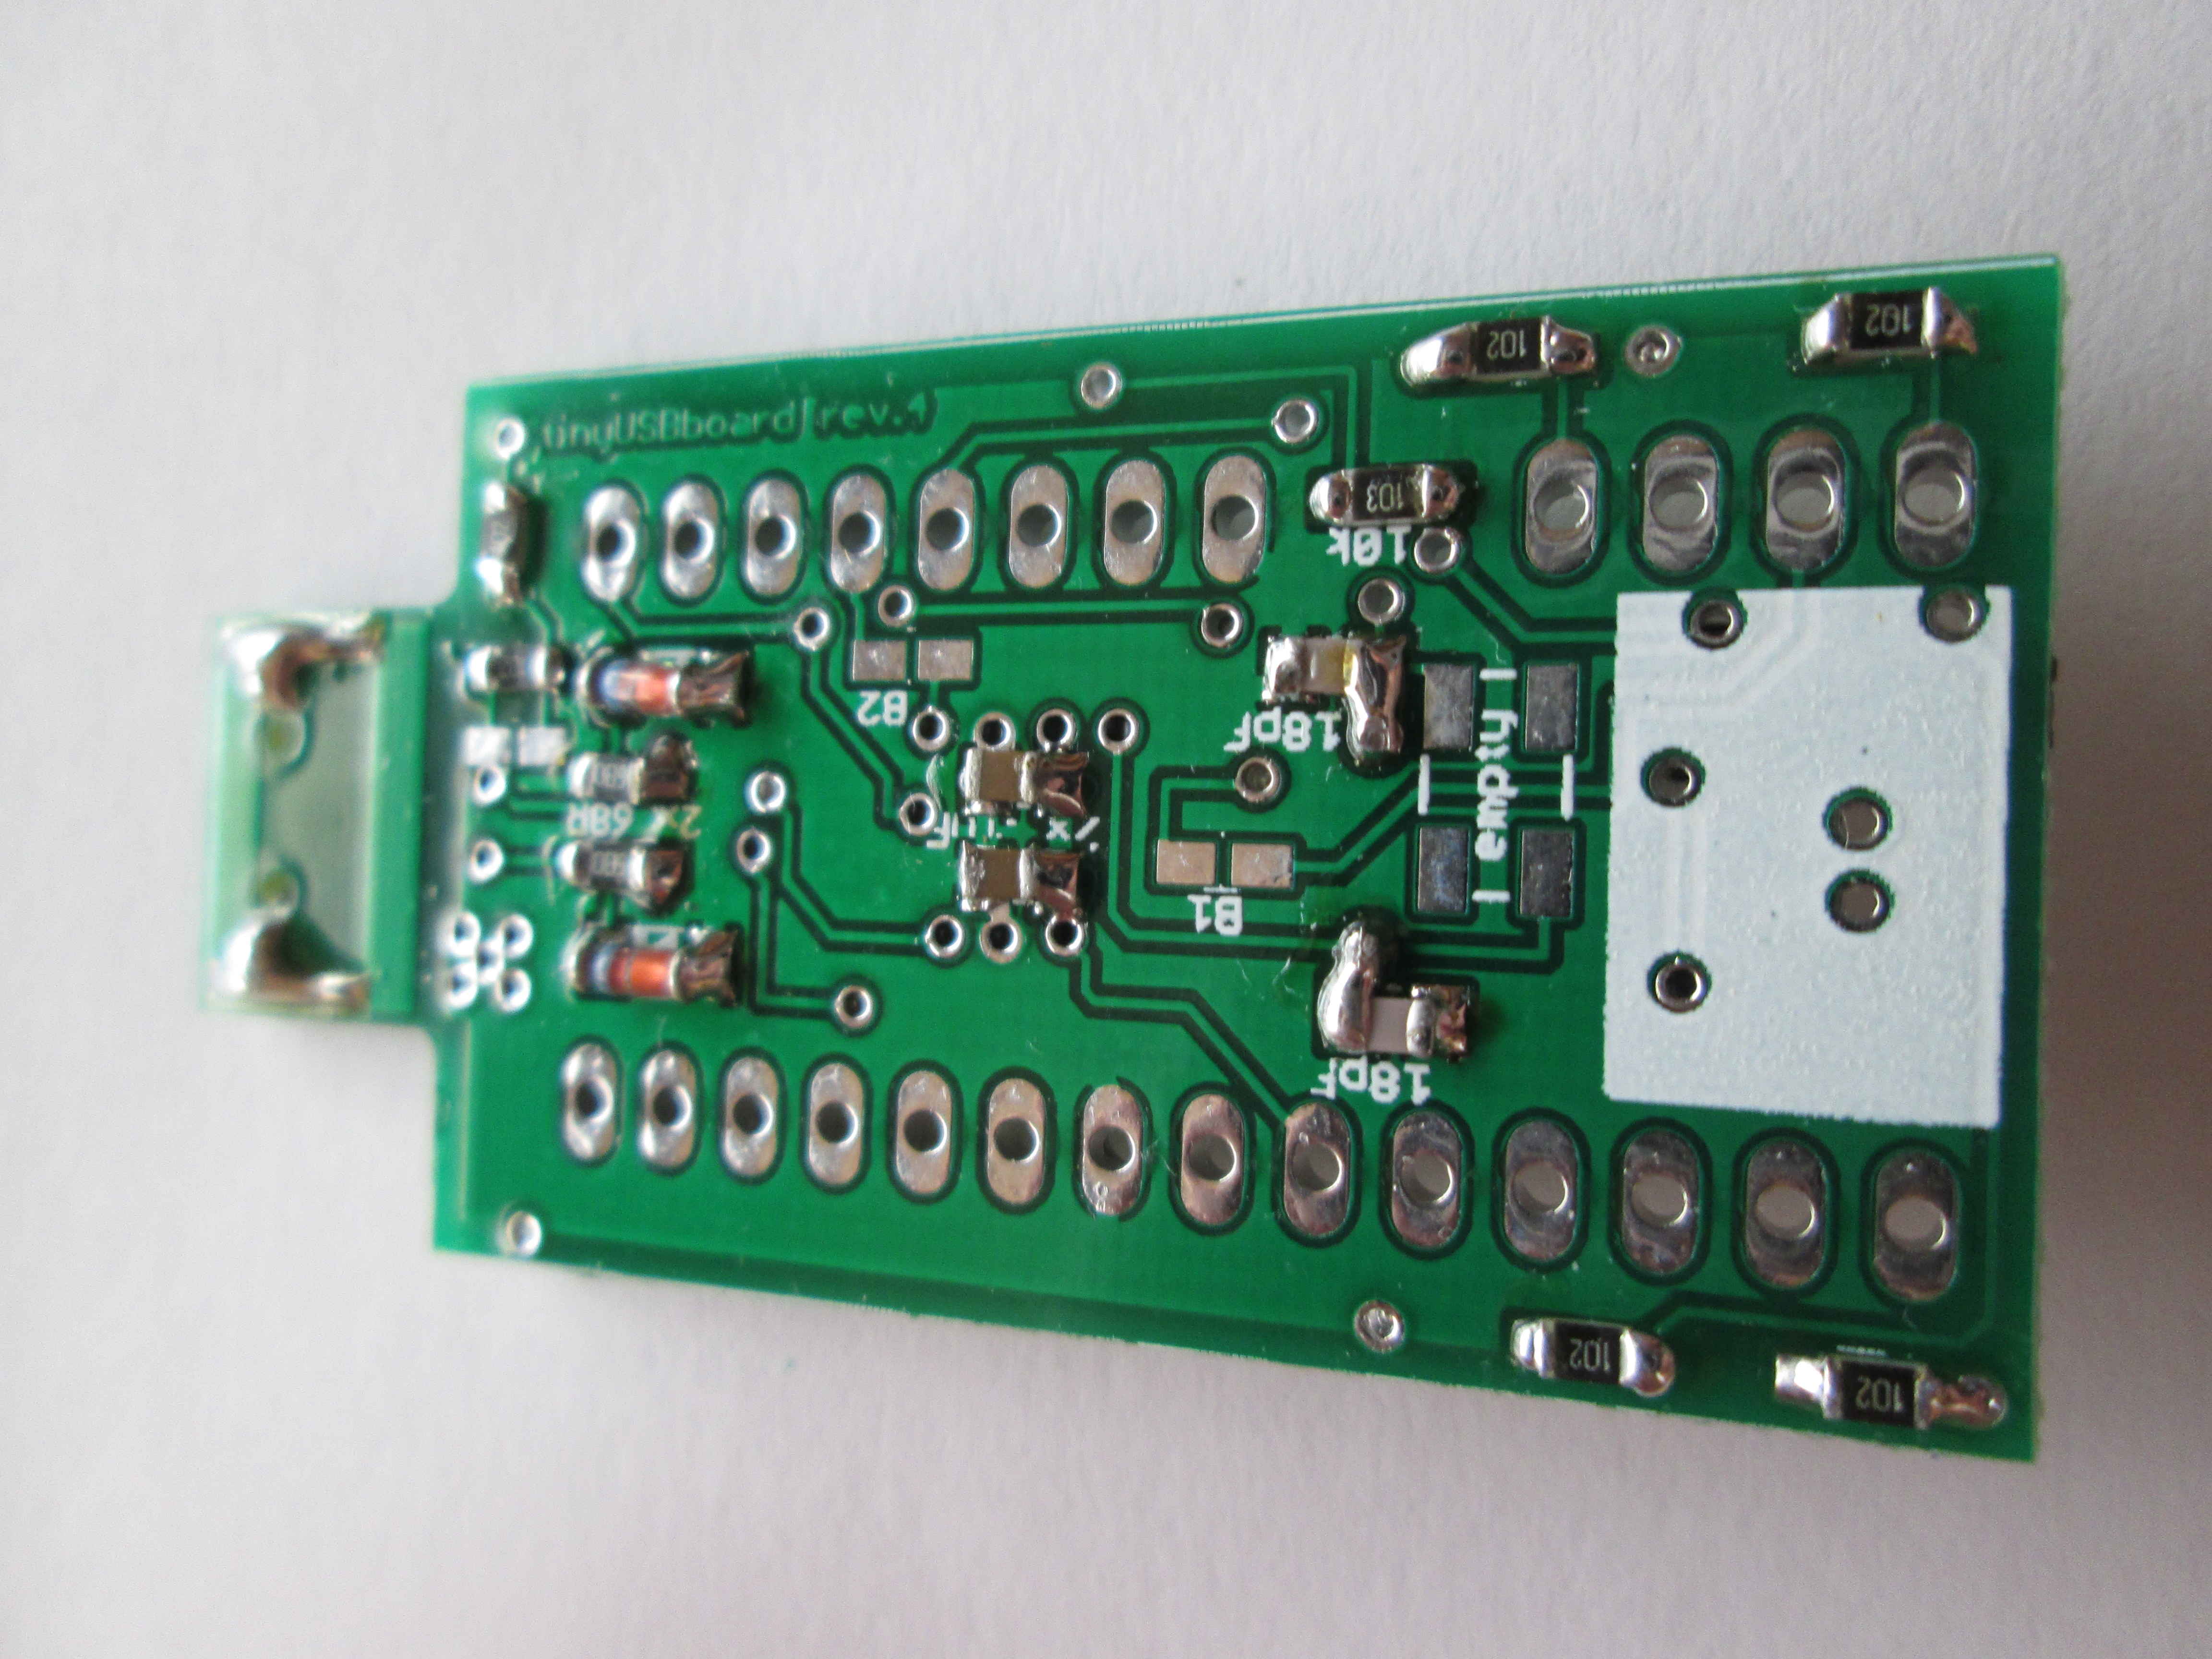
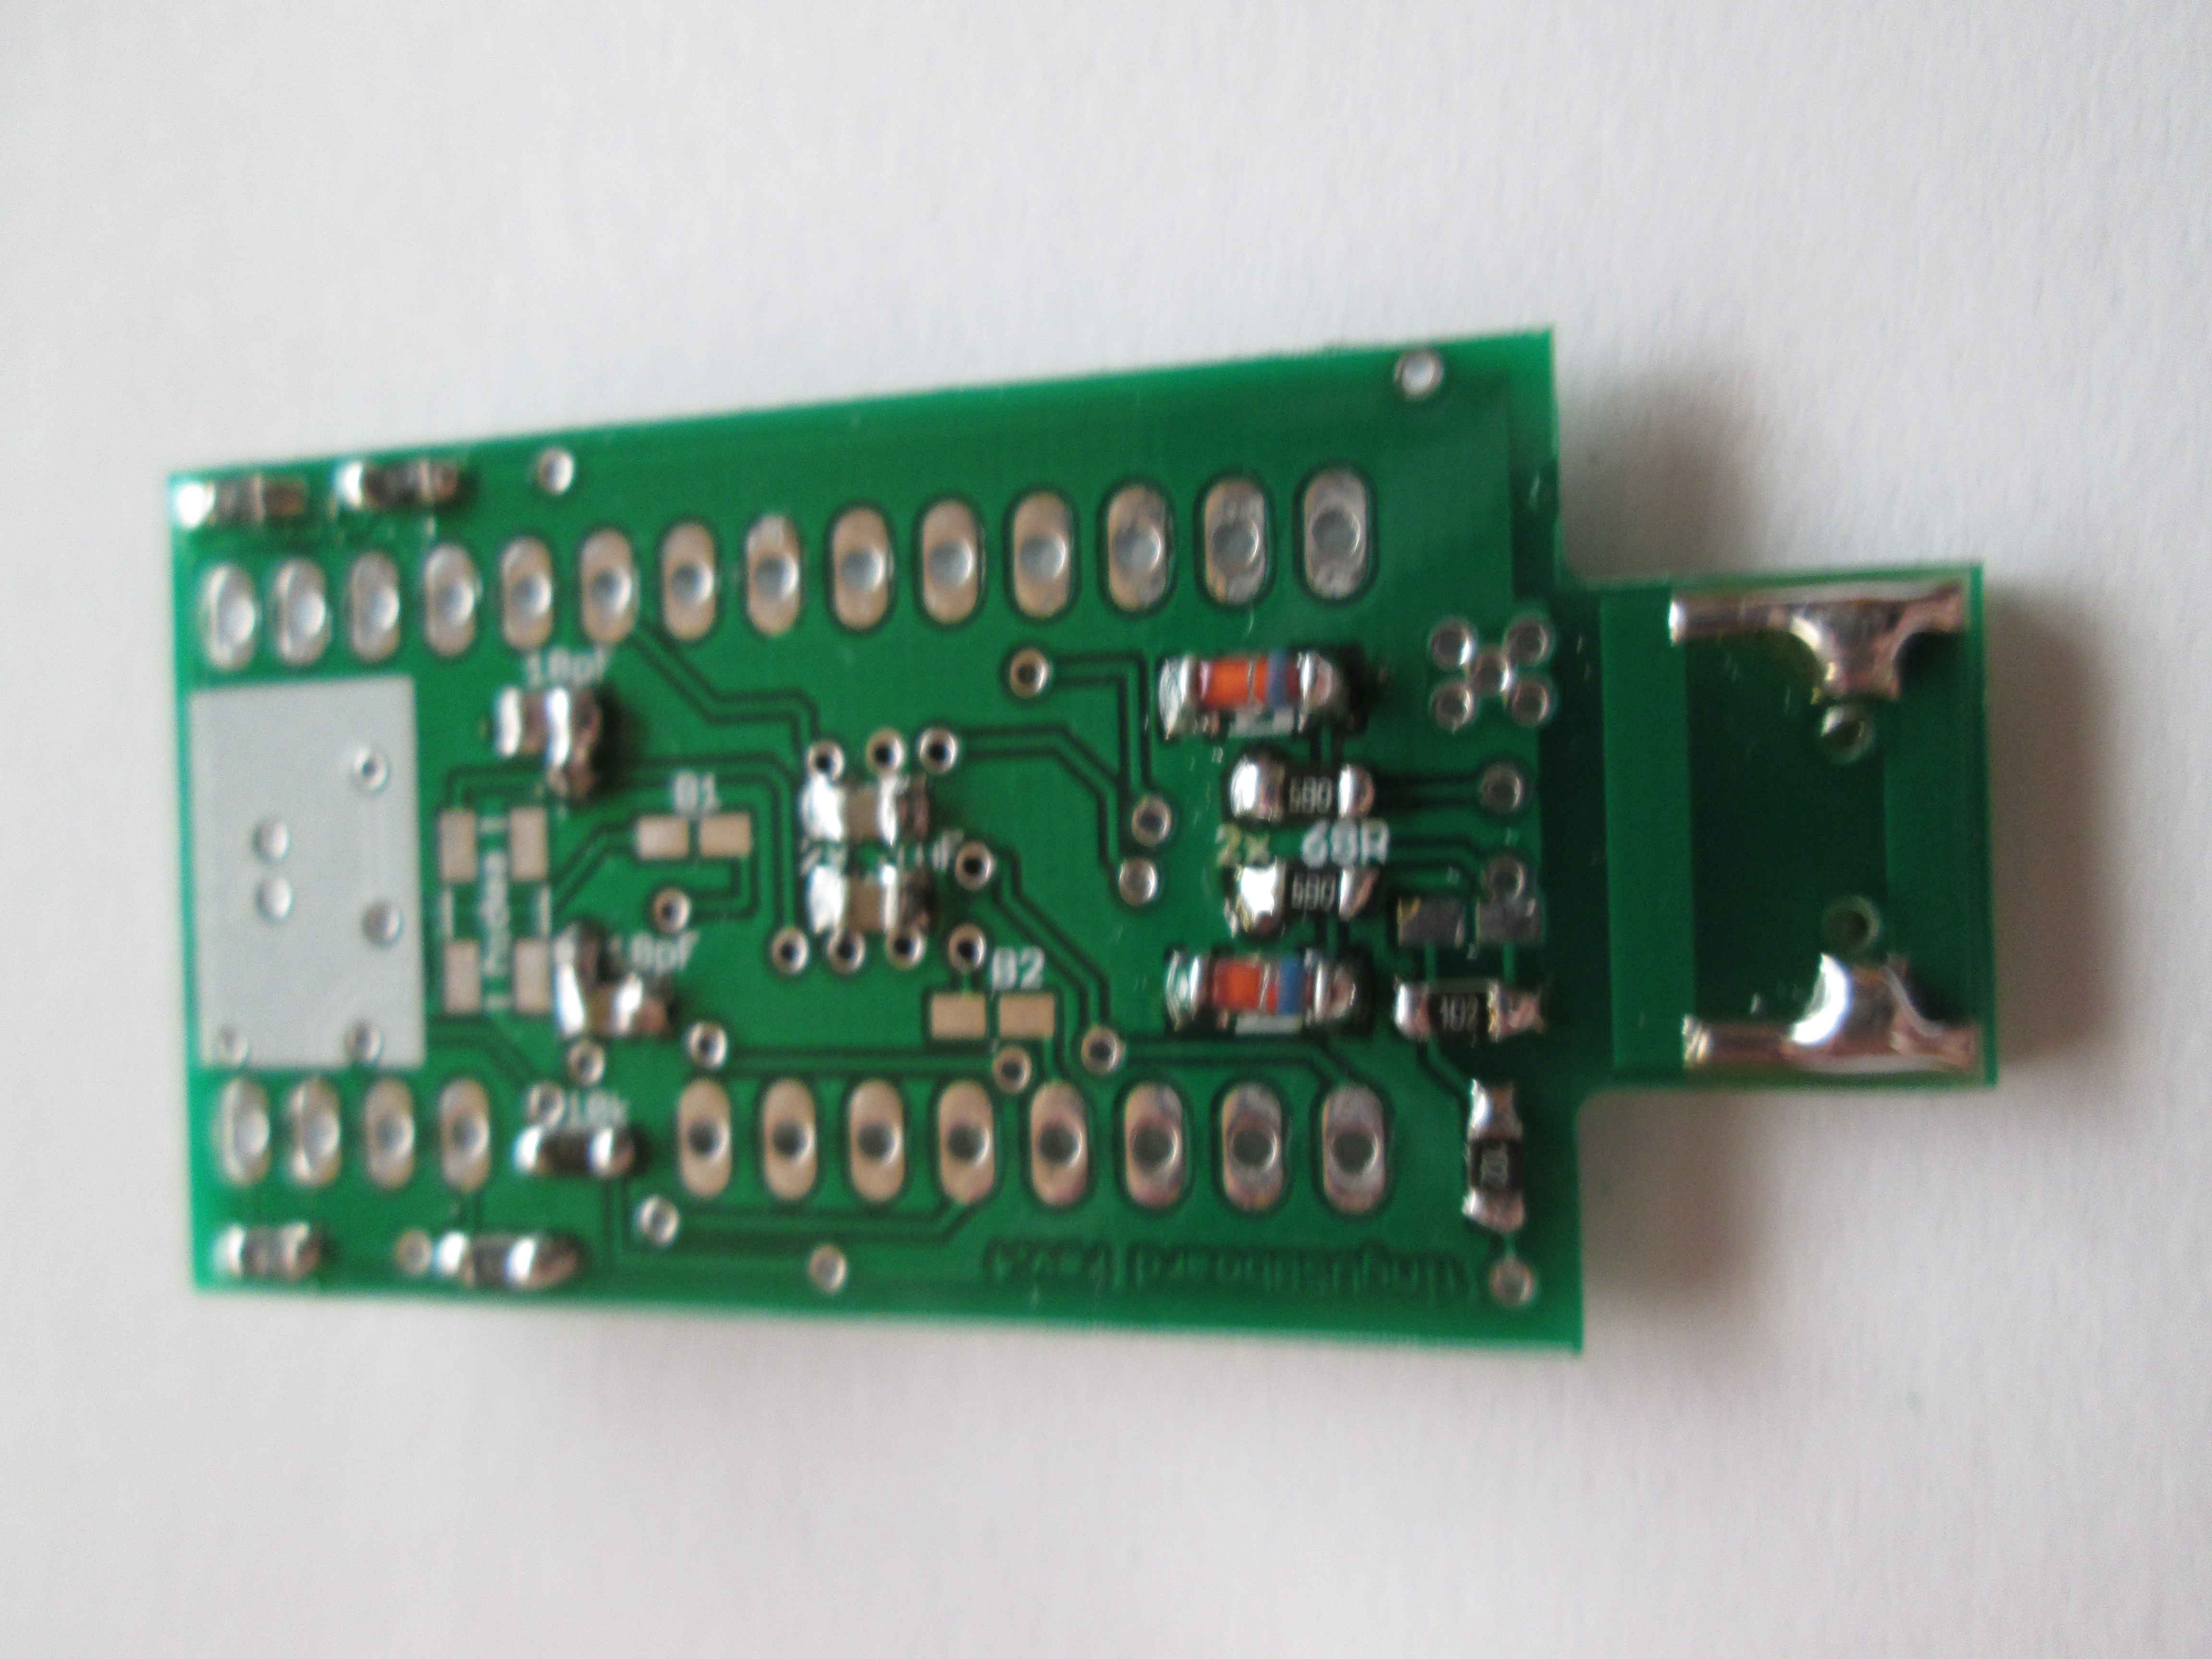
TinyUSBboard now also is available on an even smaller PCB.
It looks prettier, is faster to build and it is better for massproduction.
It is also cheaper, more robust and might be useful in other (kickstarter?-)projects as the center logic board.
If you are interested, please contact me...
The components are listed in blocks of recommended construction order. Total value should be less than $5.
Per board you basically will need:
At the moment there is no official manual for soldering the board. (It is not ready, yet.)
However there is already a lot of stuff from betatesters and fans in the net.
During construction this might help you:
In case you need some parts to build your own tinyUSBboard or you are unsure about sth., contact me...
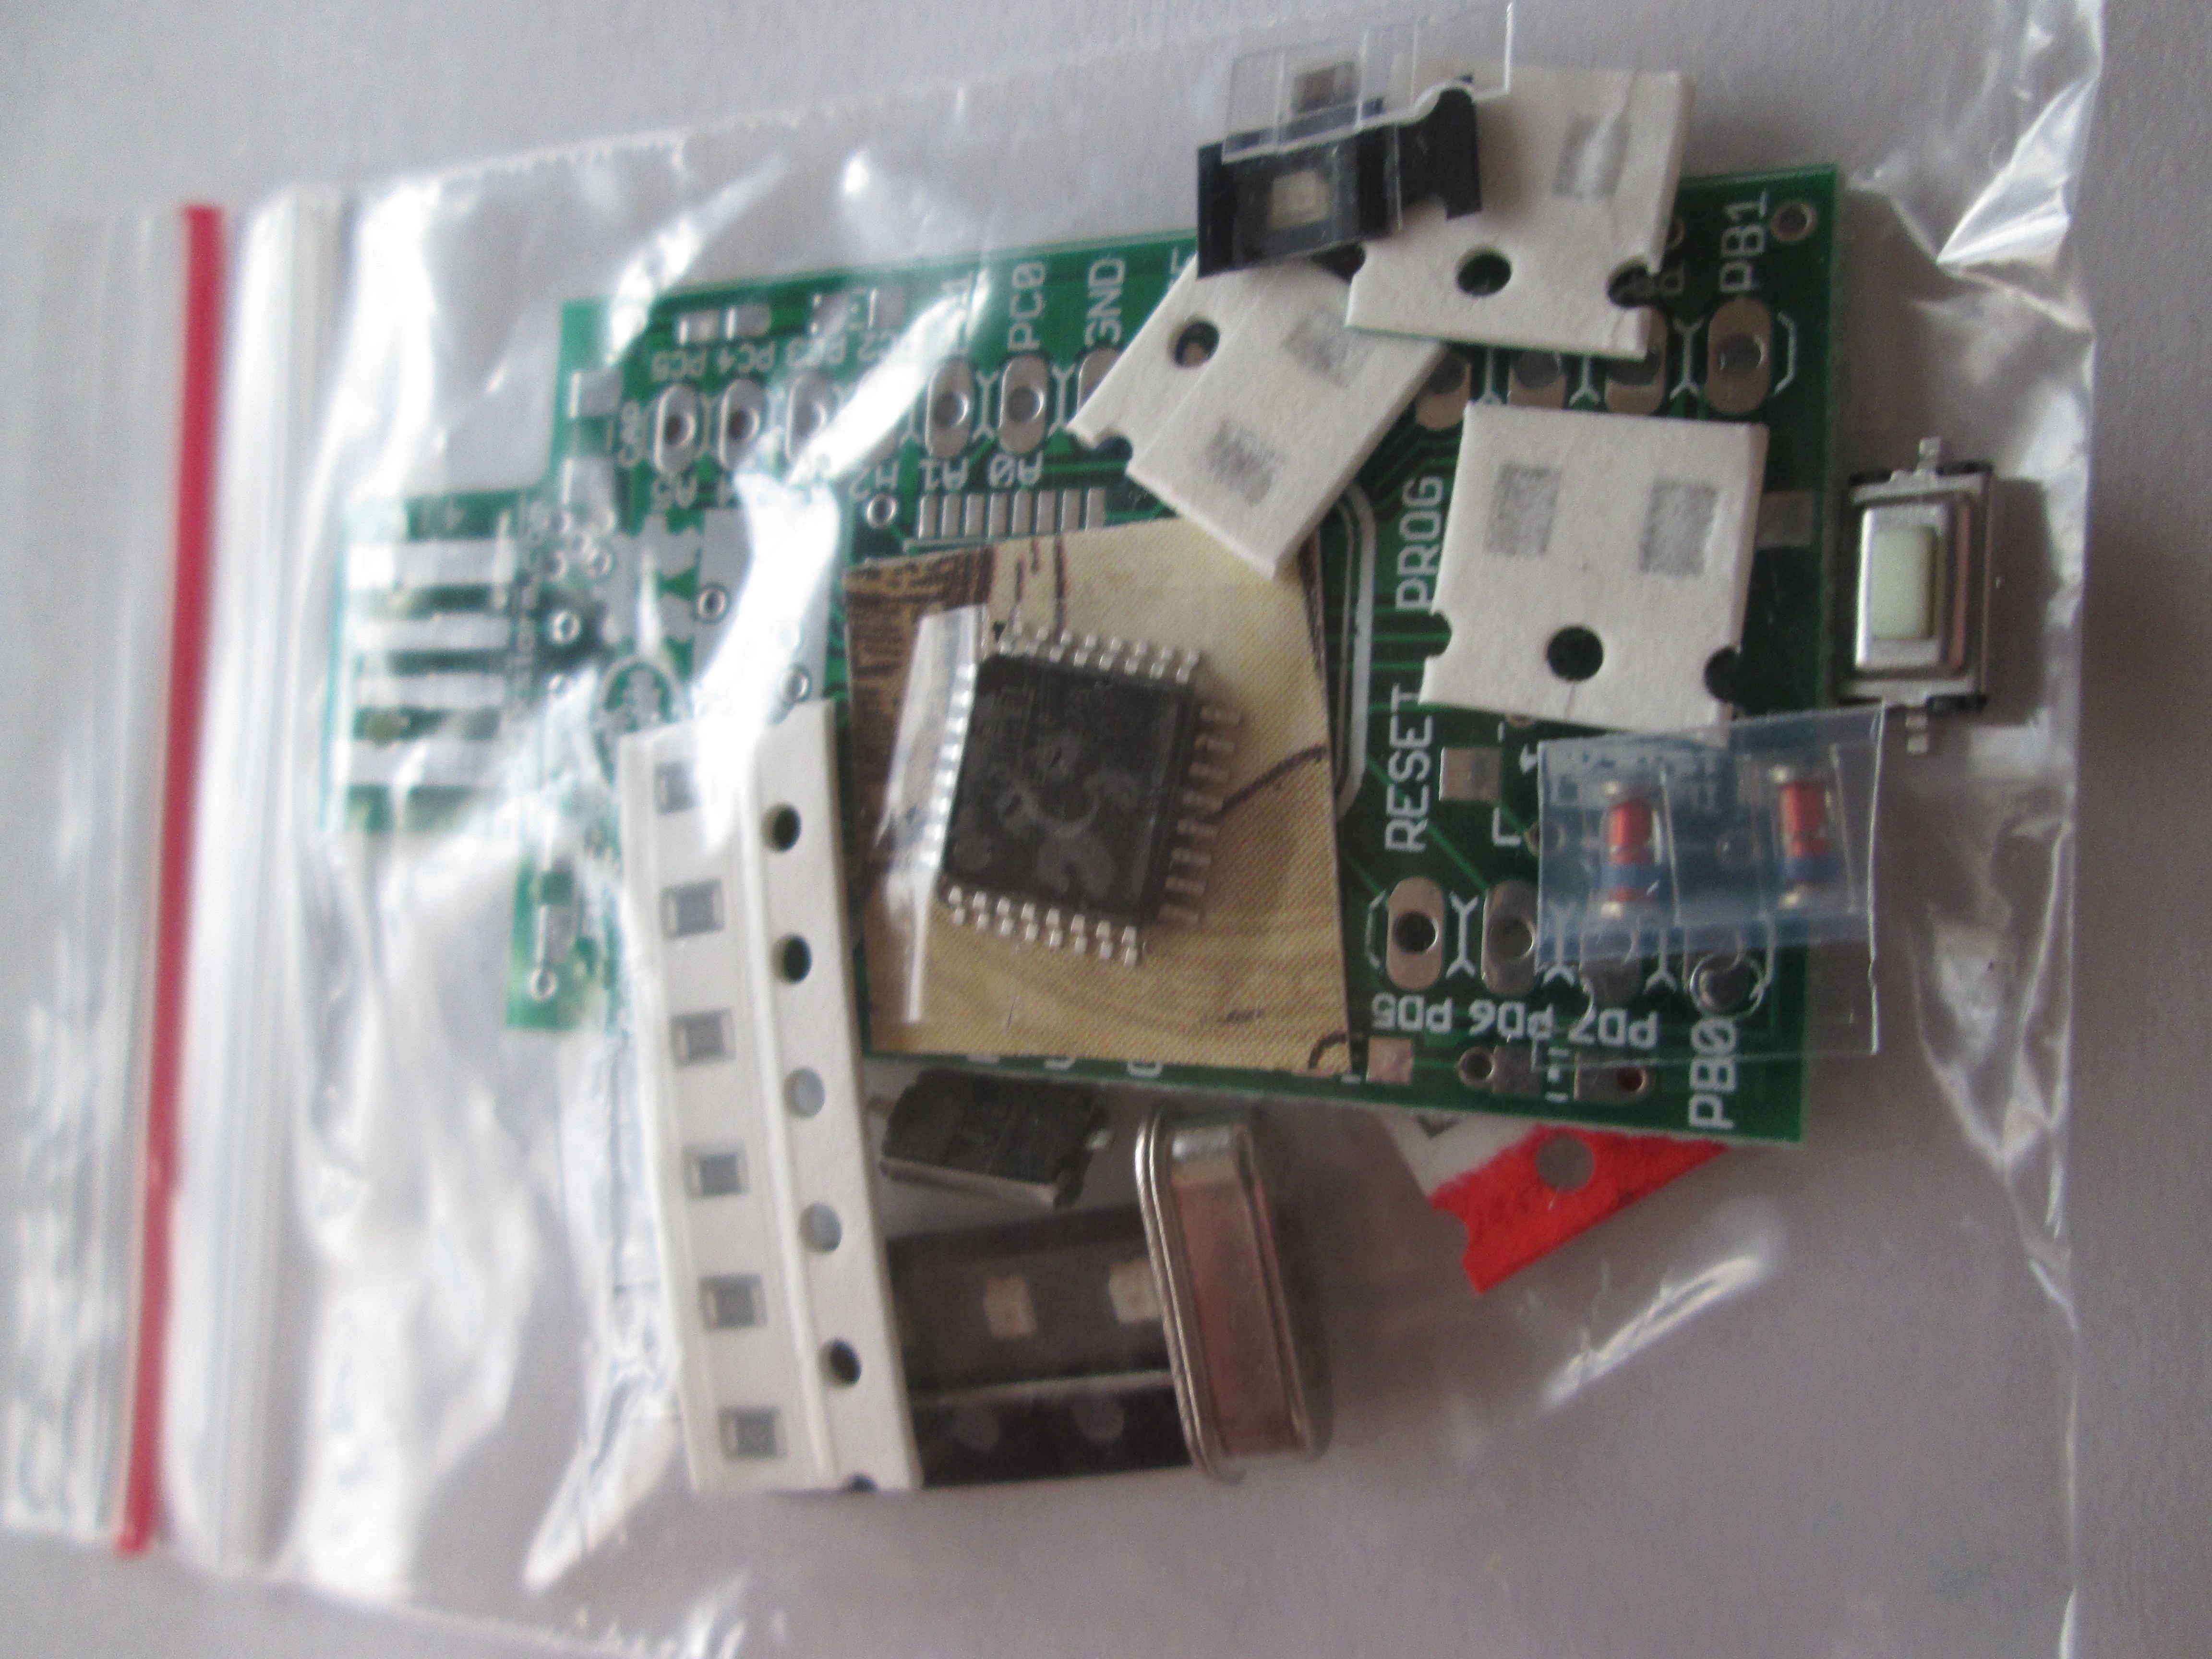
The components are listed in blocks of recommended construction order. Total value should be less than $6.
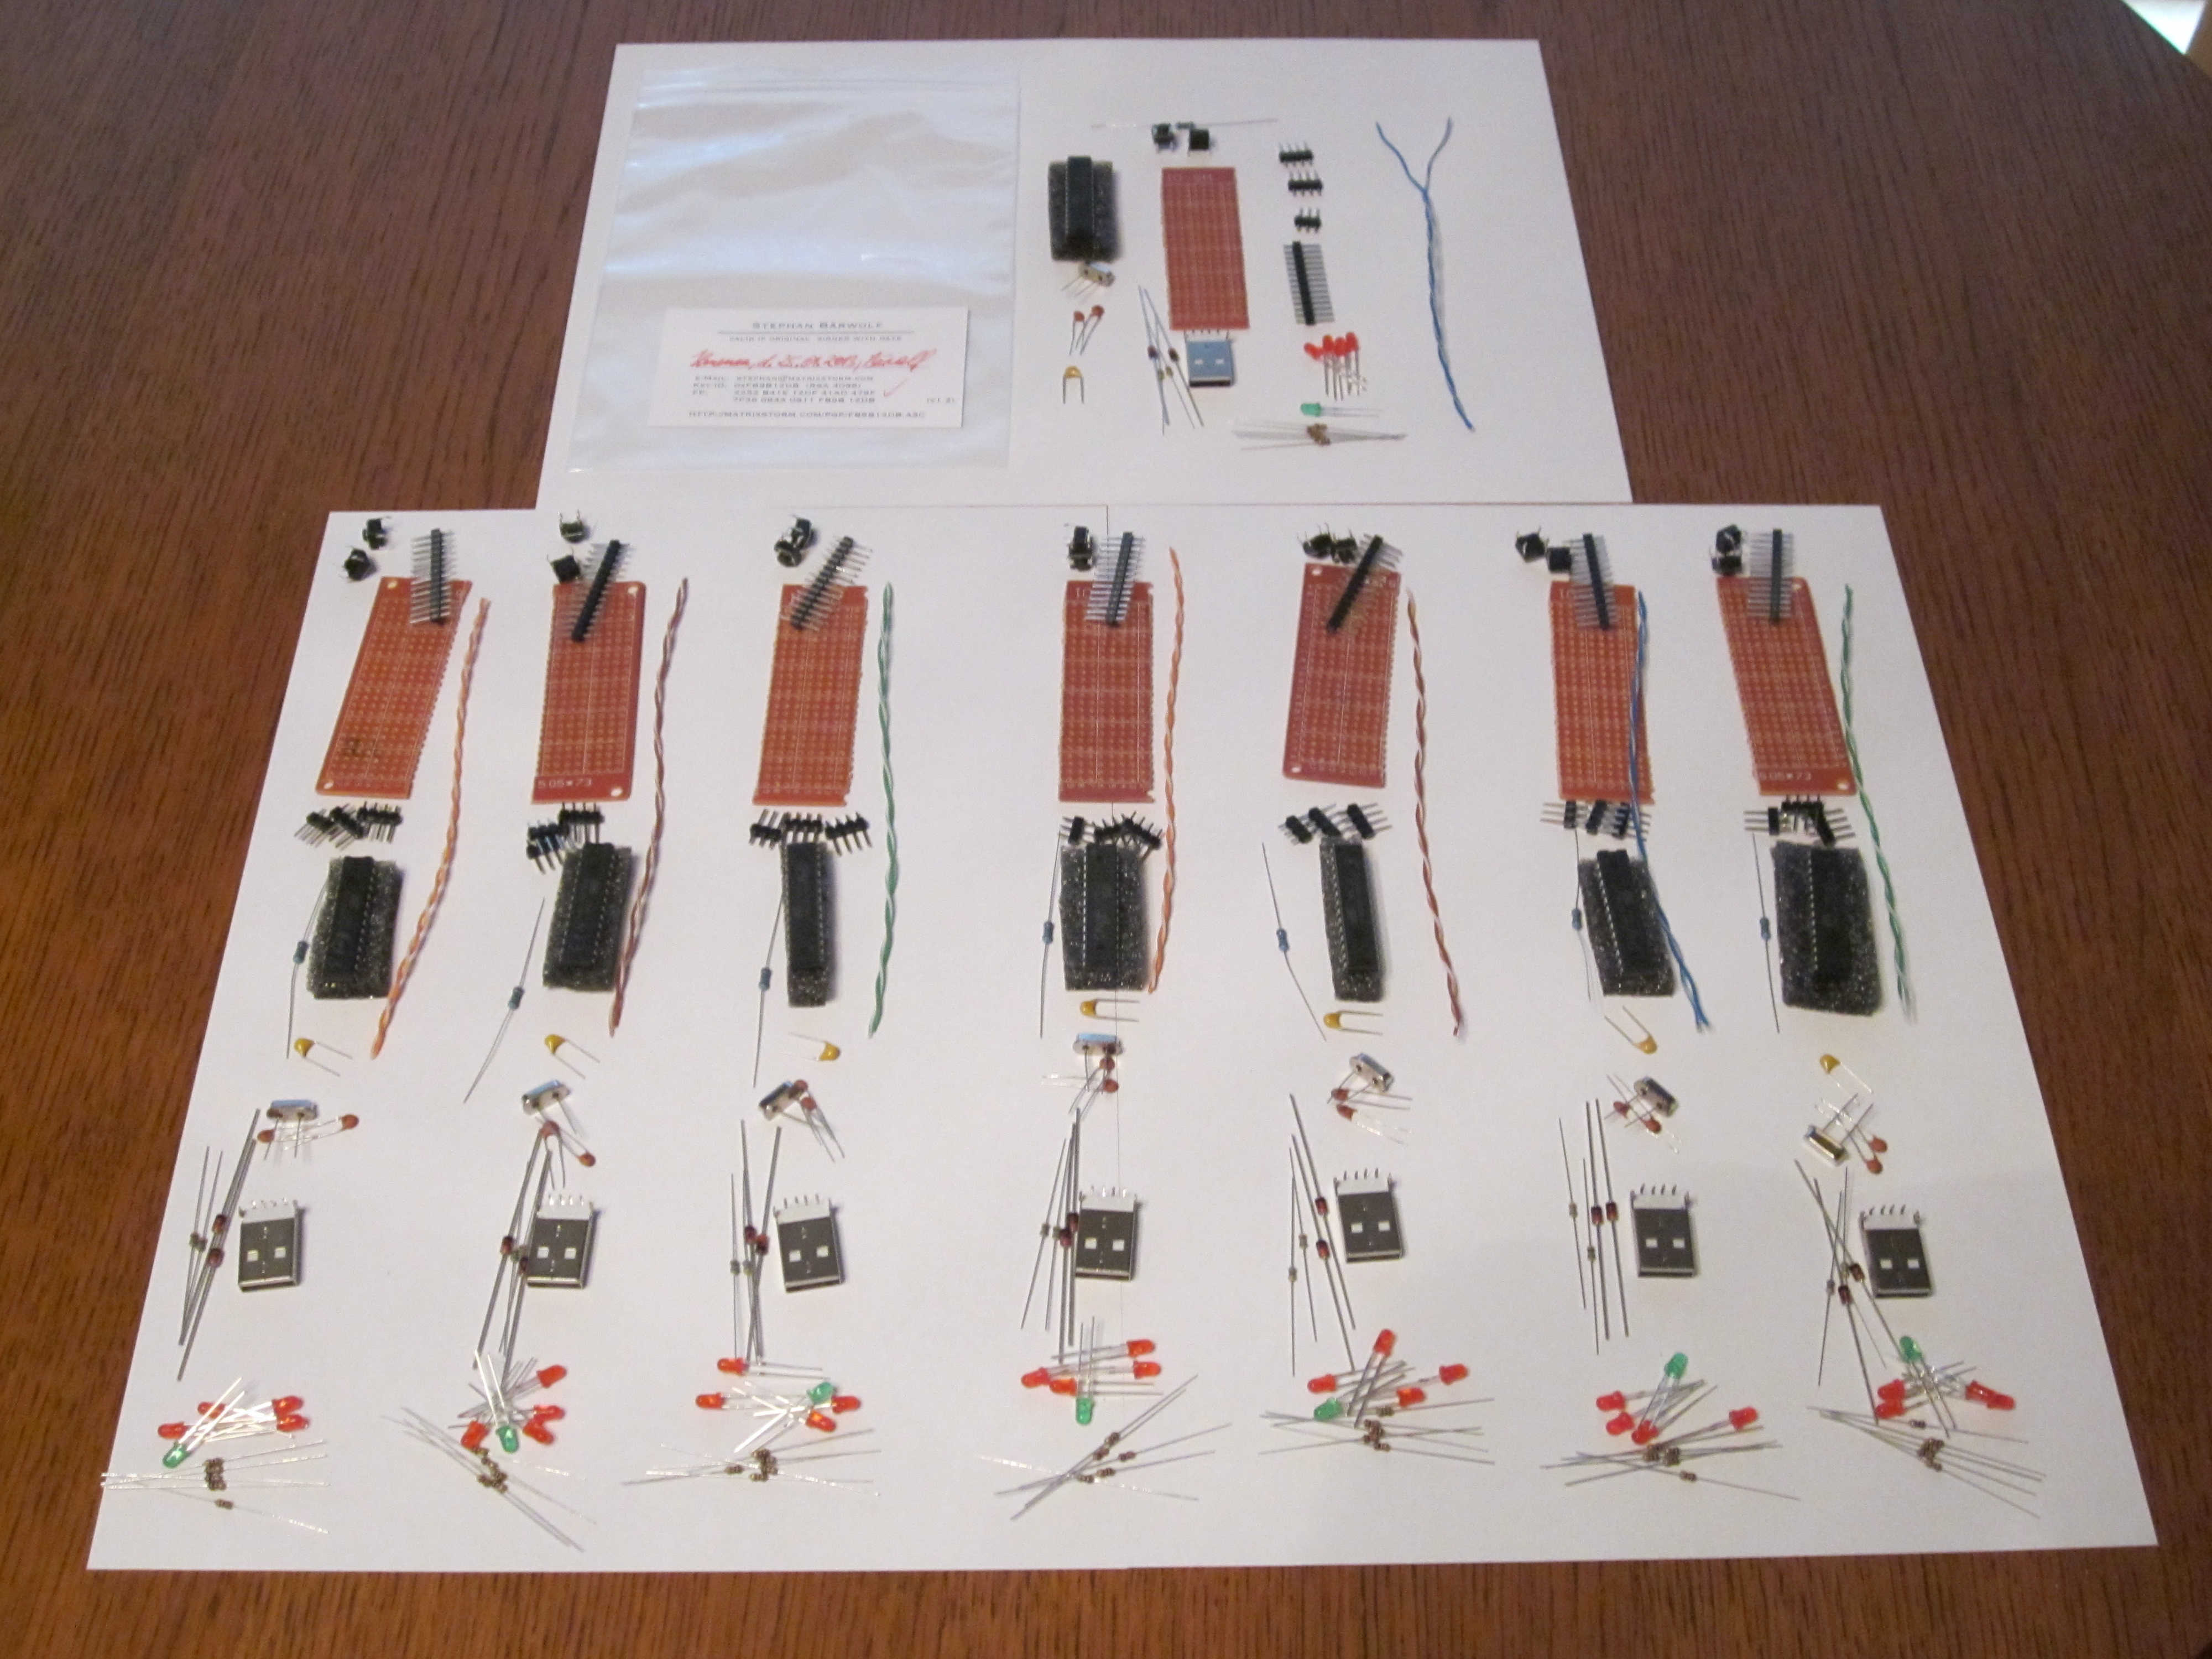

If you want to build your own board(s) you may want to check out my construction-part kits available on ebay.
You also can contact me to trade a construction kit for bitcoins.
Usually the price for a Revision 3 kit will be around 0.07BTC including shipment within Germany.
Per board you basically will need:
For soldering you may also need about 0.75m to 0.85m of (1mm in diameter) Sn60Pb40 solder wire, which is however not seen as a component here.
If you experiencing instabilities during operation (ATmega8A, ATmega328p?) put some capacitor with 0.1uF or more somewhere near the microcontroller between Vcc and GND. (For example between PIN 7 and PIN 8)
Even tinyUSBboard can be used standalone with just one USB-capable computer necessary, you might want to extend playing with it.
Some useful first-step hardware addons are collected here:
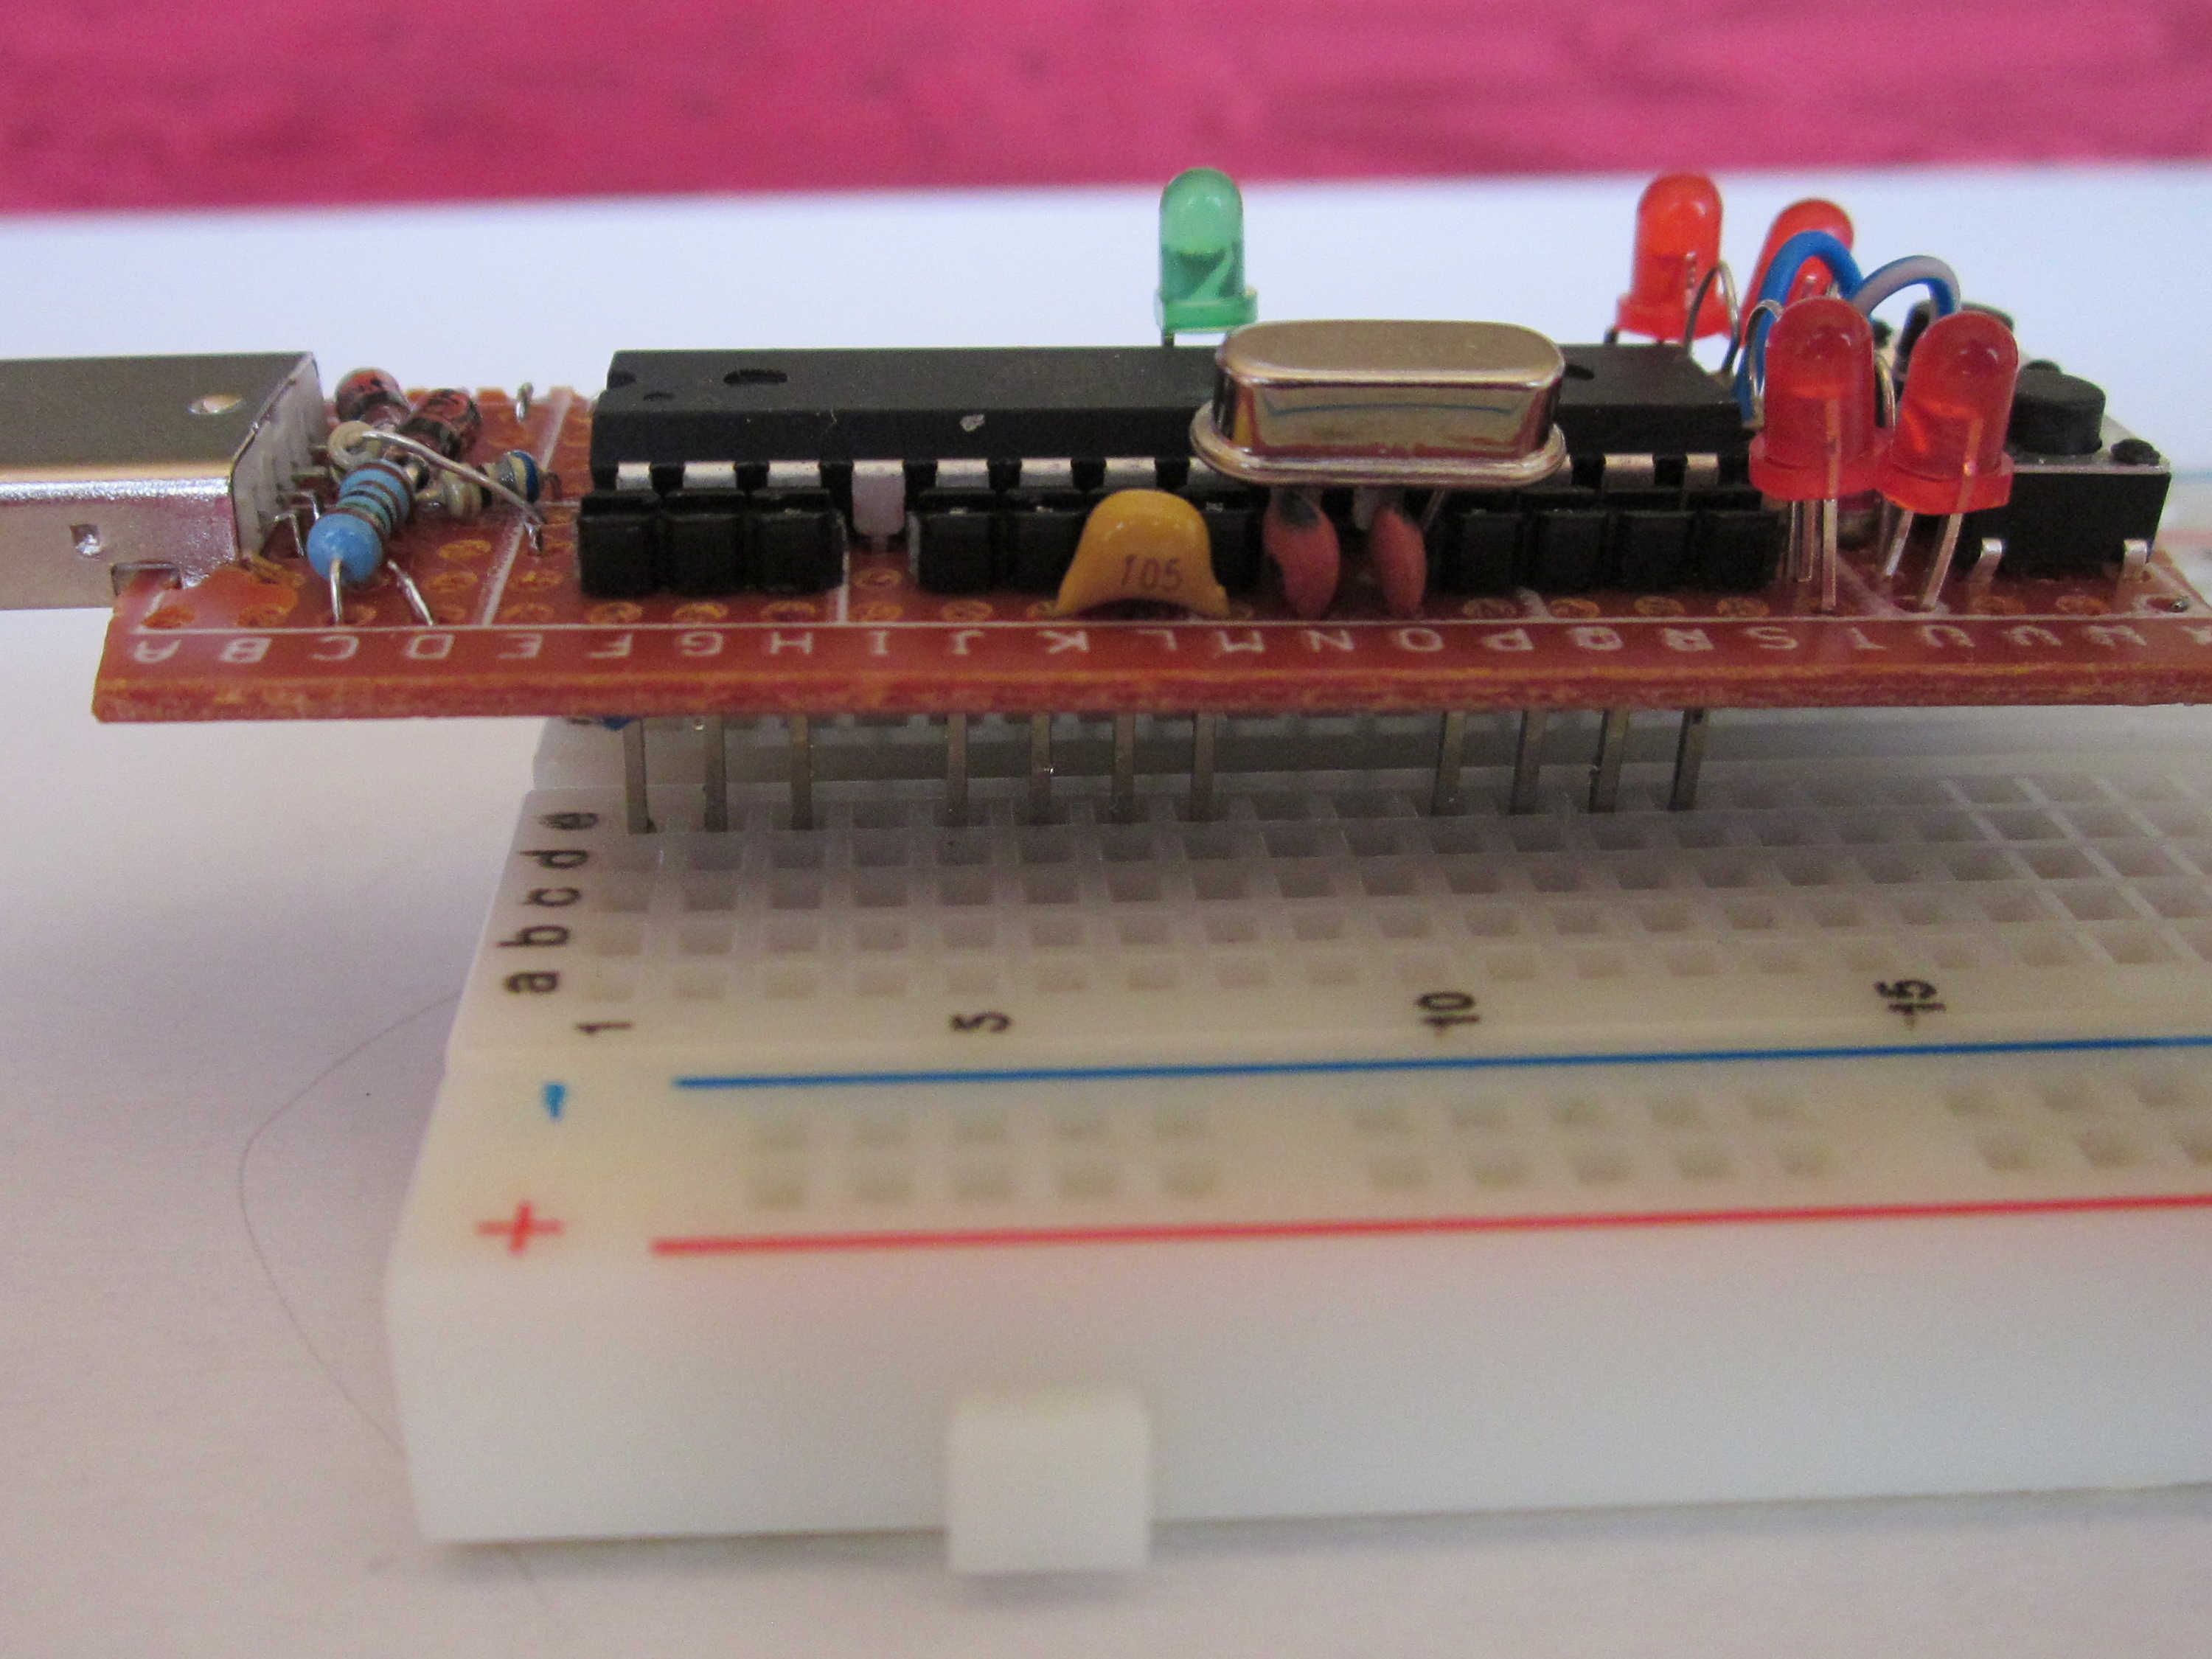
In order to use tinyUSBboards PIN-header to connect further circuits: Solderless Breadboard
...and you might need also a set of Breadboard cables for it
Some crappy cheap digital multimeter...
...and maybe also some crocodile clip wires
Perhaps some RGB LEDs...
... and a LCD module
Maybe some cheap ethernet network interface card for ATmega8's SPI interface (you may need 3.3V voltage)
For soldering may be ZD-99 station
...in combination with some solder sucker
For soldering you may also need solder wire. Therefore Felder Sn60Pb40 with lowest diameter (<= 1mm) possible is recommended.
For further suggestion please contact me.
Some people contacted and pointed out to me, that there is always the same "chicken or egg" issue with these kind of DIY boards.
Since real beginners don't have any equipment (i.e. a programming hardware) nor an already working board (which they could use as a programming hardware),
how can they program the microcontroller to build their own board for the first time?
In this section I would like to present and collect ideas to handle this issue. Please contact me me, if you want to contribute to this list or just have remarks to it.
Althought tinyUSBboard has a variaty of different (and exchangeable) bootloaders, its default one is USBaspLoader.
In normal mode the bootloader simply starts up the firmware, the user programmed into the AVR last time using the program-mode.
Additionally the bootloader implements some API, which can be used for example to write-access the flash from inside your own firmware.
This also makes it possible to provide migration- and update-firmwares (an application-section-firmware which exchanges the bootloader during its own execution).
With migration firmwares the bootloader can be either exchanged with some complete other bootloader:
For example switch out the default USBaspLoader bootloader with some other ones.
Or the bootloader can be exchanged with some other version of itself - this way the user always can maintain recent patchlevel and feature set.
By pressing the PROG button (effectively putting PD6 to GND) during a reset or power-up, the program-mode will be entered:
There the bootloader impersonates an USBasp programmer and
makes all the different memories and data of the AVR available for your programming tool.
Bootloaders used on tinyUSBboard implement specific code, allowing normal firmwares to utilize some of the bootloaders functionality.
This way you can enable your firmware to do things (like writing to the flash), which normally is impossible due to hardware restriction. The API also enables you to interact with the bootloader via software.
Get the tinyUSBboard API from GitHub
In normal mode of operation the bootloader (USBaspLoader) protects itself from being overwritten due normal uploads.
In order to update your tinyUSBboard's bootloader you first have to upload a special "updater"-firmware.
This procedure is exactly the same as uploading a normal firmware.
After the "updater" is uploaded, the bootloader has to be exitted to start the just programmed firmware. (Replug or reset the board.)
When the "updater" takes over control (LED on PD5 flashes), it first checks the current installed bootloader with the one contained within the "updater".
If both are identical, no writing is performed and
it stops working by signalling "operation complete" (LED on PB0 flashes, too).
If there are differences it starts overwriting the existing bootloader with the new one. WARNING: In this phase the board should not be disconnected from power until it signalls "success" by flashing the
LED on PB0.(LED on PB1 only flashes when update was done).
The procedure can be repeated some times (since the updater checks before write), until the updater haven't done any change anymore and it only signalls completition with LEDs PB0 and PD5. (PB1 will not flash).
After this it is save to upload (and overwrite the "updater" with) new firmwares by the user...
In order to protect the bootloader on tinyUSBboard from wrong "updates", which do not meet the necessary conditions (PIN layout, clock ...etc...), since version v0.9 it uses a magic value. This magic will prevent the old bootloader from being replaced by some inappropriate one (which results in loosing access to the board).
(magic value = 0xfe9a5680)
(magic value = 0xfe9a5680)
(magic value = 0xfe65a980)
This section describes how you can patch your old tinyUSBboard into a revision three board in only a few steps.
Roughly spoken there are four major milestones to do:
Revision 3 will swap connections of PD6 and PD7 in order to enable even more functions of the MCU.
(It is possible to use the internal analogous comperator module)
If you experiencing instabilities during operation (ATmega8A, ATmega328p?) put some capacitor with 0.1uF or more somewhere near the microcontroller between Vcc and GND. (For example between PIN 7 and PIN 8)
Other default- and bootloader firmwares only are provided for revision 3.
Most of them are still inofficial and need further testing.
If not noted otherwise, example binaries/hexfiles are always compiled for ATmega8.
An arduino hardware description also is available for ATmega8 and ATmega328P only.
In order to program appropriate firmwares for tinyUSBboard, you can choose out of many programming languages.
If you want to use famous C language you might want to do this via open source avr-libc and
its chain of tools.
Since the toolchain just generates the binary-data, you still need a piece of software to bring it into the MCU.
Because there are some major differences between the available platforms, the following subsections will explain some
tools doing the job...
If you want to have some empty skeleton to start with your firmware, you might want to look at my avrskeleton at github.
(Just define environment variable "AVR8TOOLCHAINBINDIR" with the PATH to your toolchain binaries and the Makefile will do everything else.)
In case you want to see/experiment or just play with AVR assembler you can try out this.
Atmel offers directly two precompiled avr-libc toolchain versions for linux.
One LZMA recompressed version for 32bit systems is available here, and another for 64bit here.
At your raspberry pi (using raspbian), you can use this build.
For flashing the data into tinyUSBboard you can use AVRDUDE.
(avrdude -c usbasp -p atmega8 -D -U flash:w:main.hex)
For using tinyUSBboard with Windows, you first have to install some usb-drivers.
A good programming software I recommend as graphical replacement for avrdude is KhazamaAVRProgrammer (link).
Even there is also an avr-libc port (avr8-gnu-toolchain-installer-3.4.3.12-win32.any.x86.exe) available for Windows, you might try out Atmels AVR Studio
Since the new toolchain avr8-gnu-toolchain-installer-3.4.3.12-win32.any.x86.exe is without an installer and thus harder to setup/use, you might want to use older avr-toolchain-installer-3.4.2.1573-win32.win32.x86 available from the mirrors instead.
Using tinyUSBboard with Mac is completly untested. For reports I would be very thankful.
Under Mac you can try (use?) CrossPack for AVR� Development.
It runs on Mac OS X 10.6 or higher and promises to be similar to AVR Studio on Windows.
"Arduino is an open-source electronics prototyping platform based on flexible, easy-to-use hardware and software. It's intended for artists, designers, hobbyists, and anyone interested in creating interactive objects or environments."
How you can download the appropriate arduino-ide version for you will be explained in the following subsections. Before you can start using arduino-ide after downloading and extracting it, you have to extend the list of know boards to arduino.
Therefore all you need to do is to extract this zip-file (or this tgz) into your arduino directory.
This is the new and recommended way to use tinyUSBboard within arduino IDE.
Please only use stable mainline Arduino IDE version 1.x.. (Download URLs are below.)
Borddescriptions in Arduino 1.5 aren't final and only available as a draft at the moment.
The old way was to copy this text below into "/arduino-####/hardware/arduino/boards.txt".
(Or to use this patch.)
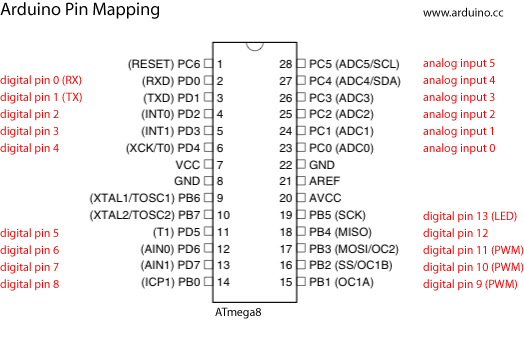
Please also note the different PIN-names (compared to the datasheet) in arduino. (See more)
Here you can download the arduino-ide for windows.
Arduino for Linux is available in two versions: One for 32bit systems, and another for recent 64bit technology.
For the moment all arduino and avr-libc toolchain files are mirrored within an GMX mediacenter. HERE
In case you have any problems/trouble and/or need some help, in case you have remarks or you want to participate tinyUSBboard-project, in case you need some parts to build your own tinyUSBboard, you can contact Stephan Bärwolf via:
If you want to use PGP, my key-id is 0xFB9B12DB. The corresponding fingerprint must be: 2252 B41E 12DF 41AD 476F 7F36 084A 0911 FB9B 12DB
|
|
last change: 2015-02-10T21:15Z |
|---|