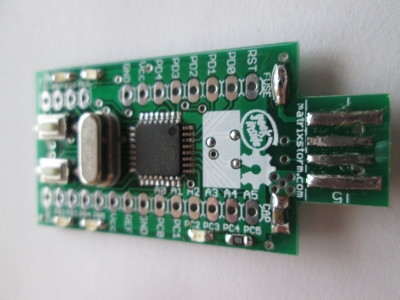
Revision 4 SMT (latest)
Revision 4 is 100% compatible to its predecessor revision 3. You CAN use revision 3 firm-/software.
However, the schematic has been pimped (even they are mostly identical).
The new schematic also is available in PDF or EAGLE (tinyusbboard.sch, tinyusbboard.brd) formats.
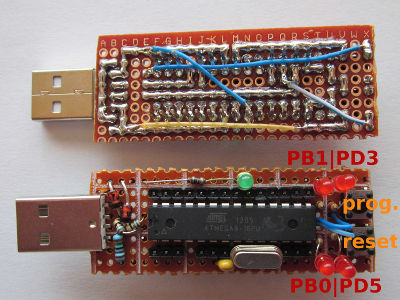
Revision 3 THT
TinyUSBboard is an Arduino compatible, minimalistic and cheap AVR microprocessor board with USB interface and simple "do it yourself" capability.
All its components you need to construct it are universal and available nearly everywhere - no special PCB needed. Also available as a DIY kit!
Bootloader and Firmwares
Althought tinyUSBboard has a variaty of different (and exchangeable) bootloaders, its default one is USBaspLoader.
In normal mode the bootloader simply starts up the firmware, the user programmed into the AVR last time using the program-mode